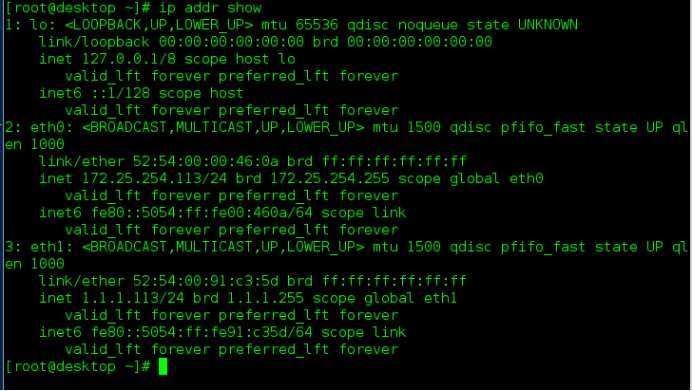
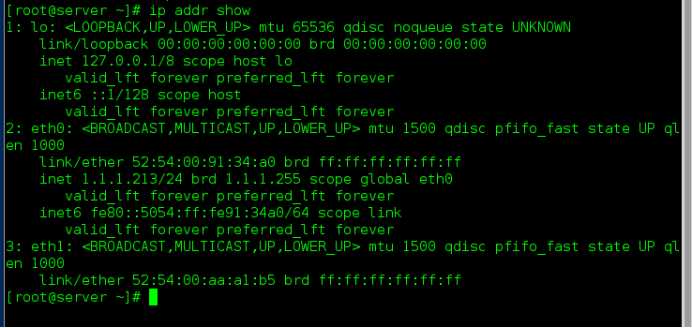
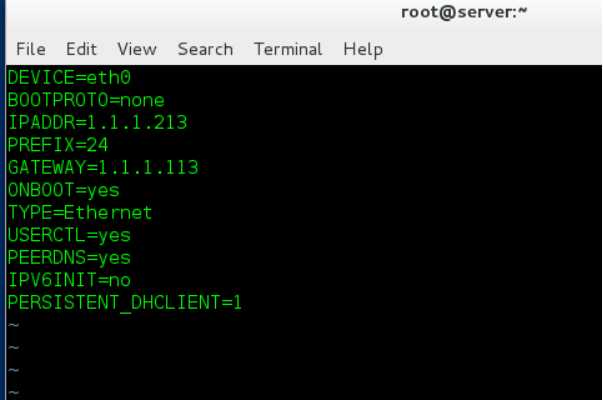
两台虚拟机,desktop双网卡,配置ip分别为172.25.254.113和1.1.1.113
打开另一台虚拟机server,配置ip为1.1.1.213
在双网卡的desktop下载httpd,在默认发布目录编写默认发布文件
systemctl start httpd
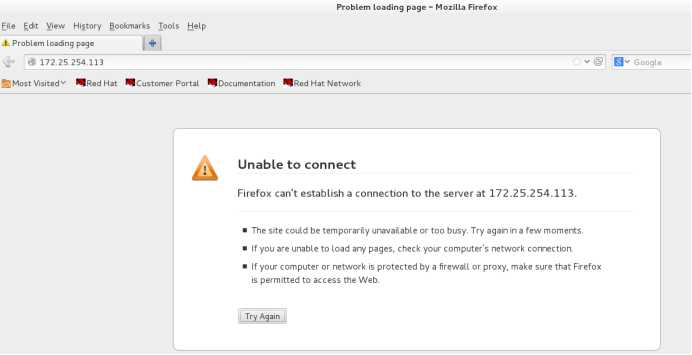
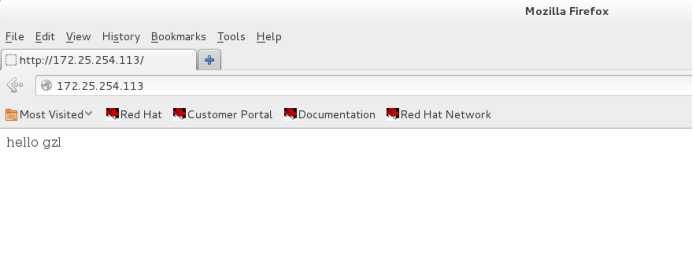
1.用真机通过http访问172.25.254.113
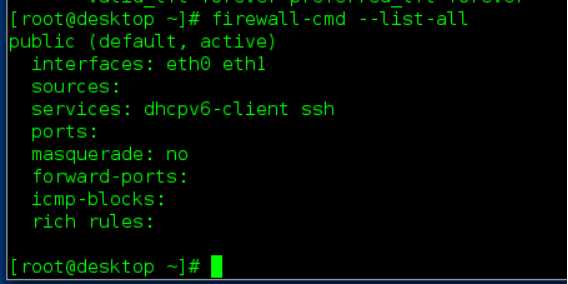
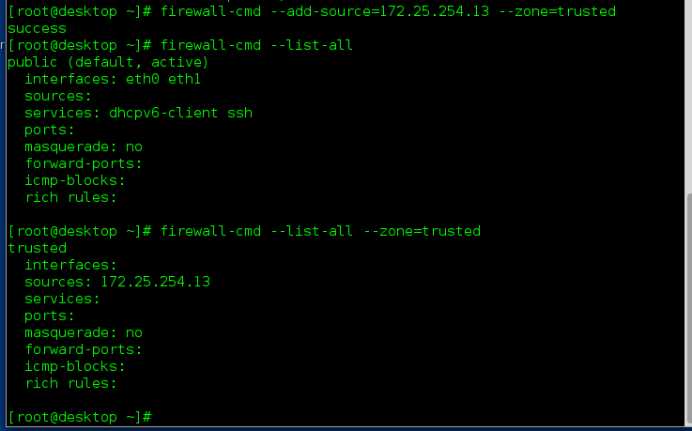
firewall-cmd --list-all 查看火墙状态
访问不到,因为desktop的虚拟机火墙是public,不允许http访问
firewall-cmd --add-source=172.25.254.13 --zone=trusted
把主机的ip这个源添加到trusted域里,
在主机测试,通过http可以访问
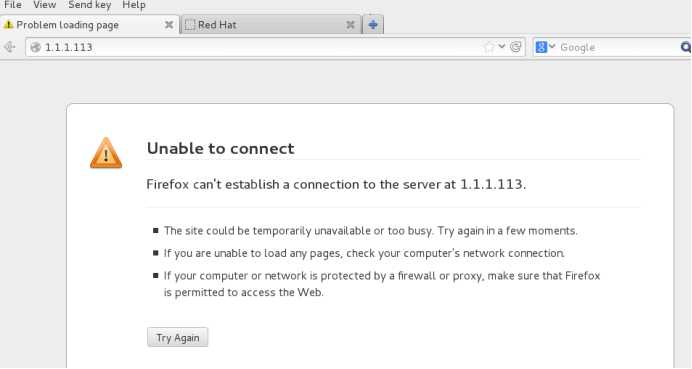
2.用server通过http访问1.1.1.113
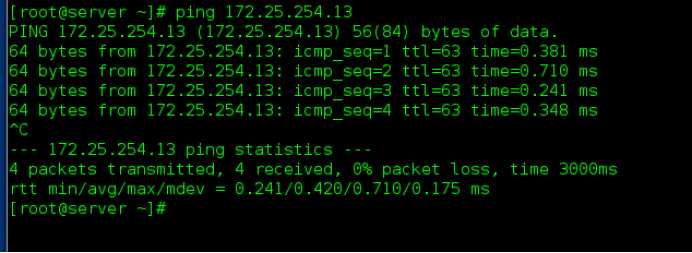
可以ping通,但是不能访问,因为火墙的默认域为public,http不能通过访问
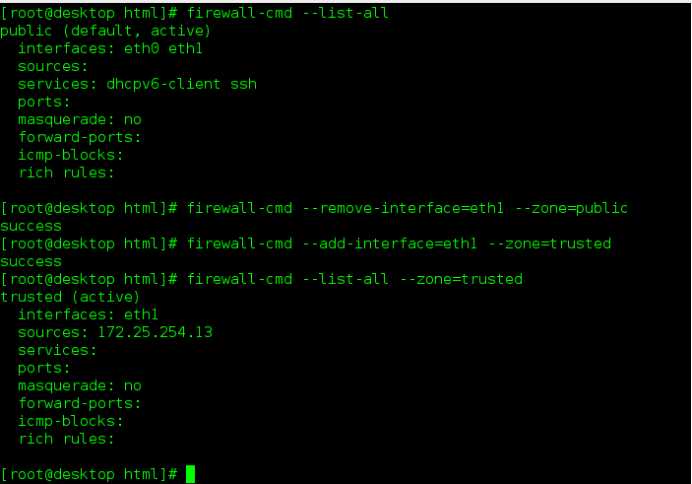
firewall-cmd --remove-interface=eth1 --zone=public	把eth1接口从public域摘下来
firewall-cmd --add-interface=eth1 --zone=trusted	把eth1接口添加到trusted域
firewall-cmd --list-all --zone=trusted  查看trusted域
添加成功后
在server测试
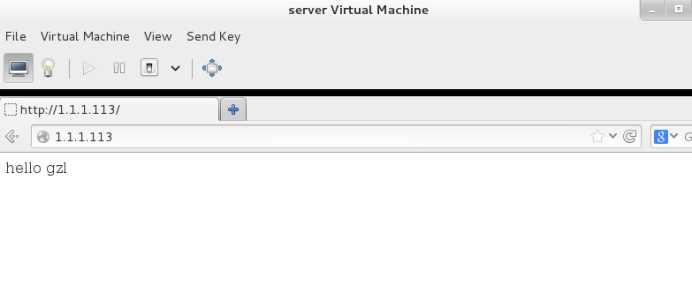
通过http访问1.1.1.113, 可以访问
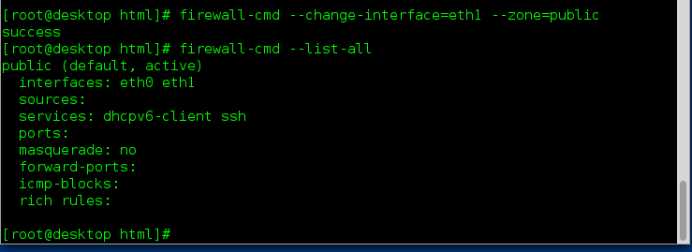
想把eth1再改回去,
firewalll-cmd --change-interface=eth1 --zone=public
永久操作与重新加载
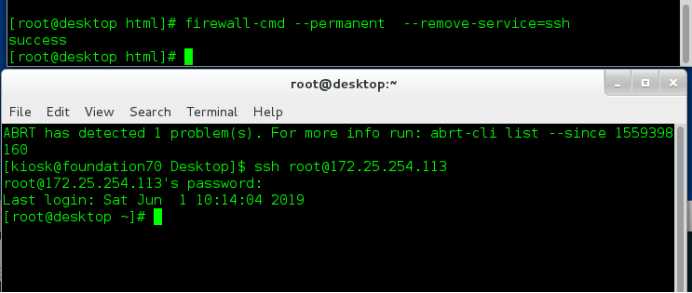
firewall-cmd --permanent --remove-service=ssh	永久的操作需要reload才能生效
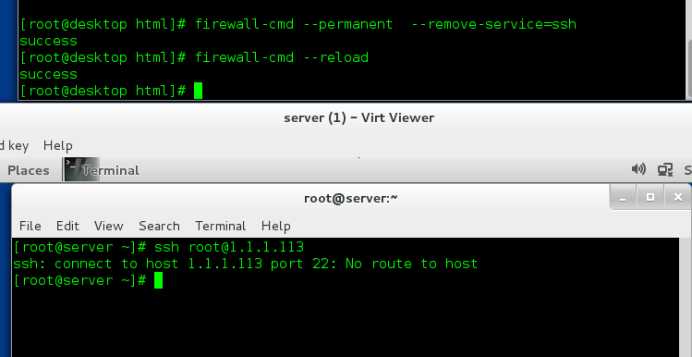
firewall-cmd --reload    重新加载后不会断开已经连接的设备
firewall-cmd --complete-reload	完全重新加载,会断开已经链接的设备
演示实验
在desktop虚拟机永久删除ssh
[root@dektop ~]# firewall-cmd --permanent --remove-service=ssh
success
[root@dektop ~]# firewall-cmd --list-all
public (default, active)
  interfaces: eth0 eth1
  sources:
  services: dhcpv6-client ssh
  ports:
  masquerade: no
  forward-ports:
  icmp-blocks:
  rich rules:
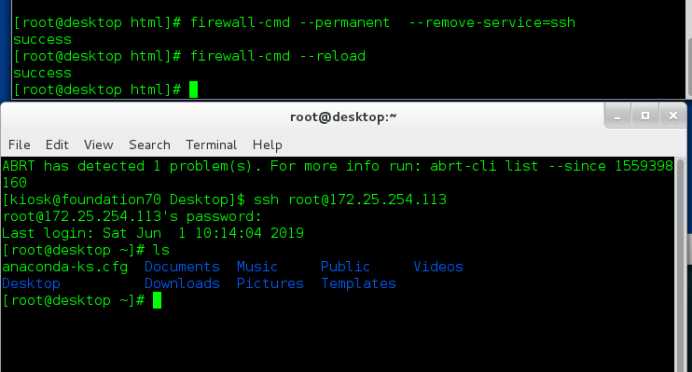
永久删除ssh后,没有重新加载
在真机ssh连接desktop可以连接
[root@dektop ~]# firewall-cmd --reload
Success
此时再用ssh已经无法连接,但之前的连接并不会断开
但之前的连接并不会断开
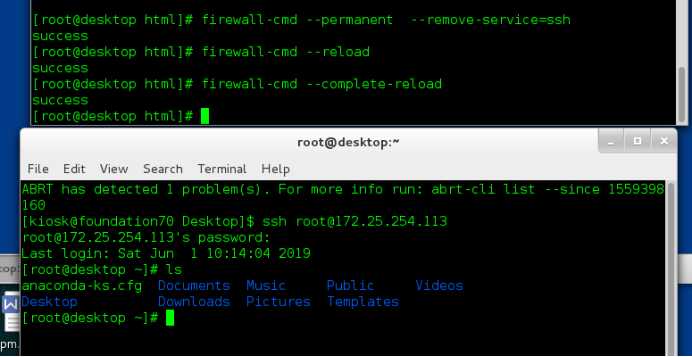
[root@dektop ~]# firewall-cmd --complete-reload
success
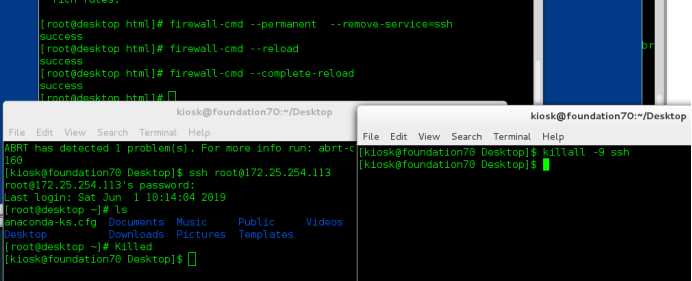
完全重新加载后,之前的连接断开,已经无法操作
结束方法
再打开一个shell,然后结束掉进程
端口操作
firewall-cmd --zone=public --list-ports
firewall-cmd --permanent --zone=public --add-port=8080/tcp
firewall-cmd --permanent --zone=public --remove-port=22/ssh
在desktop
cd /etc/firewalld 配置文件
指定某个ip可以访问ssh
[root@dektop ~]# firewall-cmd --direct --
--add-chain       --get-all-rules   --passthrough     --query-rule
--add-rule        --get-chains      --permanent       --remove-chain
--get-all-chains  --get-rules       --query-chain     --remove-rule
[root@dektop ~]# firewall-cmd --direct --add-rule ipv4 filter INPUT 1 -s 172.25.254.13 -p tcp --dport 22 -j ACCEPT
success
[root@dektop ~]# firewall-cmd --remove-service=ssh
success
用direct命令来指定,然后再删除掉默认方式的ssh,被指定的走指定的方式,其他的走默认方式,所以将默认方式的ssh删掉,实验现象会明显
accept 接受
reject 拒绝,有回应,客户端不再访问
drop 丢弃,没有回应,客户端会一直访问
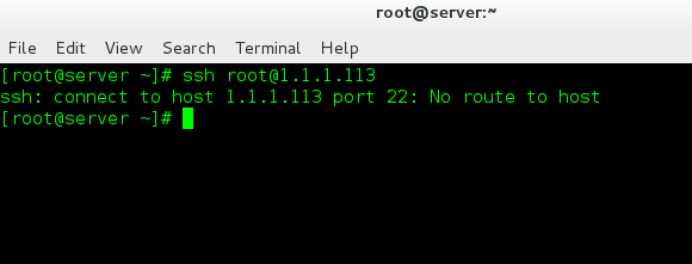
在server端测试
[root@localhost ~]# ssh root@1.1.1.113
ssh: connect to host 1.1.1.113 port 22: No route to host
[root@localhost ~]#
在真机测试
[kiosk@foundation13 ~]$ ssh root@172.25.254.113
root@172.25.254.113's password:
Last login: Fri May 31 22:41:32 2019 from 172.25.254.13
[root@dektop ~]#
因为真机ip就是被指定的,所以可以访问
[root@dektop ~]# firewall-cmd –list-all
public (default, active)
interfaces: eth0 eth1
sources:
services: dhcpv6-client
ports:
masquerade: no
forward-ports:
icmp-blocks:
rich rules:
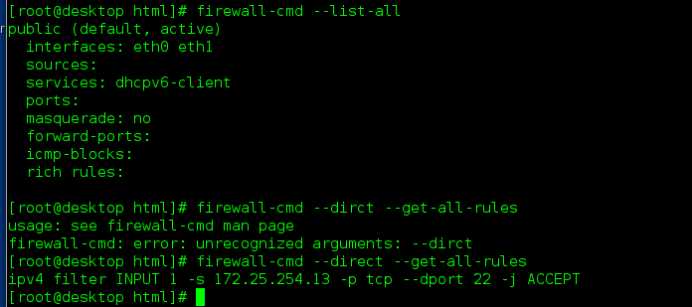
[root@dektop ~]# firewall-cmd --direct --get-all-rules
ipv4 filter INPUT 1 -s 172.25.254.13 -p tcp --dport 22 -j ACCEPT
这种方式添加后,无法用firewall-cmd –list-all查看
firewall-cmd --direct --get-all-rules 来查看
删除
[root@dektop ~]# firewall-cmd --direct --remove-rule ipv4 filter INPUT 1 -s 172.25.254.13 -p tcp --dport 22 -j ACCEPT
success
[root@dektop ~]# firewall-cmd --direct --get-all-rules
[root@dektop ~]#
地址伪装
处于1网段的server主机想要连接真机,他们不再一个网段,所以不能连接,让有双网卡的desktop开启地址伪装的功能,让server通过desktop去连接主机
[root@dektop ~]# firewall-cmd --add-masquerade
success
[root@dektop ~]# firewall-cmd --list-all
public (default, active)
  interfaces: eth0 eth1
  sources:
  services: dhcpv6-client
  ports:
  masquerade: yes
  forward-ports:
  icmp-blocks:
  rich rules:
[root@dektop ~]# sysctl -a |grep ip_forward
net.ipv4.ip_forward = 1
在1网段的server虚拟机
设置网关为 1.1.1.113
查看
[root@localhost ~]# route -n
Kernel IP routing table
Destination     Gateway     Genmask     Flags Metric Ref    Use Iface
0.0.0.0        1.1.1.113       0.0.0.0         UG    1024   0        0 eth0
1.1.1.0         0.0.0.0        255.255.255.0   U     0      0        0 eth0
测试
ping 172.25.254.13
地址伪装是在路由之后
端口转发
用ip为172的真机,去连接1网段的server主机,无法连接,
现在让真机去连接双网卡的desktop的22端口时,直接跳转到1网段的server主机
在双网卡主机
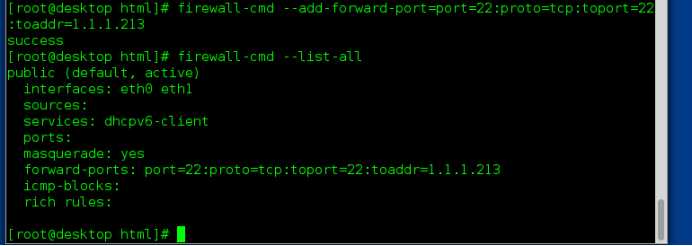
[root@dektop ~]# firewall-cmd --add-forward-port=port=22:proto=tcp:toport=22:toaddr=1.1.1.213
success
[root@dektop ~]# firewall-cmd --list-all
  public (default, active)
  interfaces: eth0 eth1
  sources:
  services: dhcpv6-client
  ports:
  masquerade: yes
  forward-ports: port=22:proto=tcp:toport=22:toaddr=1.1.1.213
  icmp-blocks:
  rich rules:
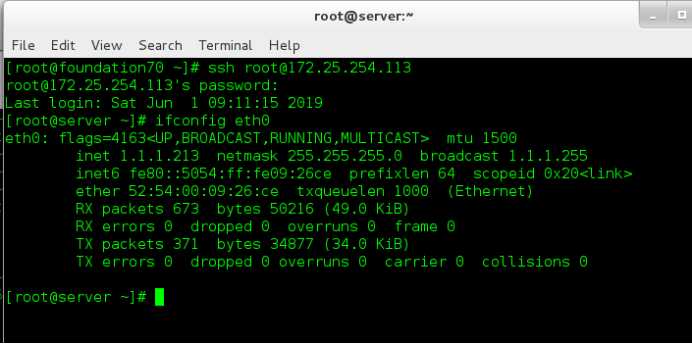
然后在真机去ssh连接
[kiosk@foundation13 ~]$ ssh root@172.25.254.113
root@172.25.254.113's password:
Last login: Sat Jun  1 01:21:30 2019 from 1.1.1.113
[root@server ~]# ifconfig eth0
eth0: flags=4163<UP,BROADCAST,RUNNING,MULTICAST>  mtu 1500
        inet 1.1.1.213  netmask 255.255.255.0  broadcast 1.1.1.255
        inet6 fe80::5054:ff:fe54:5072  prefixlen 64  scopeid 0x20<link>
        ether 52:54:00:54:50:72  txqueuelen 1000  (Ethernet)
        RX packets 163169  bytes 11236766 (10.7 MiB)
        RX errors 0  dropped 0  overruns 0  frame 0
        TX packets 2244  bytes 200891 (196.1 KiB)
        TX errors 0  dropped 0 overruns 0  carrier 0  collisions 0

[root@server ~]#
注意输入密码时,应输入单网卡server的密码
今天的文章运维进阶——firewall详解分享到此就结束了,感谢您的阅读,如果确实帮到您,您可以动动手指转发给其他人。
版权声明:本文内容由互联网用户自发贡献,该文观点仅代表作者本人。本站仅提供信息存储空间服务,不拥有所有权,不承担相关法律责任。如发现本站有涉嫌侵权/违法违规的内容, 请发送邮件至 举报,一经查实,本站将立刻删除。
如需转载请保留出处:https://bianchenghao.cn/25380.html

