邮件服务器搭建
一、mail服务器初始化配置
1.修改主机名
[root@localhost /]# hostnamectl --static set-hostname mail.drock.top|bash2.关闭防火墙和selinux
[root@localhost /]# systemctl stop firewalld && systemctl disable firewalld
[root@localhost /]# setenforce 0
3.同步时间
[root@localhost /]# yum -y install ntpdate && ntpdate ntp.aliyun.com4.安装软件
[root@localhost /]# yum -y install postfix dovecot cyrus-sasl-* mailx二、修改配置文件
1.配置postfix,备份cp /etc/postfix/main.cf /etc/postfix/main-old.cf
[root@localhost /]# cat /etc/postfix/main.cf

mail_owner = postfix

myhostname = mail.liqing-test.top

mydomain = liqing-test.top

myorigin = $mydomain

inet_interfaces = all

inet_protocols = ipv4

mydestination = $myhostname, localhost.$mydomain, localhost, $mydomain, mail.$mydomain, www.$mydomain, ftp.$mydomain

local_recipient_maps

mynetworks = 0.0.0.0/0

relay_domains = $mydestination

alias_maps = hash:/etc/aliases

alias_database = hash:/etc/aliases

smtpd_banner = $myhostname ESMTP


# 在最下面新增

smtpd_sasl_type = dovecot

smtpd_sasl_path = private/auth

smtpd_sasl_local_domain =

smtpd_sasl_auth_enable = yes

smtpd_sasl_security_options = noanonymous

broken_sasl_auth_clients = yes

smtpd_recipient_restrictions = permit_mynetworks,permit_auth_destination,permit_sasl_authenticated

smtpd_client_restrictions = permit_sasl_authenticated
2.配置dovectot
2.1配置监听协议:
[root@localhost /]# cat /etc/dovecot/dovecot.conf

protocols = imap pop3 lmtp

listen = *

login_trusted_networks = 0.0.0.0/0

dict {

}

!include conf.d/*.conf

!include_try local.conf
2.2配置登录方式
[root@localhost /]# cat /etc/dovecot/conf.d/10-auth.conf

disable_plaintext_auth = no

auth_mechanisms = plain login

!include auth-system.conf.ext
2.3配置邮件存储位置
[root@localhost /]# cat /etc/dovecot/conf.d/10-mail.conf

mail_location = mbox:~/mail:INBOX=/var/mail/%u

namespace inbox {

inbox = yes

}

first_valid_uid = 1000

mbox_write_locks = fcntl
[root@localhost /]# cat /etc/dovecot/conf.d/10-master.conf
service auth {
unix_listener /var/spool/postfix/private/auth {
mode = 0666
user = postfix
group = postfix
}
}2.4配置ssl(关闭)
[root@localhost /]# cat /etc/dovecot/conf.d/10-ssl.conf

ssl = no
3.配置sasl2
3.1配置系统认证
[root@localhost /]# cat /etc/sysconfig/saslauthd

SOCKETDIR=/run/saslauthd

MECH=shadow

FLAGS=
3.2配置登录方式
[root@localhost /]# cat /etc/sasl2/smtpd.conf

pwcheck_method: saslauthd

mech_list: PLAIN LOGIN

log_level:3
4.启动服务
[root@localhost /]# systemctl restart dovecot

[root@localhost /]# systemctl restart postfix

[root@localhost /]# systemctl restart saslauthd

[root@localhost /]# systemctl enable dovecot

[root@localhost /]# systemctl enable postfix

[root@localhost /]# systemctl enable saslauthd
5.创建用户并设置pass
[root@localhost /]# useradd -m drock && echo 123456 | passwd --stdin drock

[root@localhost /]# su - drock

[drock@mail ~]$ mkdir -p ~/mail/.imap/INBOX

[drock@mail ~]$ chmod -R 750 ~/mail        #(这不操作不做会在使用foxmail登录时报错{Error: Couldn't open INBOX: Permission denied})

[drock@mail ~]$ exit
6.配置mailx
[root@localhost /]# vi /etc/mail.rc

set from=drock@drock.top

set smtp=mail.drock.top

set smtp-auth-user=drock

set smtp-auth-password=123456

set smtp-auth=login
四、发送邮件测试
1.命令行发送邮件测试
[root@localhost /]# echo "邮件服务器测试" | mail -s "邮件服务器测试" other-email@163.com2.使用foxmail登录并发送邮件测试
五、报错
1.权限被拒绝
在使用foxmail登录邮箱时提示权限被拒绝,这是因为在邮箱用户的家目录下mail文件权限不是750,设置为750后解决。
[drock@mail ~]$ chmod -R 750 ~/mail2.无法找到主机
邮件在发送时会根据邮件地址的解析记录去查找mx记录,这里我在向腾讯的企业邮箱发送测试邮件时找不到腾讯的邮箱地址。我在内网的dns代理中加入了腾讯的mx记录后解决
[root@dns- ~]# grep qq /etc/dnsmasq.conf

mx-host=***.com,mxbiz2.qq.com,10

mx-host=***.com,mxbiz1.qq.com,5
3.邮件被拒绝
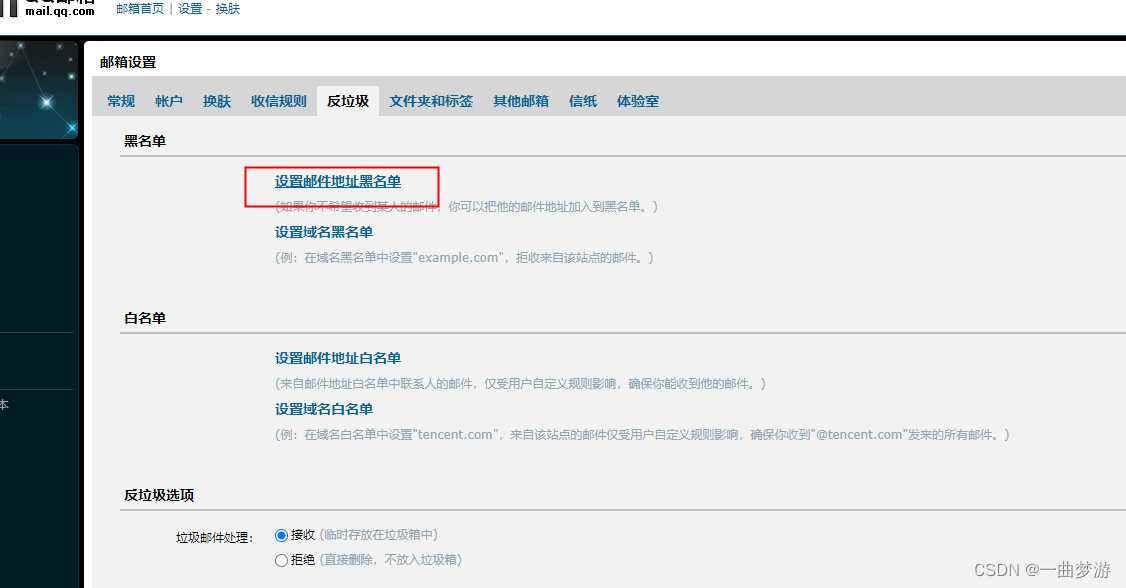
在我向腾讯企业邮箱发送测试邮件时日志里出现了550邮件连接被拒绝的情况,此情况在邮件中设置白名单后解决。
今天的文章自主搭建邮件服务器分享到此就结束了,感谢您的阅读,如果确实帮到您,您可以动动手指转发给其他人。
版权声明:本文内容由互联网用户自发贡献,该文观点仅代表作者本人。本站仅提供信息存储空间服务,不拥有所有权,不承担相关法律责任。如发现本站有涉嫌侵权/违法违规的内容, 请发送邮件至 举报,一经查实,本站将立刻删除。
如需转载请保留出处:https://bianchenghao.cn/28399.html

