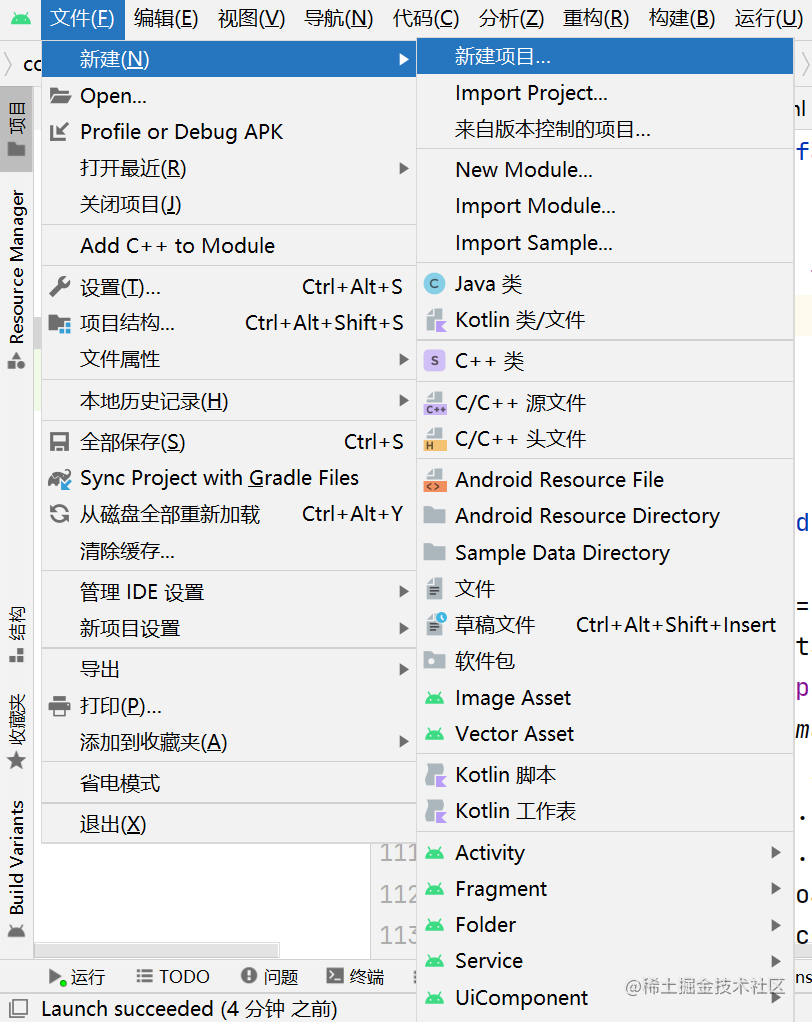
1.常规操作,创建项目

2.清单文件给权限
<?xml version="1.0" encoding="utf-8"?>
<manifest xmlns:android="http://schemas.android.com/apk/res/android"
    package="com.example.canvas">
    <uses-permission android:name="android.permission.WRITE_EXTERNAL_STORAGE"/>

    <application
        android:allowBackup="true"
        android:icon="@mipmap/ic_launcher"
        android:label="@string/app_name"
        android:roundIcon="@mipmap/ic_launcher_round"
        android:supportsRtl="true"
        android:theme="@style/Theme.Map">
        <activity
            android:name=".MainActivity"
            android:exported="true">
            <intent-filter>
                <action android:name="android.intent.action.MAIN" />

                <category android:name="android.intent.category.LAUNCHER" />
            </intent-filter>
        </activity>
    </application>

</manifest>
[外链图片转存失败,源站可能有防盗链机制,建议将图片保存下来直接上传(img-qvtFTYIc-1652364651356)(https://juejin.cn/ “点击并拖拽以移动”)]
3.布局文件
<LinearLayout xmlns:android="http://schemas.android.com/apk/res/android"
    xmlns:tools="http://schemas.android.com/tools"
    android:layout_width="match_parent"
    android:layout_height="match_parent"
    android:orientation="vertical"
    android:paddingLeft="5dp"
    android:paddingTop="5dp"
    android:paddingRight="5dp"
    android:paddingBottom="5dp"
    tools:context=".MainActivity">
    <LinearLayout
        android:layout_width="match_parent"
        android:layout_height="wrap_content"
        android:orientation="horizontal">
        <Button
            android:id="@+id/btn_resume"
            android:layout_width="wrap_content"
            android:layout_height="wrap_content"
            android:text="重新画图" />
        <Button
            android:id="@+id/btn_save"
            android:layout_width="match_parent"
            android:layout_height="wrap_content"
            android:text="保存图片" />
    </LinearLayout>
    <ImageView
        android:id="@+id/iv_canvas"
        android:layout_width="match_parent"
        android:layout_height="match_parent" />
</LinearLayout>
4.主活动
package com.example.canvas;

import androidx.appcompat.app.AppCompatActivity;

import android.content.DialogInterface;
import android.content.Intent;
import android.graphics.Bitmap;
import android.graphics.Canvas;
import android.graphics.Color;
import android.graphics.Paint;
import android.net.Uri;
import android.os.Bundle;
import android.os.Environment;
import android.view.MotionEvent;
import android.view.View;
import android.widget.Button;
import android.widget.ImageView;
import android.widget.Toast;

import java.io.File;
import java.io.FileOutputStream;

public class MainActivity extends AppCompatActivity {
    private Button btn_save,btn_resume;
    private ImageView iv_canvas;
    private Bitmap baseBitmap;
    private Canvas canvas;
    private Paint paint;

    @Override
    protected void onCreate(Bundle savedInstanceState) {
        super.onCreate(savedInstanceState);
        setContentView(R.layout.activity_main);
        //初始化画笔
        paint = new Paint();
        paint.setStrokeWidth(5);
        paint.setColor(Color.RED);

        iv_canvas = findViewById(R.id.iv_canvas);
        btn_save = findViewById(R.id.btn_save);
        btn_resume = findViewById(R.id.btn_resume);

        btn_save.setOnClickListener(click);
        btn_resume.setOnClickListener(click);
        iv_canvas.setOnTouchListener(touch);//屏幕触摸事件监听器
    }
    private View.OnClickListener click = new View.OnClickListener(){

        @Override
        public void onClick(View v) {
            switch (v.getId()){
                case R.id.btn_save:
                    saveBitmap();
                    break;
                case R.id.btn_resume:
                    resumeCanvas();
                    break;
                default:
                    break;
            }
        }
    };
    private View.OnTouchListener touch = new View.OnTouchListener() {
        //定义手指开始触屏的坐标
        float startX;
        float startY;
        @Override
        public boolean onTouch(View v, MotionEvent event) {
            switch (event.getAction()){
                case MotionEvent.ACTION_DOWN:
                    if(baseBitmap==null){
                        baseBitmap = Bitmap.createBitmap(iv_canvas.getWidth(),iv_canvas.getHeight(),Bitmap.Config.ARGB_8888);
                        canvas = new Canvas(baseBitmap);
                        canvas.drawColor(Color.WHITE);
                    }
                    startX = event.getX();
                    startY = event.getY();
                    break;
                //手指在屏幕上移动的动作
                case MotionEvent.ACTION_MOVE:
                    //记录移动位置上移动的动作
                    float stopX = event.getX();
                    float stopY = event.getY();
                    //根据两点坐标,绘制连线
                    canvas.drawLine(startX,startY,stopX,stopY,paint);
                    //更新开始点的位置
                    startX = event.getX();
                    startY = event.getY();
                    //把图片展示到ImageView中
                    iv_canvas.setImageBitmap(baseBitmap);
                    break;
                case MotionEvent.ACTION_UP:
                    break;
                default:
                    break;
            }
            return true;
        }
    };


    //保存到SD卡
    protected  void saveBitmap(){
        try{
        File file = new File(Environment.getExternalStorageDirectory(),System.currentTimeMillis() + ".png");
         FileOutputStream stream = new FileOutputStream(file);
         baseBitmap.compress(Bitmap.CompressFormat.PNG,100,stream);
            Toast.makeText(MainActivity.this, "保存图片成功", Toast.LENGTH_SHORT).show();
            Intent intent = new Intent();
            intent.setAction(Intent.ACTION_MEDIA_MOUNTED);
            intent.setData(Uri.fromFile(Environment.getExternalStorageDirectory()));
            sendBroadcast(intent);
        }catch (Exception e){
            Toast.makeText(MainActivity.this, "保存图片失败", Toast.LENGTH_SHORT).show();
            e.printStackTrace();
        }
    }
    protected void resumeCanvas(){
        if(baseBitmap != null){
            baseBitmap = Bitmap.createBitmap(iv_canvas.getWidth(),iv_canvas.getHeight(),Bitmap.Config.ARGB_8888);
            canvas = new Canvas(baseBitmap);
            canvas.drawColor(Color.WHITE);
            iv_canvas.setImageBitmap(baseBitmap);
            Toast.makeText(MainActivity.this, "清除画板成功 重新绘画", Toast.LENGTH_SHORT).show();
        }
    }
}
5.运行,记得在虚拟机给应用权限
6.可以使用你自己的应用了
今天的文章【Android】用Android写个自己的画板APP分享到此就结束了,感谢您的阅读。
版权声明:本文内容由互联网用户自发贡献,该文观点仅代表作者本人。本站仅提供信息存储空间服务,不拥有所有权,不承担相关法律责任。如发现本站有涉嫌侵权/违法违规的内容, 请发送邮件至 举报,一经查实,本站将立刻删除。
如需转载请保留出处:https://bianchenghao.cn/64027.html


