
一、简介
Mosaic数据增强是一种在目标检测任务中常用的技术,特别是在使用YOLO系列算法时。这种数据增强方法通过将四张图片随机组合成一张新的图片,从而增加数据集的多样性,提高模型的泛化能力。将这样一张新的图片传入到神经网络当中去学习,相当于一下子传入四张图片进行学习了。这极大丰富了检测物体的背景,且在标准化BN计算的时候一下子会计算四张图片的数据。
二、实现步骤
具体来说,Mosaic数据增强包括以下步骤:
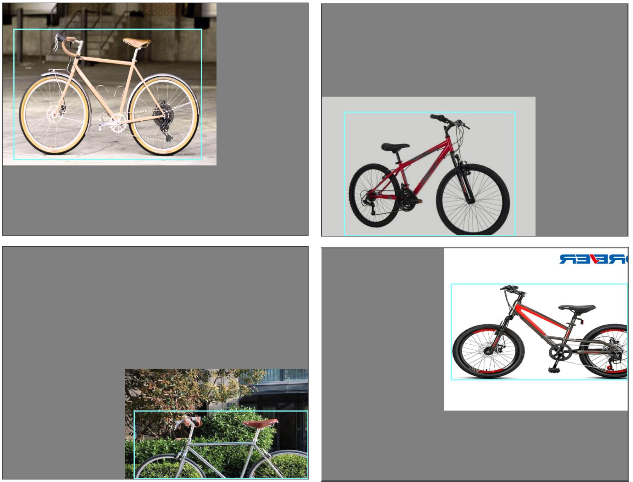
1、随机选择四张图片(为什么是4张,解释看文章最后)

2、对这四张图片进行随机缩放和随机裁剪,然后拼接在一起形成一张新的图片
有两个比较关键的参数,最小偏移x, y。示例代码中设置为0.4,如:
# w = 800, h = 608 min_offset_x = 0.4 min_offset_y = 0.4 # 计算图像等比例缩放比例 scale_low = 1 - min(min_offset_x, min_offset_y) # 0.6 scale_high = scale_low + 0.2 # 0.8 scale = rand(scale_low, scale_high) # 设置偏移坐标 place_x = [0, 0, int(w * min_offset_x), int(w * min_offset_x)] # [0, 0, 320, 320] place_y = [0, int(h * min_offset_y), int(w * min_offset_y), 0] # [0, 243, 320, 0]首先进行图像数据增强,图像缩放,之后通过它计算四个缩放、变换后图像图贴图的起始位置。
(1)翻转(对原始图片进行左右的翻转)
flip = rand() < .5 if flip and len(box) > 0: image = image.transpose(Image.FLIP_LEFT_RIGHT) box[:, [0, 2]] = iw - box[:, [2, 0]](2)缩放(对原始图片进行大小的缩放)
# 对输入进来的图片进行缩放 new_ar = w / h scale = (scale_low + scale_high) / 2 # scale = rand(scale_low, scale_high) if new_ar < 1: nh = int(scale * h) nw = int(nh * new_ar) else: nw = int(scale * w) nh = int(nw / new_ar) image = image.resize((nw, nh), Image.BICUBIC)(3)色域变化(对原始图片的明亮度、饱和度、色调进行改变)等操作
# 进行色域变换 hue = rand(-hue, hue) sat = rand(1, sat) if rand() < .5 else 1 / rand(1, sat) val = rand(1, val) if rand() < .5 else 1 / rand(1, val) x = rgb_to_hsv(np.array(image) / 255.) x[..., 0] += hue x[..., 0][x[..., 0] > 1] -= 1x[..., 0][x[..., 0] < 0] += 1x[..., 1] *= sat x[..., 2] *= val # hsv范围为[0, 1] x[x > 1] = 1 x[x < 0] = 0 image = hsv_to_rgb(x)最后分别将四张图片按照[0,0], [0,243], [320,320], [320,0]的偏移量放置到一张图像上。超出范围的剪裁掉,对应的标注框进行范围的收缩,防止越界。
3、在拼接的新图片上标注对应的边界框(bounding box)信息
完成四张图片的摆放之后,利用矩阵的方式将四张图片它固定的区域截取下来,然后将它们拼接起来,拼接成一 张新的图片,新的图片上含有框框等一系列的内容。
拼图时,依据min_offset_x、min_offset_y生成cutx, cuty的拼图中心坐标。也就是事先设置好的随机的分割线。
# 将图片分割,放在一起 cutx = np.random.randint(int(w * min_offset_x), int(w * (1 - min_offset_x))) cuty = np.random.randint(int(h * min_offset_y), int(h * (1 - min_offset_y))) new_image = np.zeros([h, w, 3]) new_image[:cuty, :cutx, :] = image_datas[0][:cuty, :cutx, :] # 左上 new_image[cuty:, :cutx, :] = image_datas[1][cuty:, :cutx, :] # 左下 new_image[cuty:, cutx:, :] = image_datas[2][cuty:, cutx:, :] # 右下 new_image[:cuty, cutx:, :] = image_datas[3][:cuty, cutx:, :] # 右上4、将这个新的图片和对应的标注信息传入到目标检测模型中进行训练或验证

三、优点
Mosaic数据增强的优点包括:
1、增加数据集的多样性:通过将四张不同的图片拼接在一起,可以增加模型在训练时的数据多样性,从而提高模型的泛化能力。
2、提高小目标检测效果:由于在拼接过程中会对图片进行随机缩放和裁剪,因此可能会将原本在单张图片中难以检测到的小目标包含进来,从而提高模型对小目标的检测能力。
3、减少过拟合:通过增加训练时的数据量,可以减少模型对训练数据的过拟合,提高模型的泛化性能。
需要注意的是,在使用Mosaic数据增强时,需要注意对图片进行适当的预处理,例如调整图片的分辨率、对比度和亮度等,以确保拼接后的图片质量不会受到影响。同时,由于Mosaic数据增强需要处理四张图片的信息,因此可能会增加计算量和存储开销。
四、代码
# -- coding: utf-8 -- import os import cv2 import numpy as np from PIL import Image, ImageDraw from matplotlib.colors import rgb_to_hsv, hsv_to_rgb def rand(a=0, b=1): # 随机生成一个(a, b)的数 return np.random.rand() * (b - a) + a def merge_bboxes(bboxes, cutx, cuty): merge_bbox = [] for i in range(len(bboxes)): for box in bboxes[i]: tmp_box = [] x1, y1, x2, y2 = box[0], box[1], box[2], box[3] # 判断第一张图片(左上)的GT框是否超出边界 if i == 0: # 判断GT框的左上角坐标是否大于分割线坐标,即判断是否有信息在(cuty, cutx)左上 if y1 > cuty or x1 > cutx: continue # 判断GT框右下角y坐标(下边界)是否超出边界,若超出,则右下角y坐标=cuty if y2 >= cuty and y1 <= cuty: y2 = cuty if y2 - y1 < 5: continue # 判断GT框右下角x坐标(右边界)是否超出边界,若超出,则右下角x坐标=cutx if x2 >= cutx and x1 <= cutx: x2 = cutx if x2 - x1 < 5: continue # 判断第二张图片(左下)的GT框是否超出边界 if i == 1: # 判断GT框的右下角坐标是否小于分割线坐标,即判断是否有信息在(cuty, cutx)左下 if y2 < cuty or x1 > cutx: continue # 判断GT框左上角y坐标(上边界)是否超出边界,若超出,则左上角y坐标=cuty if y2 >= cuty and y1 <= cuty: y1 = cuty if y2 - y1 < 5: continue # 判断GT框右下角x坐标(右边界)是否超出边界,若超出,则右下角x坐标=cutx if x2 >= cutx and x1 <= cutx: x2 = cutx if x2 - x1 < 5: continue # 判断第三张图片(右下)的GT框是否超出边界 if i == 2: # 判断GT框的右下角坐标是否小于分割线坐标,即判断是否有信息在(cuty, cutx)右下 if y2 < cuty or x2 < cutx: continue # 判断GT框左上角y坐标(上边界)是否超出边界,若超出,则左上角y坐标=cuty if y2 >= cuty and y1 <= cuty: y1 = cuty if y2 - y1 < 5: continue # 判断GT框左上角x坐标(左边界)是否超出边界,若超出,则左上角x坐标=cutx if x2 >= cutx and x1 <= cutx: x1 = cutx if x2 - x1 < 5: continue # 判断第四张图片(右上)的GT框是否超出边界 if i == 3: # 判断GT框的左上角坐标是否小于分割线坐标,即判断是否有信息在(cuty, cutx)右上 if y1 > cuty or x2 < cutx: continue # 判断GT框右下角y坐标(下边界)是否超出边界,若超出,则右下角y坐标=cuty if y2 >= cuty and y1 <= cuty: y2 = cuty if y2 - y1 < 5: continue # 判断GT框左上角x坐标(左边界)是否超出边界,若超出,则左上角x坐标=cutx if x2 >= cutx and x1 <= cutx: x1 = cutx if x2 - x1 < 5: continue tmp_box.append(x1) tmp_box.append(y1) tmp_box.append(x2) tmp_box.append(y2) tmp_box.append(box[-1]) merge_bbox.append(tmp_box) return merge_bbox def get_random_data(b_data, input_shape, hue=.1, sat=1.5, val=1.5): h, w = input_shape # (608, 800) # 设置最小偏移量 min_offset_x = 0.4 min_offset_y = 0.4 # 计算图片等比例缩放比例 scale_low = 1 - min(min_offset_x, min_offset_y) # 0.6 scale_high = scale_low + 0.2 # 0.8 image_datas = [] box_datas = [] index = 0 # 设置偏移坐标 place_x = [0, 0, int(w * min_offset_x), int(w * min_offset_x)] # [0, 0, 320, 320] place_y = [0, int(h * min_offset_y), int(w * min_offset_y), 0] # [0, 243, 320, 0] print("place:", place_x, place_y) for i in range(4): idx = i img, box, img_path = b_data[i] # print(img_path, boxes) img = cv2.cvtColor(img, cv2.COLOR_BGR2RGB) image = Image.fromarray(img, mode="RGB") # 图片的大小 iw, ih = image.size # 是否翻转图片 flip = rand() < .5 if flip and len(box) > 0: image = image.transpose(Image.FLIP_LEFT_RIGHT) box[:, [0, 2]] = iw - box[:, [2, 0]] # 对输入进来的图片进行缩放 new_ar = w / h scale = (scale_low + scale_high) / 2 # scale = rand(scale_low, scale_high) if new_ar < 1: nh = int(scale * h) nw = int(nh * new_ar) else: nw = int(scale * w) nh = int(nw / new_ar) image = image.resize((nw, nh), Image.BICUBIC) # 进行色域变换 hue = rand(-hue, hue) sat = rand(1, sat) if rand() < .5 else 1 / rand(1, sat) val = rand(1, val) if rand() < .5 else 1 / rand(1, val) x = rgb_to_hsv(np.array(image) / 255.) x[..., 0] += hue x[..., 0][x[..., 0] > 1] -= 1 x[..., 0][x[..., 0] < 0] += 1 x[..., 1] *= sat x[..., 2] *= val # hsv范围为[0, 1] x[x > 1] = 1 x[x < 0] = 0 image = hsv_to_rgb(x) image = Image.fromarray((image * 255).astype(np.uint8)) # 将图片进行放置,分别对应四张分割图片的位置 dx = place_x[index] dy = place_y[index] # 创建一张(w, h),背景为灰色的图像 new_image = Image.new('RGB', (w, h), (128, 128, 128)) # 将缩放的图像粘贴到新生成的灰色图像上 new_image.paste(image, (dx, dy)) # image.save("photo_%d.jpg" % (idx+1)) image_data = np.array(new_image) / 255 index = index + 1 box_data = [] # 对box进行重新处理,处理越界问题。 if len(box) > 0: np.random.shuffle(box) # 按照缩放后图片的尺寸以及偏移坐标缩放GT框 box[:, [0, 2]] = box[:, [0, 2]] * nw / iw + dx box[:, [1, 3]] = box[:, [1, 3]] * nh / ih + dy # 判断缩放后的GT框是否超出边界 box[:, 0:2][box[:, 0:2] < 0] = 0 box[:, 2][box[:, 2] > w] = w box[:, 3][box[:, 3] > h] = h box_w = box[:, 2] - box[:, 0] box_h = box[:, 3] - box[:, 1] # 剔除宽高小于1的GT框 box = box[np.logical_and(box_w > 1, box_h > 1)] box_data = np.zeros((len(box), 5)) box_data[:len(box)] = box image_datas.append(image_data) box_datas.append(box_data) img = Image.fromarray((image_data * 255).astype(np.uint8)) # 将GT框绘制到缩放的图片上 for j in range(len(box_data)): thickness = 3 left, top, right, bottom = box_data[j][0:4] draw = ImageDraw.Draw(img) for i in range(thickness): draw.rectangle([left + i, top + i, right - i, bottom - i], outline=(125, 255, 255)) # img.show() img.save("box_%d.jpg" % (idx + 1)) # 将图片分割,放在一起 cutx = np.random.randint(int(w * min_offset_x), int(w * (1 - min_offset_x))) cuty = np.random.randint(int(h * min_offset_y), int(h * (1 - min_offset_y))) new_image = np.zeros([h, w, 3]) new_image[:cuty, :cutx, :] = image_datas[0][:cuty, :cutx, :] # 左上 new_image[cuty:, :cutx, :] = image_datas[1][cuty:, :cutx, :] # 左下 new_image[cuty:, cutx:, :] = image_datas[2][cuty:, cutx:, :] # 右下 new_image[:cuty, cutx:, :] = image_datas[3][:cuty, cutx:, :] # 右上 # 对GT框进行进一步的处理 new_boxes = merge_bboxes(box_datas, cutx, cuty) return new_image, new_boxes def get_img_data() -> object: data_dir = r".\dataset" # 加载图片文件夹路径 file_paths = [os.path.join(data_dir, v) for v in os.listdir(data_dir)] # 获取文件夹中每个文件的路径 print(file_paths) file_paths = [v for v in file_paths if v.endswith(".jpg") and os.path.exists(v[:-4] + ".txt")] # 加载有GT框信息的图片文件路径 print("label img cnt:", len(file_paths), file_paths) if len(file_paths) < 4: # 判断图片数据是否小于4 print("数据不足!") return batch_data = [] for img_path in file_paths: img = cv2.imread(img_path) # 读取图片信息 gt_boxes = [] lines = [] with open(img_path[:-4] + ".txt") as fp: # 打开该图片对应的GT框信息 for item in fp.readlines(): lines.append(item.strip().split()) lines = [v for v in lines if v] img_h, img_w = img.shape[:2] for item in lines: item = [float(v) for v in item] [cls, cx, cy, bw, bh] = item # 获取GT框信息,类别,中心点,宽高(均为相对坐标) x1 = max(0, int((cx - bw / 2) * img_w)) # 计算左上角x坐标 y1 = max(0, int((cy - bh / 2) * img_h)) # 计算左上角y坐标 x2 = min(int((cx + bw / 2) * img_w), img_w - 1) # 计算右下角x坐标 y2 = min(int((cy + bh / 2) * img_h), img_h - 1) # 计算右下角y坐标 gt_boxes.append([x1, y1, x2, y2, int(cls)]) batch_data.append([img, np.array(gt_boxes), img_path]) return batch_data if __name__ == "__main__": batch_data = get_img_data() image_data, box_data = get_random_data(batch_data, [608, 800]) img = Image.fromarray((image_data * 255).astype(np.uint8)) for j in range(len(box_data)): thickness = 3 left, top, right, bottom = box_data[j][0:4] draw = ImageDraw.Draw(img) for i in range(thickness): draw.rectangle([left + i, top + i, right - i, bottom - i], outline=(125, 255, 255)) img.save(r"./dataset/box_all.jpg") 写在最后:为啥是Mosaic是选择四张图片拼接,六张可以吗?
Mosaic数据增强不仅限于拼接四张图片,实际上,可以拼接更多张图片。不过,一般来说,拼接四张图片已经能够带来显著的性能提升,而且过多的图片可能会增加计算和存储的开销。
至于拼接六张图片是否可行,具体还需要根据实际应用场景和需求来决定。如果计算资源充足,且六张图片的拼接能够带来更好的性能提升,那么完全可以尝试。但如果计算资源有限,或者六张图片的拼接效果并不明显,那么可能没有必要使用。
今天的文章 【YOLO系列】 YOLOv4之Mosaic数据增强(附代码)分享到此就结束了,感谢您的阅读。
版权声明:本文内容由互联网用户自发贡献,该文观点仅代表作者本人。本站仅提供信息存储空间服务,不拥有所有权,不承担相关法律责任。如发现本站有涉嫌侵权/违法违规的内容, 请发送邮件至 举报,一经查实,本站将立刻删除。
如需转载请保留出处:https://bianchenghao.cn/bian-cheng-ji-chu/81856.html