
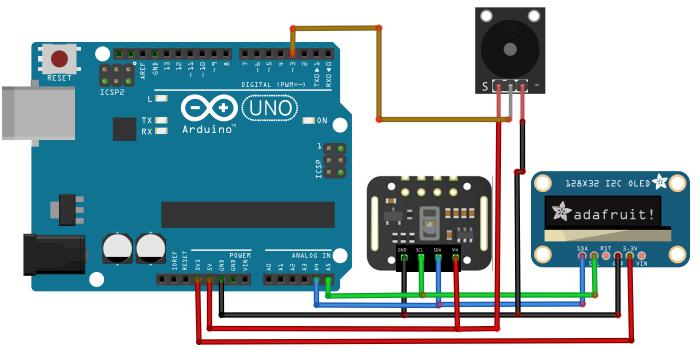
项目采用MAX30102血氧及心率监视模块、Arduino UNO板、OLED显示器和蜂鸣器,搭建了一个简单的心率(BPM)测量仪。
这里,BPM为每分钟的心跳数,正常人的数字为65-75之间,体育运动员的数字要低些;血氧饱和度(SaO2)对于正常然来说大概为95%。
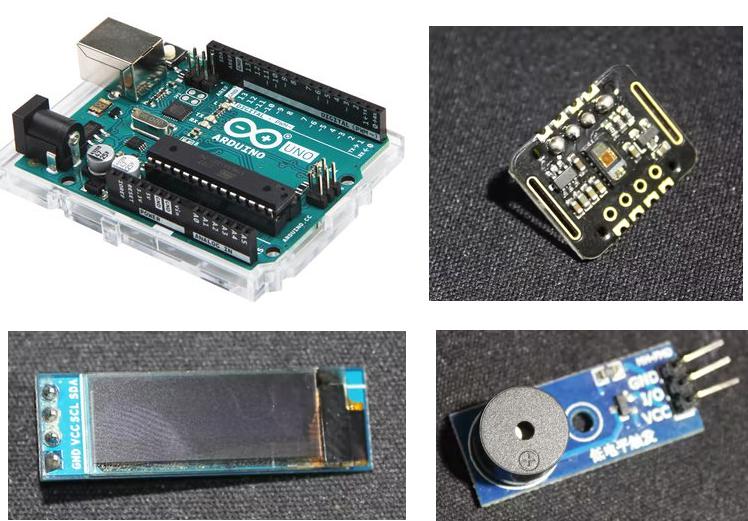
项目物料
本项目所需材料包括:
Max30102(×1):这是项目的功能器件,是一款用于可穿戴设备的高灵敏脉冲式血样及心率传感器,具有不同版本,但是只要型号正确即可。
Arduino UNO(×1)
OLED 128x32(×1):低功耗显示器。
Buzzer (×1):蜂鸣器
面包板(×1):方便组件安装和连接的线路板。
连接线
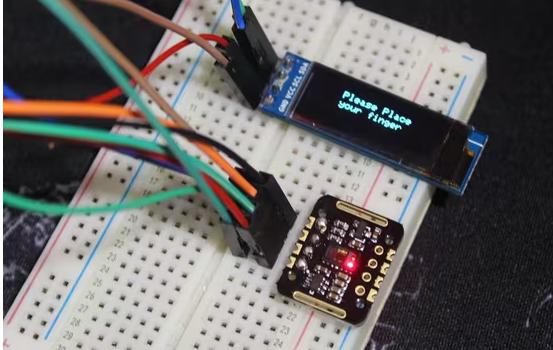
本项目所用代码来自Sparkfun_MAX3010x示例库,OLED和Buzzer代码根据 "HeartRate" 示例改进而来,这需要用户将手指放在传感器上。
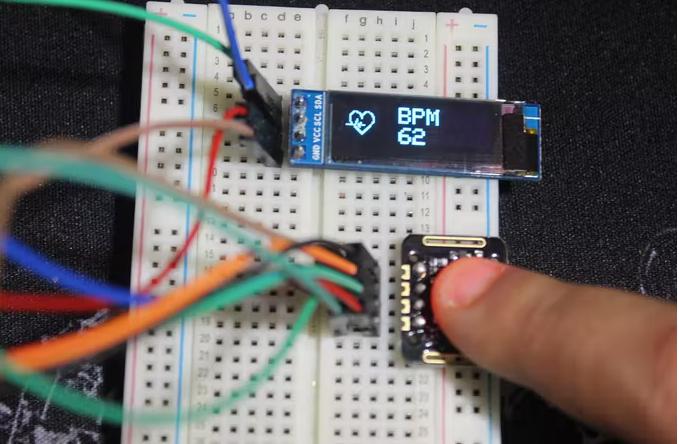
注意,如果将手指放在传感器上,就要保持安静,直到蜂鸣器的“哔哔”声与你的心率节拍同步,或者与OLED动画同步,这时可读出正确的BPM心率读数。
本项目采用4次BPM读数的平均值,因此比较准确。
让OLED显示bmp图像
OLED显示的是小的“心形”栅格图(bmp),一旦传感器检测到一次心跳,就立即切换为大点的“心形”栅格图并保持一会儿,这样屏幕就像心跳一样,一闪一闪的,并伴有蜂鸣器的“哔哔”声。
选择希望看到的图走向的格式,如 .png .bmp .dib等。切记,本项目屏幕尺寸为128x32px,图像尺寸要小一些,为32x32px和24x21px。
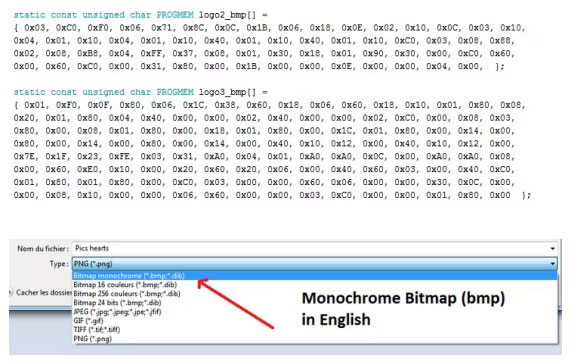
下载LCD助手并打开。

可看到如下"数字"
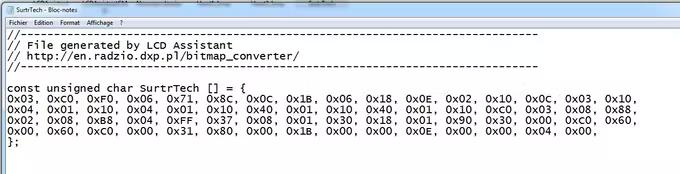
这就是所谓的代码:
display.drawBitmap(5, 5, logo2_bmp, 24, 21, WHITE);
其含义为:
display.drawBitmap(Starting x pos, Starting y pos, Bitmap name, Width, Height, Color);
这段代码描述了两件事——“当检测到手指时做什么”,以及“捡到心跳时做什么”。
以下是更新后的代码:
MAX_BPM_OLED_Buzzer.inoArduino
Modified from the SparkFun MAX3010x library
/* This code works with MAX30102 + 128x32 OLED i2c + Buzzer and Arduino UNO
* It's displays the Average BPM on the screen, with an animation and a buzzer sound
* everytime a heart pulse is detected
* It's a modified version of the HeartRate library example
* Refer to www.surtrtech.com for more details or SurtrTech YouTube channel
*/
#include //OLED libraries
#include
#include
#include "MAX30105.h" //MAX3010x library
#include "heartRate.h" //Heart rate calculating algorithm
MAX30105 particleSensor;
const byte RATE_SIZE = 4; //Increase this for more averaging. 4 is good.
byte rates[RATE_SIZE]; //Array of heart rates
byte rateSpot = 0;
long lastBeat = 0; //Time at which the last beat occurred
float beatsPerMinute;
int beatAvg;
#define SCREEN_WIDTH 128 // OLED display width, in pixels
#define SCREEN_HEIGHT 32 // OLED display height, in pixels
#define OLED_RESET -1 // Reset pin # (or -1 if sharing Arduino reset pin)
Adafruit_SSD1306 display(SCREEN_WIDTH, SCREEN_HEIGHT, &Wire, OLED_RESET); //Declaring the display name (display)
static const unsigned char PROGMEM logo2_bmp[] =
{ 0x03, 0xC0, 0xF0, 0x06, 0x71, 0x8C, 0x0C, 0x1B, 0x06, 0x18, 0x0E, 0x02, 0x10, 0x0C, 0x03, 0x10, //Logo2 and Logo3 are two bmp pictures that display on the OLED if called
0x04, 0x01, 0x10, 0x04, 0x01, 0x10, 0x40, 0x01, 0x10, 0x40, 0x01, 0x10, 0xC0, 0x03, 0x08, 0x88,
0x02, 0x08, 0xB8, 0x04, 0xFF, 0x37, 0x08, 0x01, 0x30, 0x18, 0x01, 0x90, 0x30, 0x00, 0xC0, 0x60,
0x00, 0x60, 0xC0, 0x00, 0x31, 0x80, 0x00, 0x1B, 0x00, 0x00, 0x0E, 0x00, 0x00, 0x04, 0x00, };
static const unsigned char PROGMEM logo3_bmp[] =
{ 0x01, 0xF0, 0x0F, 0x80, 0x06, 0x1C, 0x38, 0x60, 0x18, 0x06, 0x60, 0x18, 0x10, 0x01, 0x80, 0x08,
0x20, 0x01, 0x80, 0x04, 0x40, 0x00, 0x00, 0x02, 0x40, 0x00, 0x00, 0x02, 0xC0, 0x00, 0x08, 0x03,
0x80, 0x00, 0x08, 0x01, 0x80, 0x00, 0x18, 0x01, 0x80, 0x00, 0x1C, 0x01, 0x80, 0x00, 0x14, 0x00,
0x80, 0x00, 0x14, 0x00, 0x80, 0x00, 0x14, 0x00, 0x40, 0x10, 0x12, 0x00, 0x40, 0x10, 0x12, 0x00,
0x7E, 0x1F, 0x23, 0xFE, 0x03, 0x31, 0xA0, 0x04, 0x01, 0xA0, 0xA0, 0x0C, 0x00, 0xA0, 0xA0, 0x08,
0x00, 0x60, 0xE0, 0x10, 0x00, 0x20, 0x60, 0x20, 0x06, 0x00, 0x40, 0x60, 0x03, 0x00, 0x40, 0xC0,
0x01, 0x80, 0x01, 0x80, 0x00, 0xC0, 0x03, 0x00, 0x00, 0x60, 0x06, 0x00, 0x00, 0x30, 0x0C, 0x00,
0x00, 0x08, 0x10, 0x00, 0x00, 0x06, 0x60, 0x00, 0x00, 0x03, 0xC0, 0x00, 0x00, 0x01, 0x80, 0x00 };
void setup() {
display.begin(SSD1306_SWITCHCAPVCC, 0x3C); //Start the OLED display
display.display();
delay(3000);
// Initialize sensor
particleSensor.begin(Wire, I2C_SPEED_FAST); //Use default I2C port, 400kHz speed
particleSensor.setup(); //Configure sensor with default settings
particleSensor.setPulseAmplitudeRed(0x0A); //Turn Red LED to low to indicate sensor is running
}
void loop() {
long irValue = particleSensor.getIR(); //Reading the IR value it will permit us to know if there's a finger on the sensor or not
//Also detecting a heartbeat
if(irValue > 7000){ //If a finger is detected
display.clearDisplay(); //Clear the display
display.drawBitmap(5, 5, logo2_bmp, 24, 21, WHITE); //Draw the first bmp picture (little heart)
display.setTextSize(2); //Near it display the average BPM you can display the BPM if you want
display.setTextColor(WHITE);
display.setCursor(50,0);
display.println("BPM");
display.setCursor(50,18);
display.println(beatAvg);
display.display();
if (checkForBeat(irValue) == true) //If a heart beat is detected
{
display.clearDisplay(); //Clear the display
display.drawBitmap(0, 0, logo3_bmp, 32, 32, WHITE); //Draw the second picture (bigger heart)
display.setTextSize(2); //And still displays the average BPM
display.setTextColor(WHITE);
display.setCursor(50,0);
display.println("BPM");
display.setCursor(50,18);
display.println(beatAvg);
display.display();
tone(3,1000); //And tone the buzzer for a 100ms you can reduce it it will be better
delay(100);
noTone(3); //Deactivate the buzzer to have the effect of a "bip"
//We sensed a beat!
long delta = millis() - lastBeat; //Measure duration between two beats
lastBeat = millis();
beatsPerMinute = 60 / (delta / 1000.0); //Calculating the BPM
if (beatsPerMinute < 255 && beatsPerMinute > 20) //To calculate the average we strore some values (4) then do some math to calculate the average
{
rates[rateSpot++] = (byte)beatsPerMinute; //Store this reading in the array
rateSpot %= RATE_SIZE; //Wrap variable
//Take average of readings
beatAvg = 0;
for (byte x = 0 ; x < RATE_SIZE ; x++)
beatAvg += rates[x];
beatAvg /= RATE_SIZE;
}
}
}
if (irValue < 7000){ //If no finger is detected it inform the user and put the average BPM to 0 or it will be stored for the next measure
beatAvg=0;
display.clearDisplay();
display.setTextSize(1);
display.setTextColor(WHITE);
display.setCursor(30,5);
display.println("Please Place ");
display.setCursor(30,15);
display.println("your finger ");
display.display();
noTone(3);
}
}
审核编辑:汤梓红
版权声明:本文内容由互联网用户自发贡献,该文观点仅代表作者本人。本站仅提供信息存储空间服务,不拥有所有权,不承担相关法律责任。如发现本站有涉嫌侵权/违法违规的内容, 请发送邮件至 举报,一经查实,本站将立刻删除。
如需转载请保留出处:https://bianchenghao.cn/bian-cheng-ri-ji/16568.html