
提示:文章写完后,目录可以自动生成,如何生成可参考右边的帮助文档
例如:OpenStack快速部署
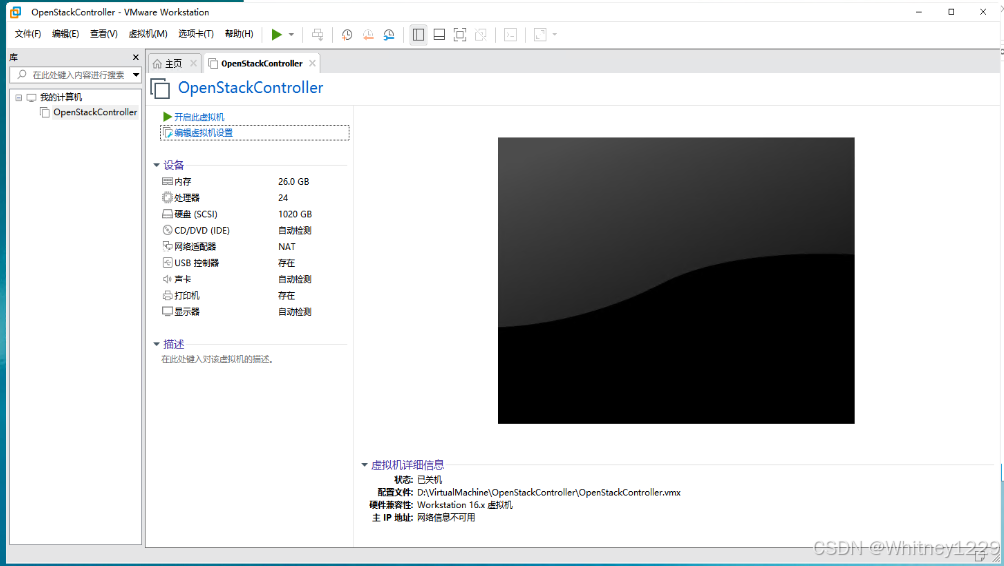
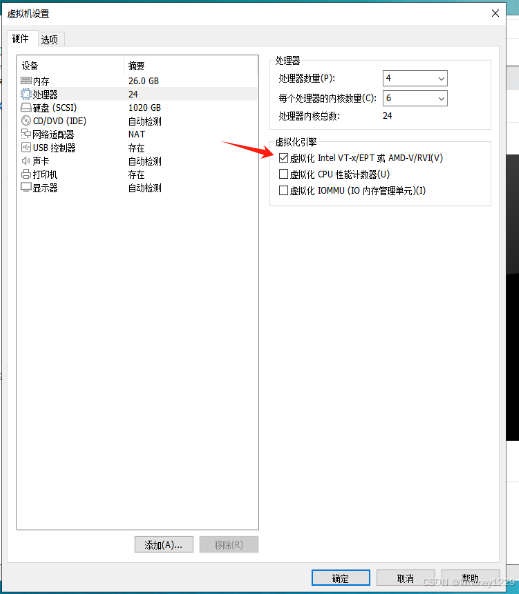
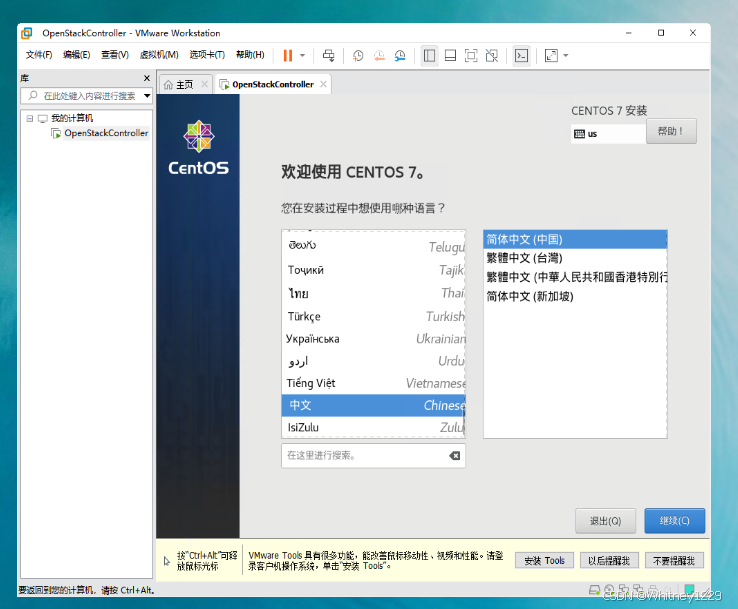
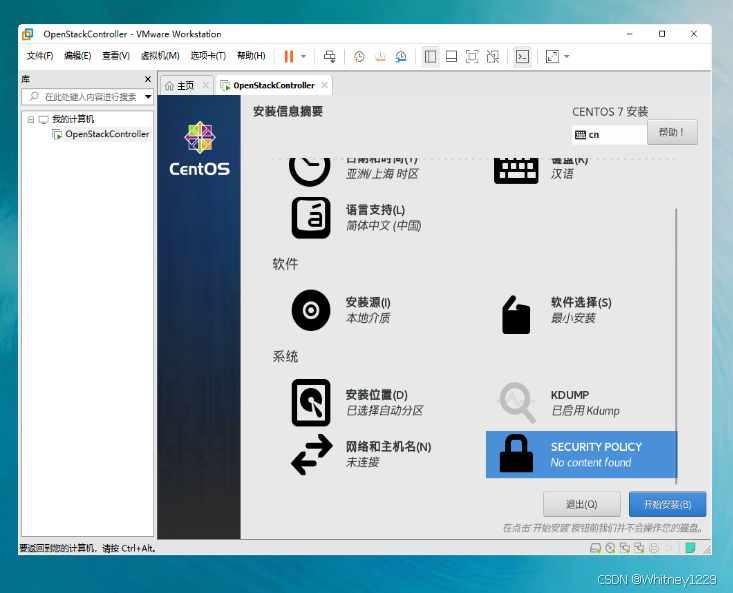
创建一台虚拟机
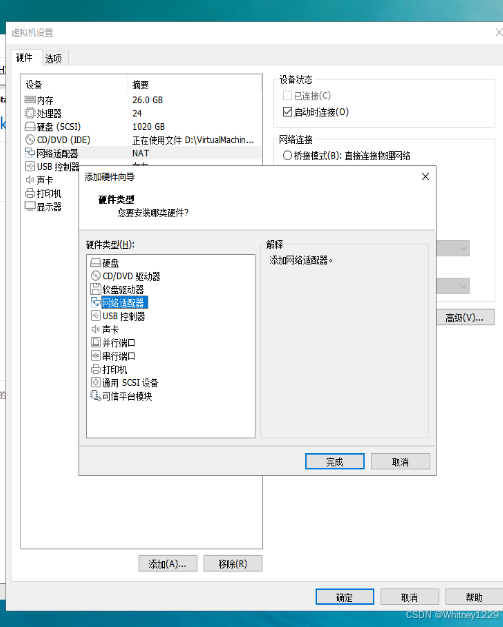
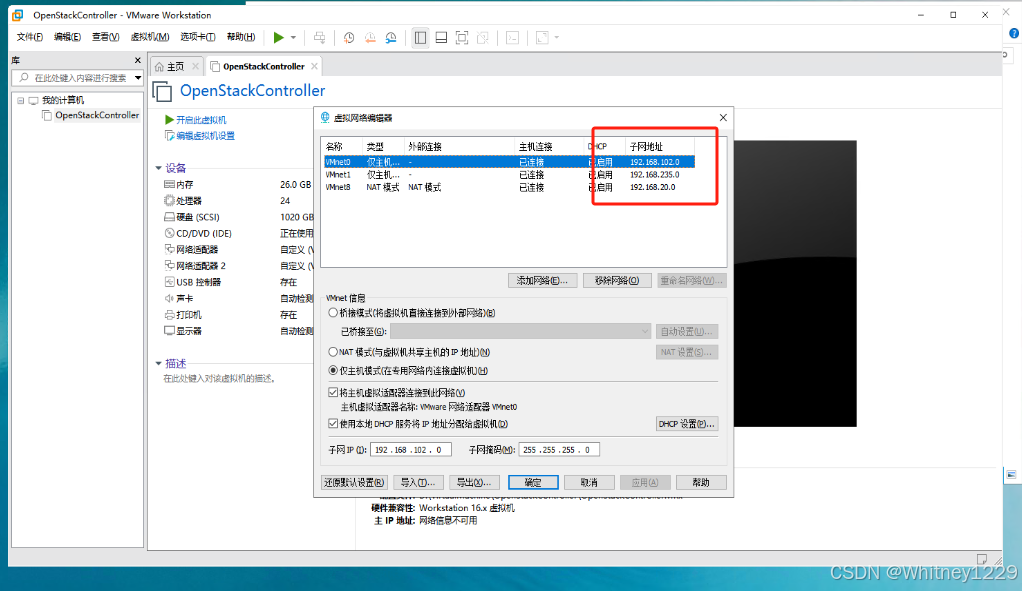
添加一块网卡
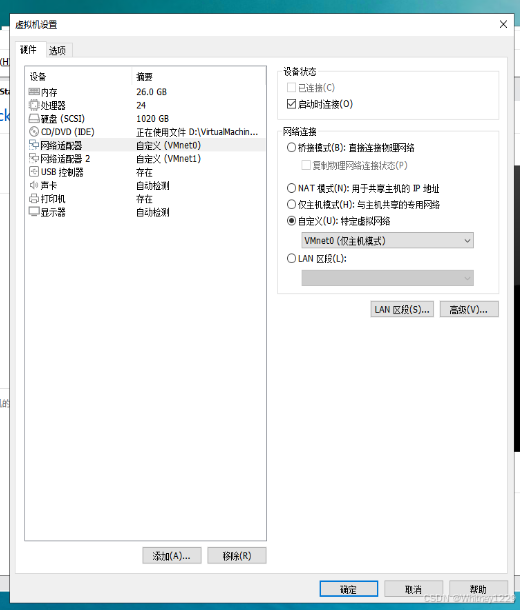
网卡设置成这个模式
然后在虚拟网络中查看后面用到的IP

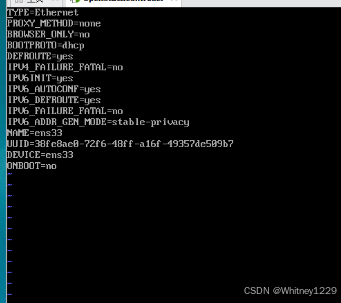
配置网卡
确认网卡后,可以通过,vi /etc/sysconfig/network-scripts/ifg-ens33
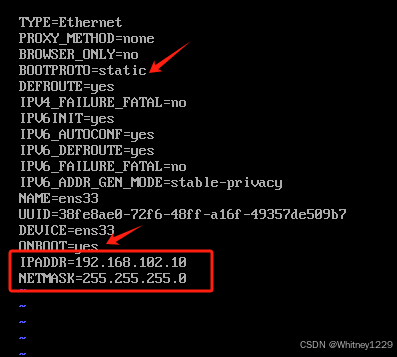
修改完后通过:wq保存退出
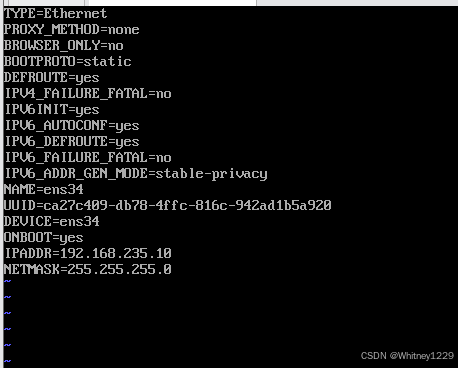
再修改另一张网卡
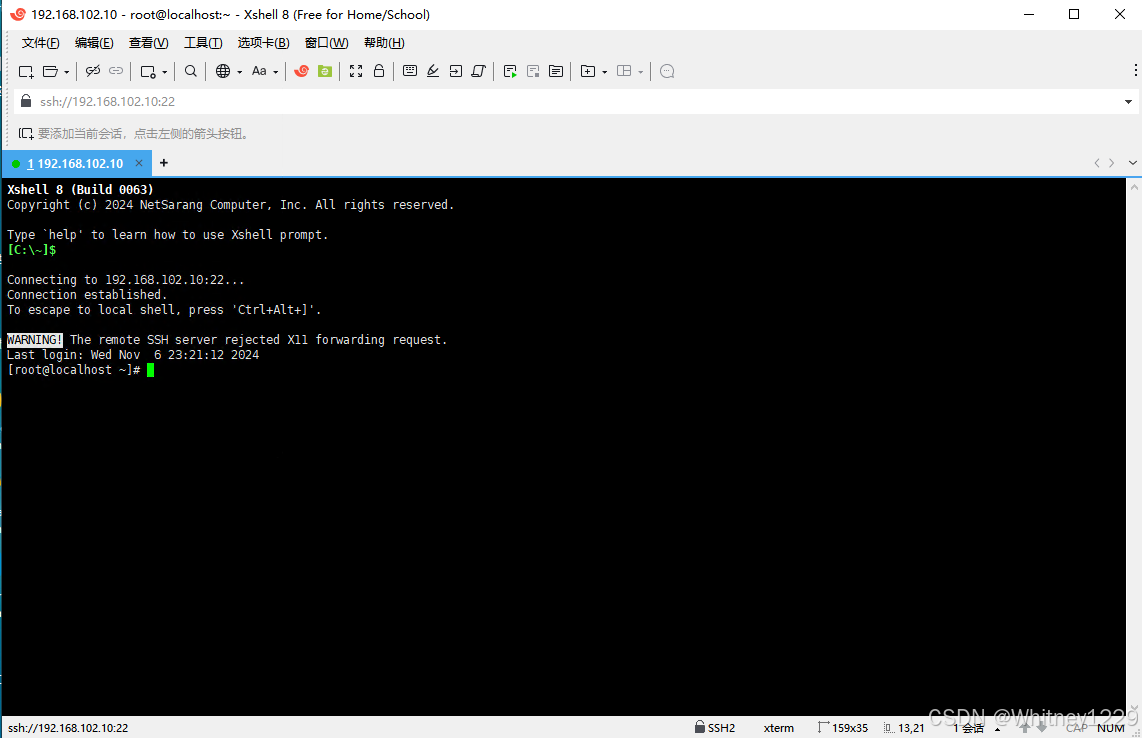
最后重启网卡 systemctl restart network
Xshell连接虚拟机
[root@localhost ~]# systemctl stop firewalld 关闭防火墙
[root@localhost ~]# systemctl disable firewalld 禁用防火墙
Removed symlink /etc/systemd/system/multi-user.target.wants/firewalld.service.
Removed symlink /etc/systemd/system/dbus-org.fedoraproject.FirewallD1.service.
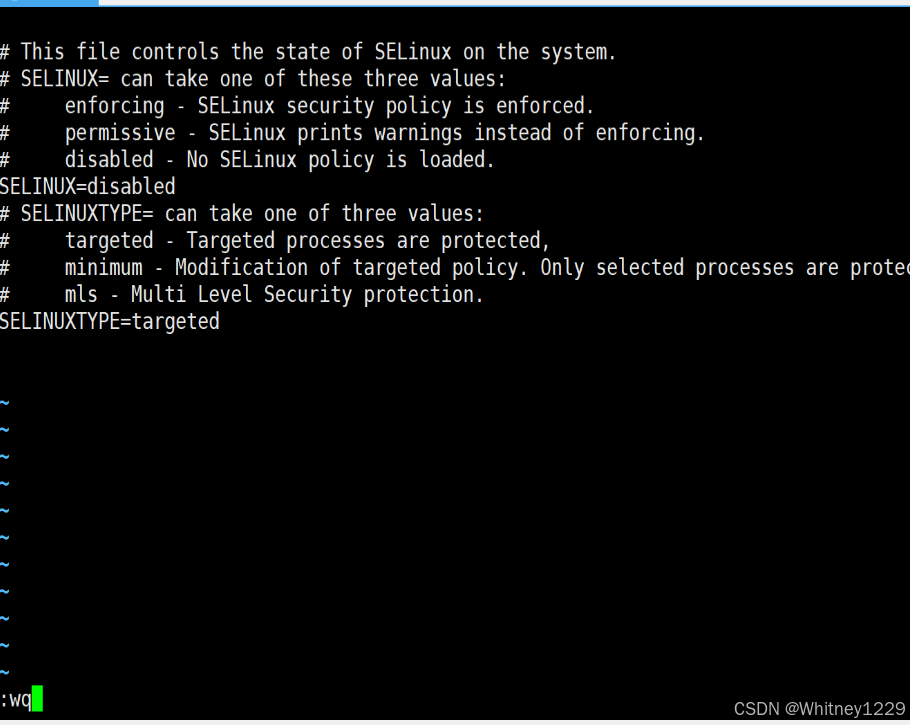
[root@localhost ~]# setenforce 0
[root@localhost ~]# vi /etc/selinux/config
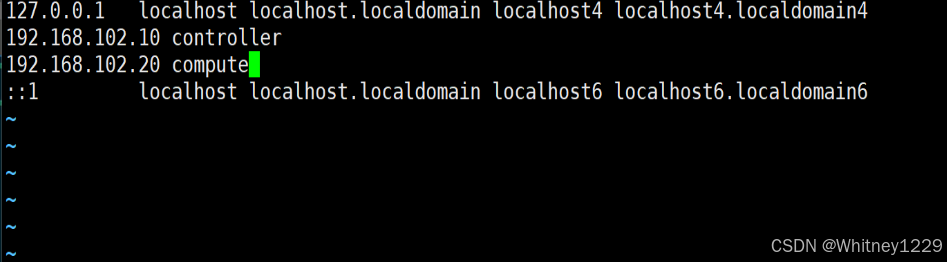
[root@localhost ~]# vi /etc/hosts
[root@localhost ~]# rm -rf /etc/yum.repos.d/* 删除yum源
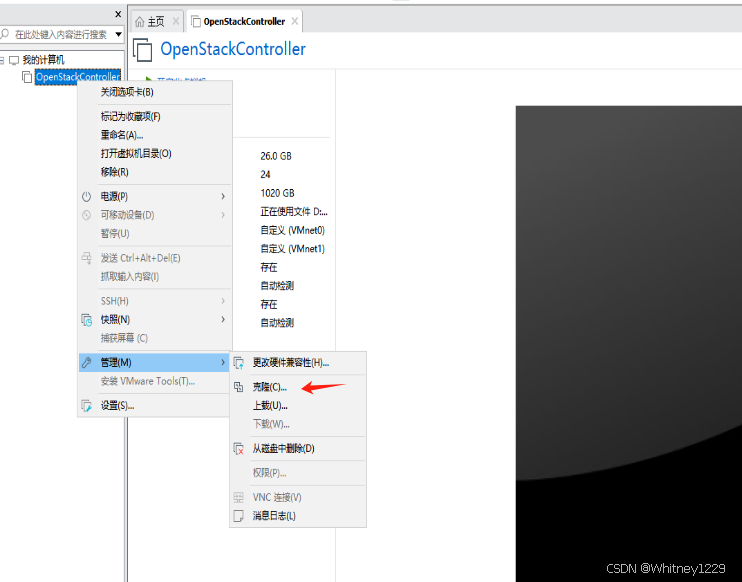
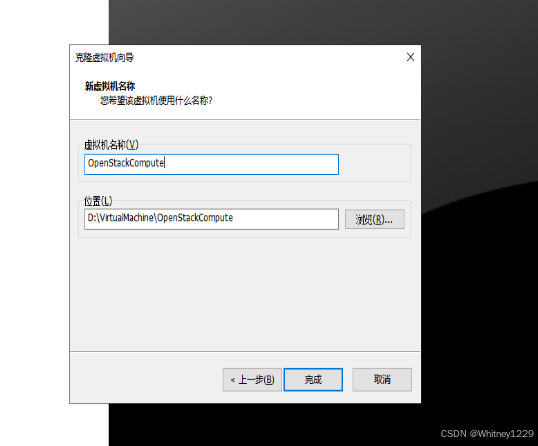
关闭虚拟机,克隆一份作为从节点
克隆之后的虚拟机更改网卡信息,将上面两张网卡改为20,重启网络,Xshell链接

这些配置完成之后,发送两个软件包
配置一下yum源,vi /etc/yum.repos.d/local.repo
[centos]
name=centos
enabled=1
gpgcheck=0
baseurl=file:///opt/centos
[iaas]
name=iaas
enabled=1
gpgcheck=0
baseurl=file:///opt/iaas/iaas-repo
创建文件夹
[root@localhost ~]# mkdir /opt/centos
[root@localhost ~]# mkdir /opt/iaas
[root@localhost ~]# ls
anaconda-ks.cfg CentOS-7-x86_64-DVD-2009.iso chinaskills_cloud_iaas.iso
compute节点也配置一下yum源
[BEGIN] 2024/11/6 16:11:27
[root@localhost ~]# rm -rf /etc/yum.repos.d/*
[root@localhost ~]# vi /etc/yum.repos.d/ftp.repo
[centos]
name=centos
enabled=1
gpgcheck=0
baseurl=ftp://192.168.102.10/centos
[iaas]
name=iaas
enabled=1
gpgcheck=0
baseurl=ftp://192.168.102.10/iaas/iaas-repo
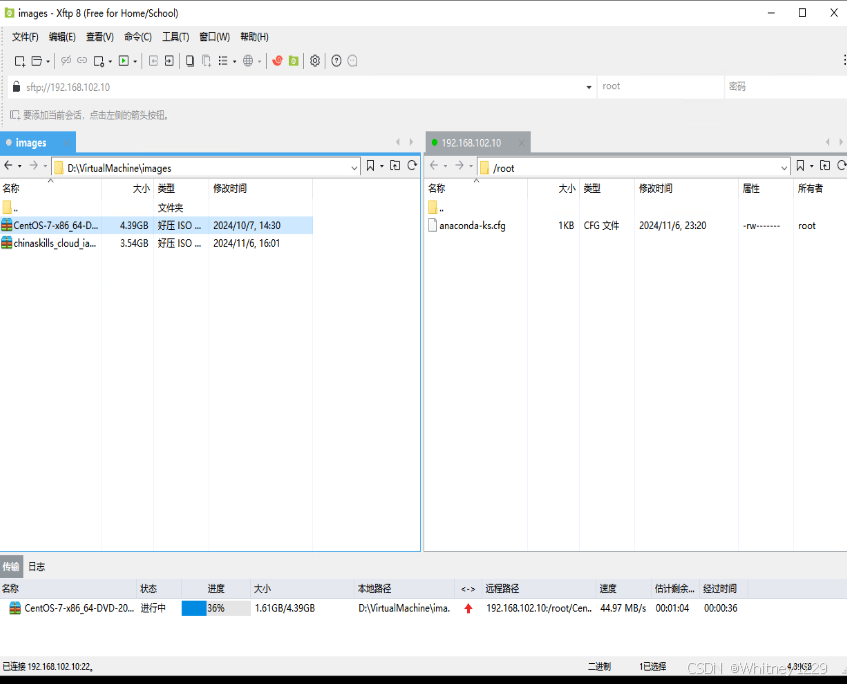
将centos镜像临时挂在并复制到文件夹中
[root@localhost ~]# mount -o loop CentOS-7-x86_64-DVD-2009.iso /mnt/
mount: /dev/loop0 写保护,将以只读方式挂载
[root@localhost ~]# cp -rvf /mnt/* /opt/centos/
复制完成后,取消挂载,重新挂载另一个镜像,并复制到对应的文件夹
[root@localhost ~]# umount /mnt/
[root@localhost ~]# ^C
[root@localhost ~]# mount -o loop chinaskills_cloud_iaas.iso /mnt/
mount: /dev/loop0 写保护,将以只读方式挂载
[root@localhost ~]# cp -rvf /mnt/* /opt/iaas/
最后取消挂载,删除镜像
[root@localhost ~]# rm -rf chinaskills_cloud_iaas.iso
[root@localhost ~]# rm -rf CentOS-7-x86_64-DVD-2009.iso
[root@localhost ~]# umount /mnt/
查看yum源是否做好
[root@localhost ~]# yum repolist
下在vsftpd
[root@localhost ~]# yum install vsftpd -y
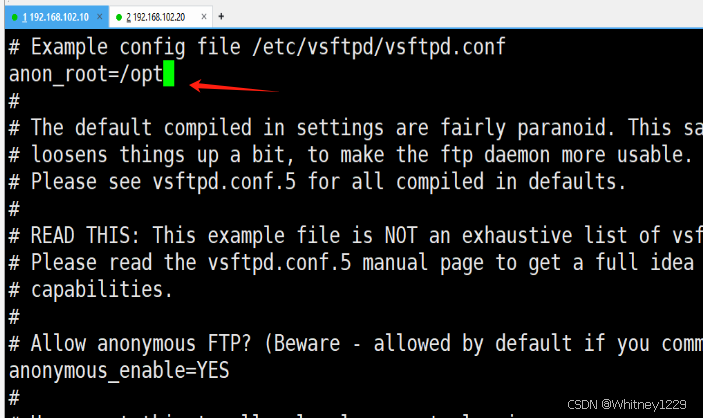
修改配置
[root@localhost ~]# vi /etc/vsftpd/vsftpd.conf
[root@localhost ~]# systemctl restart vsftpd
[root@localhost ~]# systemctl enable vsftpd
下载软件包,俩个节点都要下载
[root@localhost ~]# yum install iaas-xiandian -y
[root@localhost ~]# vi /etc/xiandian/openrc.sh
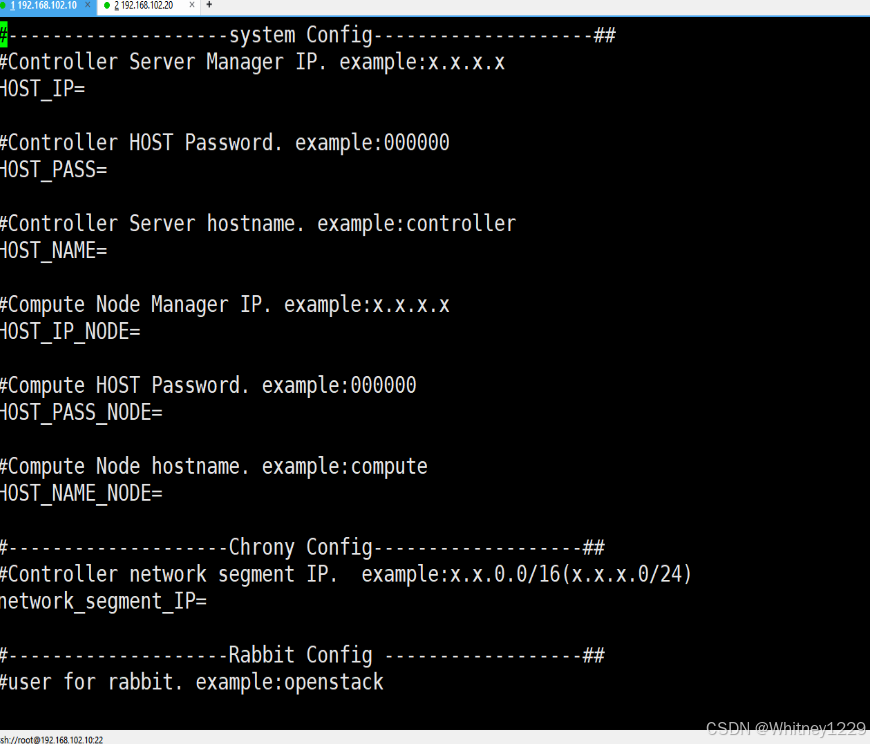
修改配置文件,开始通过ctrl+v G d,取消注释 以及通过这个修改密码:%s/PASS=/PASS=201706/g
[root@localhost ~]# vi /etc/xiandian/openrc.sh
[root@localhost ~]# cat /etc/xiandian/openrc.sh
#--------------------system Config--------------------##
#Controller Server Manager IP. example:x.x.x.x
HOST_IP=192.168.102.10
#Controller HOST Password. example:000000
HOST_PASS=201706
#Controller Server hostname. example:controller
HOST_NAME=controller
#Compute Node Manager IP. example:x.x.x.x
HOST_IP_NODE=192.168.102.20
#Compute HOST Password. example:000000
HOST_PASS_NODE=201706
#Compute Node hostname. example:compute
HOST_NAME_NODE=compute
#--------------------Chrony Config-------------------##
#Controller network segment IP. example:x.x.0.0/16(x.x.x.0/24)
network_segment_IP=192.168.0.0/16
#--------------------Rabbit Config ------------------##
#user for rabbit. example:openstack
RABBIT_USER=openstack
#Password for rabbit user .example:000000
RABBIT_PASS=201706
#--------------------MySQL Config---------------------##
#Password for MySQL root user . exmaple:000000
DB_PASS=201706
#--------------------Keystone Config------------------##
#Password for Keystore admin user. exmaple:000000
DOMAIN_NAME=demo
ADMIN_PASS=201706
DEMO_PASS=201706
#Password for Mysql keystore user. exmaple:000000
KEYSTONE_DBPASS=201706
#--------------------Glance Config--------------------##
#Password for Mysql glance user. exmaple:000000
GLANCE_DBPASS=201706
#Password for Keystore glance user. exmaple:000000
GLANCE_PASS=201706
#--------------------Nova Config----------------------##
#Password for Mysql nova user. exmaple:000000
NOVA_DBPASS=201706
#Password for Keystore nova user. exmaple:000000
NOVA_PASS=201706
#--------------------Neturon Config-------------------##
#Password for Mysql neutron user. exmaple:000000
NEUTRON_DBPASS=201706
#Password for Keystore neutron user. exmaple:000000
NEUTRON_PASS=201706
#metadata secret for neutron. exmaple:000000
METADATA_SECRET=201706
#Tunnel Network Interface. example:x.x.x.x
INTERFACE_IP=192.168.235.10
#External Network Interface. example:eth1
INTERFACE_NAME=ens34
#External Network The Physical Adapter. example:provider
Physical_NAME=provider
#First Vlan ID in VLAN RANGE for VLAN Network. exmaple:101
minvlan=1
#Last Vlan ID in VLAN RANGE for VLAN Network. example:200
maxvlan=400
#--------------------Cinder Config--------------------##
#Password for Mysql cinder user. exmaple:000000
CINDER_DBPASS=201706
#Password for Keystore cinder user. exmaple:000000
CINDER_PASS=201706
#Cinder Block Disk. example:md126p3
BLOCK_DISK=sdb
#--------------------Swift Config---------------------##
#Password for Keystore swift user. exmaple:000000
SWIFT_PASS=201706
#The NODE Object Disk for Swift. example:md126p4.
OBJECT_DISK=sdc
#The NODE IP for Swift Storage Network. example:x.x.x.x.
STORAGE_LOCAL_NET_IP=192.168.102.20
#--------------------Heat Config----------------------##
#Password for Mysql heat user. exmaple:000000
HEAT_DBPASS=201706
#Password for Keystore heat user. exmaple:000000
HEAT_PASS=201706
#--------------------Zun Config-----------------------##
#Password for Mysql Zun user. exmaple:000000
ZUN_DBPASS=201706
#Password for Keystore Zun user. exmaple:000000
ZUN_PASS=201706
#Password for Mysql Kuryr user. exmaple:000000
KURYR_DBPASS=201706
#Password for Keystore Kuryr user. exmaple:000000
KURYR_PASS=201706
#--------------------Ceilometer Config----------------##
#Password for Gnocchi ceilometer user. exmaple:000000
CEILOMETER_DBPASS=201706
#Password for Keystore ceilometer user. exmaple:000000
CEILOMETER_PASS=201706
#--------------------AODH Config----------------##
#Password for Mysql AODH user. exmaple:000000
AODH_DBPASS=201706
#Password for Keystore AODH user. exmaple:000000
AODH_PASS=201706
#--------------------Barbican Config----------------##
#Password for Mysql Barbican user. exmaple:000000
BARBICAN_DBPASS=201706
#Password for Keystore Barbican user. exmaple:000000
BARBICAN_PASS=201706
配置文件编写完成后,传送至另一个节点
[root@localhost ~]# scp /etc/xiandian/openrc.sh root@192.168.102.20:/etc/xiandian/
The authenticity of host ‘192.168.102.20 (192.168.102.20)’ can’t be established.
ECDSA key fingerprint is SHA256:FUb7Ac05C3dxzzwbFU513Q9sNM/MGvmh6ZS/7V2T6QA.
ECDSA key fingerprint is MD5:d0:3f:92:a1:a1:92:1a:e1:fd:1f:d3:f5:b3:03🇩🇪e7.
Are you sure you want to continue connecting (yes/no)? yewHsH
Please type ‘yes’ or ‘no’: yes
Warning: Permanently added ‘192.168.102.20’ (ECDSA) to the list of known hosts.
root@192.168.102.20’s password:
openrc.sh 100% 3813 1.5MB/s 00:00
传送文件完成后,进行初始化
[root@localhost ~]# iaas-pre-host.sh
初始化完成之后进行组件的安装,先安装MySQL
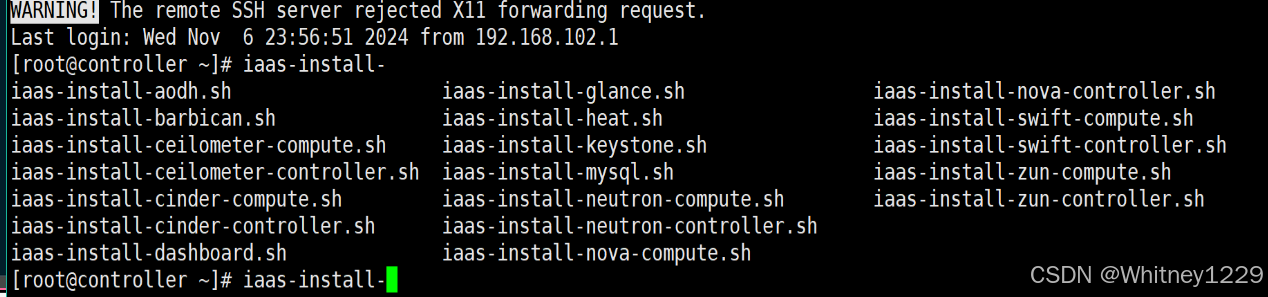
主节点要跑的脚本
[root@compute ~]# iaas-install-mysql.sh
[root@compute ~]# iaas-install-keystone.sh
[root@compute ~]# iaas-install-glance.sh
[root@compute ~]# iaas-install-nova-controller.sh
[root@compute ~]# iaas-install-neutron-controller.sh
[root@compute ~]# iaas-install-dashboard.sh
从节点需要跑的脚本
[root@compute ~]# iaas-install-nova-compute.sh
[root@compute ~]# iaas-install-neutron-compute.sh
版权声明:本文内容由互联网用户自发贡献,该文观点仅代表作者本人。本站仅提供信息存储空间服务,不拥有所有权,不承担相关法律责任。如发现本站有涉嫌侵权/违法违规的内容, 请发送邮件至 举报,一经查实,本站将立刻删除。
如需转载请保留出处:https://bianchenghao.cn/bian-cheng-ri-ji/8207.html