下载
我们首先要到官网上下载OpenCV库, 最新版是4.0 , 地址 opencv.org/android/ 下载完成之后, 可以看到以下目录:

我们这里这里暂时只用到native目录下的libs库
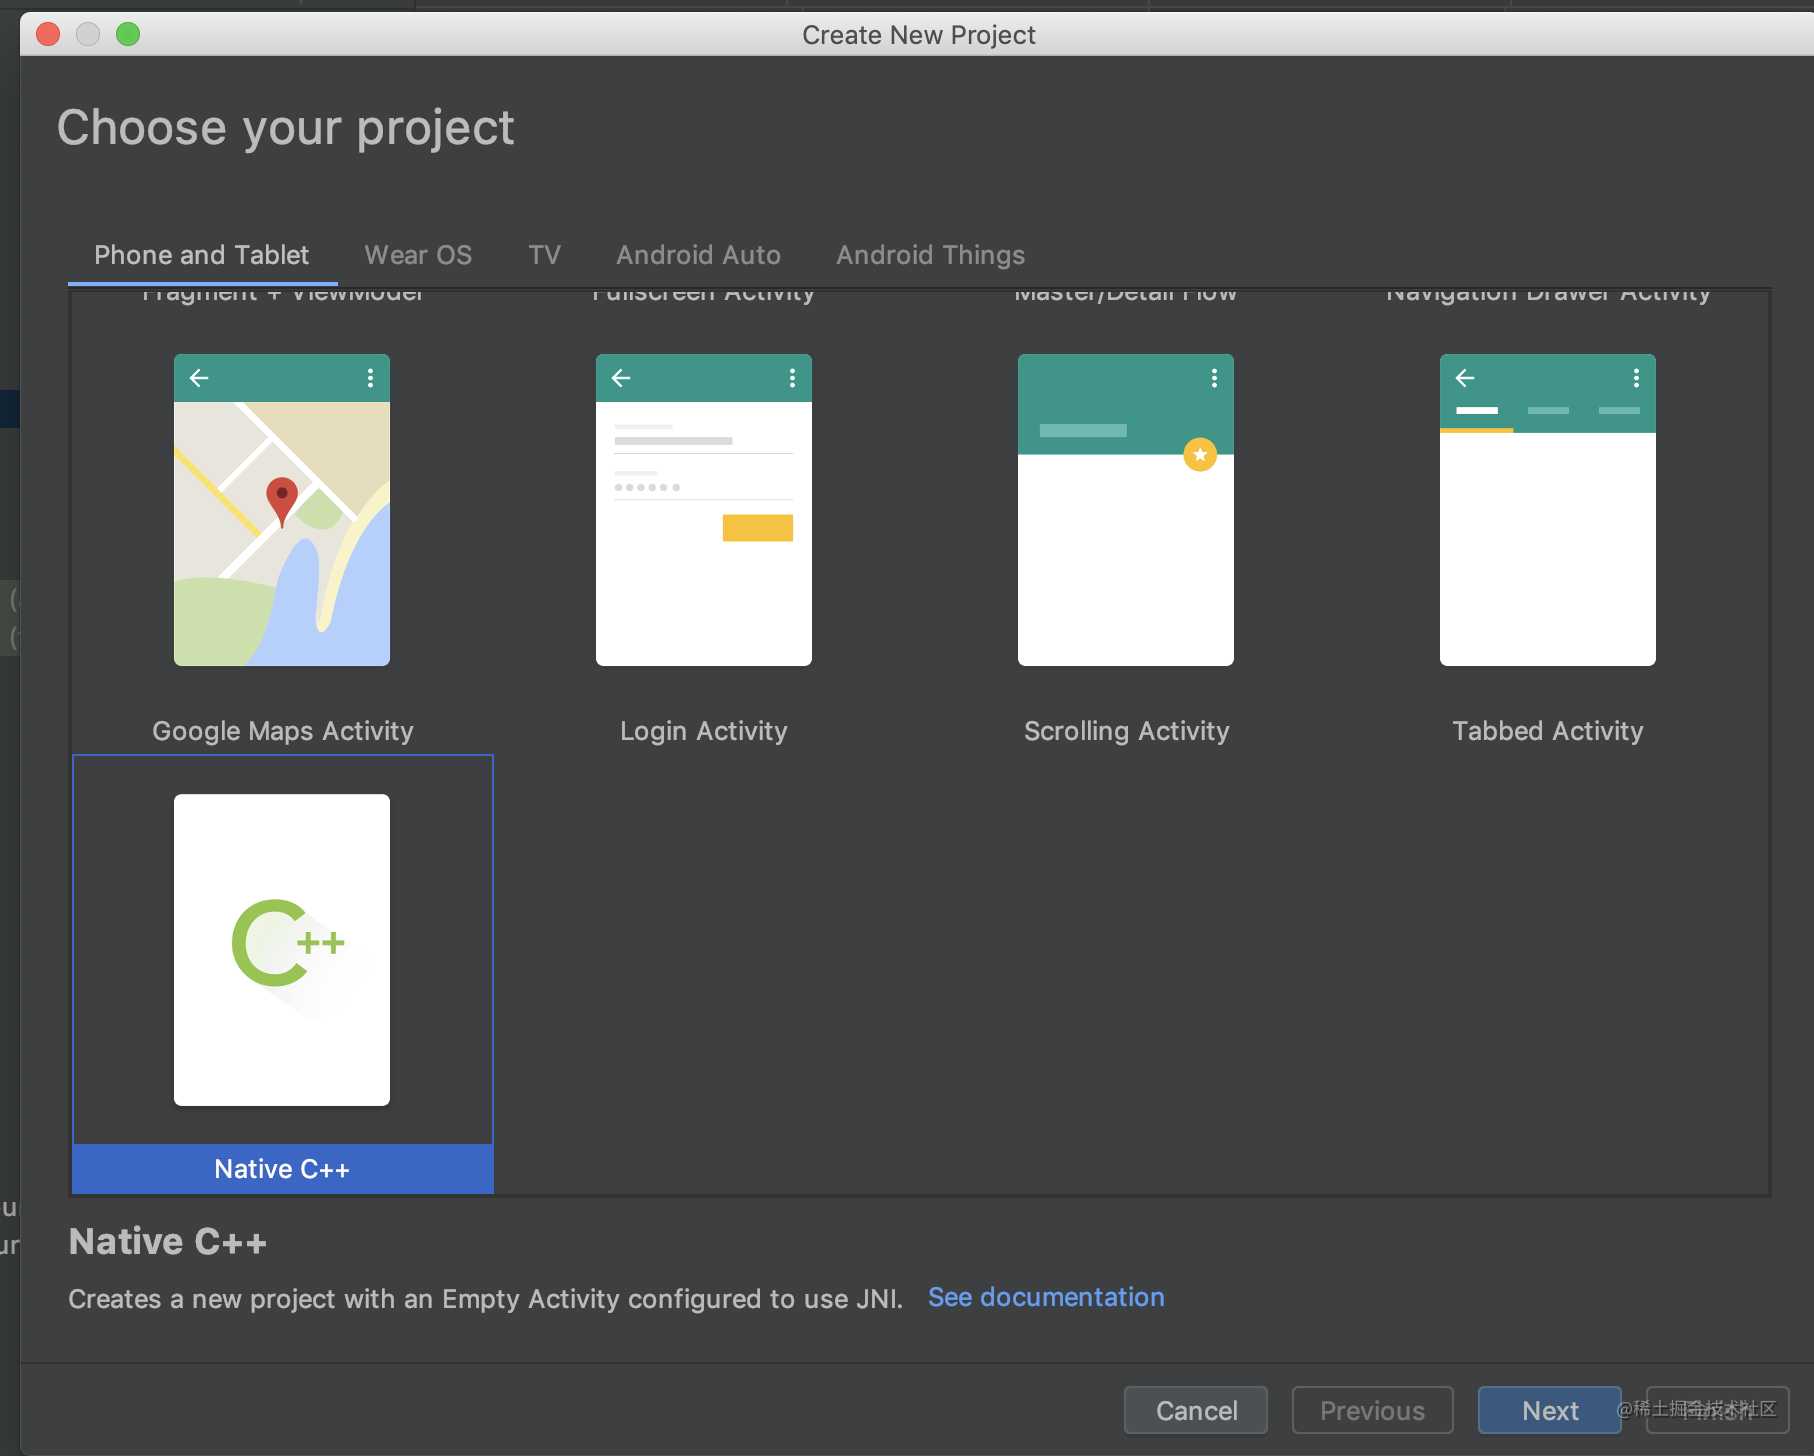
新建Android NDK工程

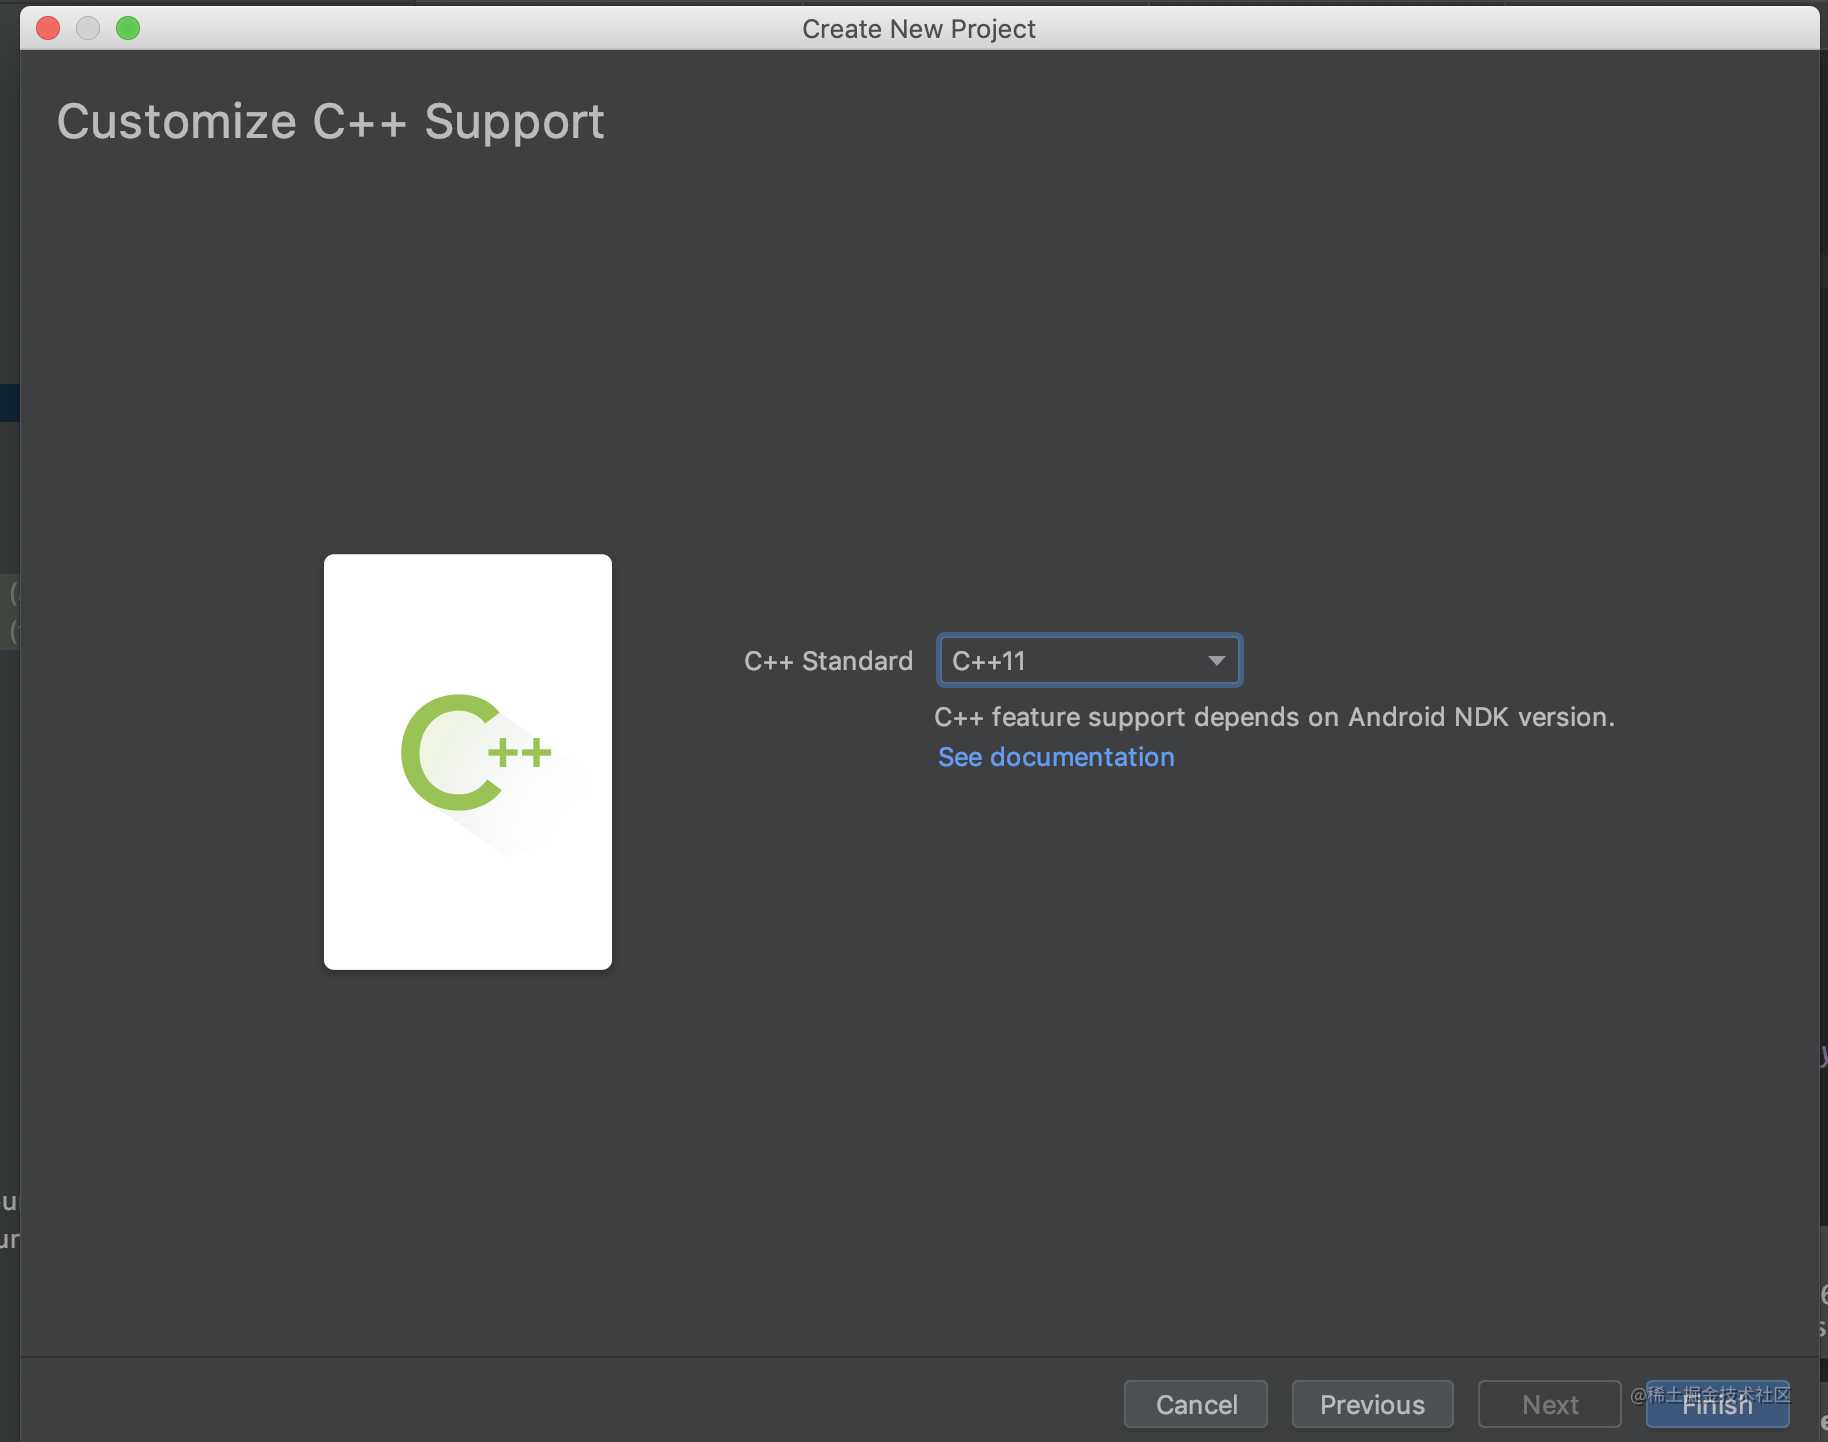
不断点击下一步, 注意这一步我们选择C++ 11

将OpenCV 4.0的文件拷贝到项目中
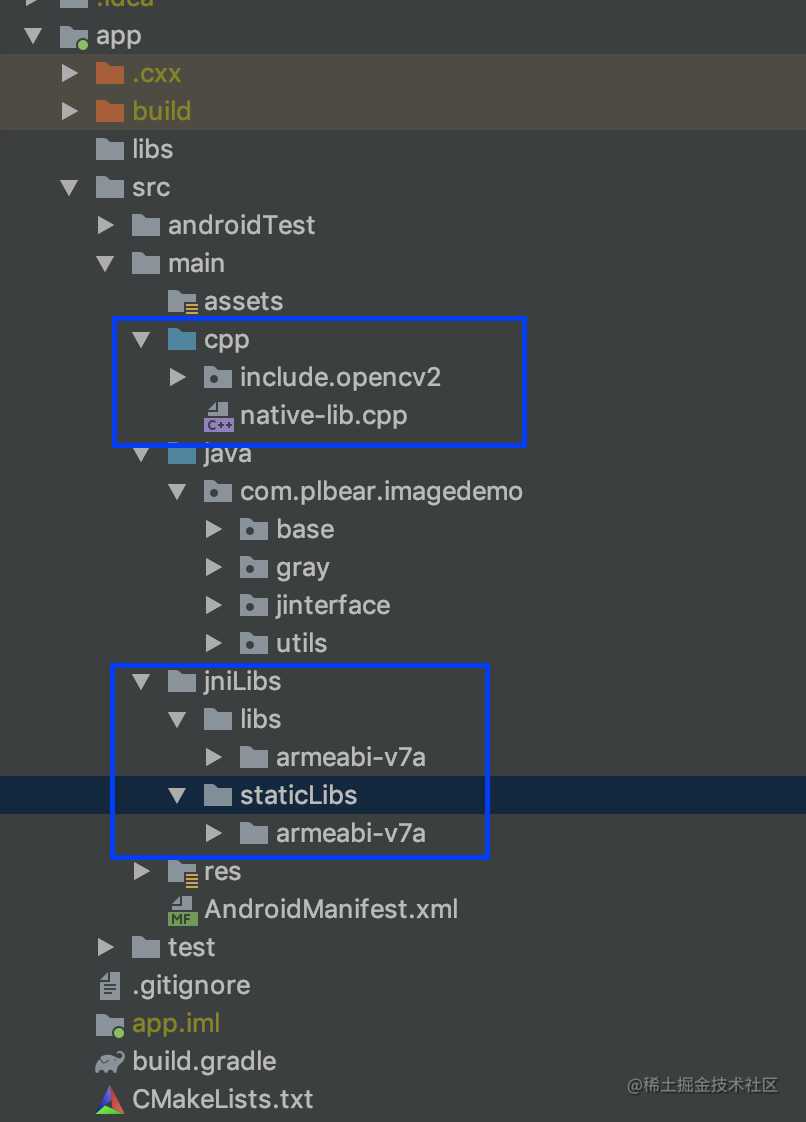
我们项目目录如下

- 我们在OpenCv Lib库中找到include文件, 将所有的文件拷贝到cpp目录下
- 我们新建jinLibs文件, 将libs和staticLibs文件拷贝进去, 我们这里只演示arm 32的, 其他arm64等也都类似
修改模块的gradle文件, 完整的目录如下:
apply plugin: 'com.android.application'

apply plugin: 'kotlin-android'

apply plugin: 'kotlin-android-extensions'

android {
    compileSdkVersion 29
    buildToolsVersion "29.0.2"
    defaultConfig {
        applicationId "com.plbear.imagedemo"
        minSdkVersion 18
        targetSdkVersion 29
        versionCode 1
        versionName "1.0"
        testInstrumentationRunner "androidx.test.runner.AndroidJUnitRunner"
        externalNativeBuild {
            cmake {
// 我们配置cmake命令
                cppFlags "-std=c++11 -frtti -fexceptions"
                abiFilters 'armeabi-v7a'
                arguments "-DANDROID_STL=c++_shared"
            }
        }
        ndk {
            abiFilters 'armeabi-v7a'
        }
    }
    sourceSets {
        main {
            //配置我们自己的libs库目录
            jniLibs.srcDirs = ['src/main/jniLibs/libs']
        }
    }
    buildTypes {
        release {
            minifyEnabled false
            proguardFiles getDefaultProguardFile('proguard-android-optimize.txt'), 'proguard-rules.pro'
            ndk {
                //设置为arm32的, 其他的架构往后面加文件就可以
                abiFilters 'armeabi-v7a'
            }
        }
    }
    externalNativeBuild {
        cmake {
            // 设置编译文件
            path "CMakeLists.txt"
            version "3.10.2"
        }
    }
    dataBinding {
        enabled = true
    }
}

dependencies {
    implementation fileTree(dir: 'libs', include: ['*.jar'])
    implementation "org.jetbrains.kotlin:kotlin-stdlib-jdk7:$kotlin_version"
    implementation 'androidx.appcompat:appcompat:1.1.0'
    implementation 'androidx.core:core-ktx:1.1.0'
    implementation 'androidx.constraintlayout:constraintlayout:1.1.3'
    testImplementation 'junit:junit:4.12'
    androidTestImplementation 'androidx.test:runner:1.2.0'
    androidTestImplementation 'androidx.test.espresso:espresso-core:3.2.0'
}
设置CMakeLists文件
# For more information about using CMake with Android Studio, read the
# documentation: https://d.android.com/studio/projects/add-native-code.html

# Sets the minimum version of CMake required to build the native library.

cmake_minimum_required(VERSION 3.4.1)

# Creates and names a library, sets it as either STATIC
# or SHARED, and provides the relative paths to its source code.
# You can define multiple libraries, and CMake builds them for you.
# Gradle automatically packages shared libraries with your APK.
include_directories(${CMAKE_SOURCE_DIR}/src/main/cpp/include)

add_library(libopencv_java4
        SHARED
        IMPORTED)
set_target_properties(libopencv_java4 PROPERTIES IMPORTED_LOCATION
        ${CMAKE_SOURCE_DIR}/src/main/jniLibs/libs/${ANDROID_ABI}/libopencv_java4.so)

add_library( # Sets the name of the library.
        native-lib

        # Sets the library as a shared library.
        SHARED

        # Provides a relative path to your source file(s).
        src/main/cpp/native-lib.cpp)

# Searches for a specified prebuilt library and stores the path as a
# variable. Because CMake includes system libraries in the search path by
# default, you only need to specify the name of the public NDK library
# you want to add. CMake verifies that the library exists before
# completing its build.

find_library( # Sets the name of the path variable.
        log-lib

        # Specifies the name of the NDK library that
        # you want CMake to locate.
        log)

# Specifies libraries CMake should link to your target library. You
# can link multiple libraries, such as libraries you define in this
# build script, prebuilt third-party libraries, or system libraries.

target_link_libraries( # Specifies the target library.
        native-lib libopencv_java4

        # Links the target library to the log library
        # included in the NDK.
        ${log-lib})
开始开发
接下来我们就可以在jni层面去调用OpenCV的函数进行开发了, 示例如下:
#include <jni.h>
#include <string>
#include <opencv2/opencv.hpp>
#include <ostream>

using namespace cv;
using namespace std;

extern "C" JNIEXPORT jstring JNICALL Java_com_plbear_imagedemo_jinterface_CvInterface_stringFromJNI( JNIEnv *env, jobject /* this */) {
    std::string hello = "Hello from C++";
    return env->NewStringUTF(hello.c_str());
}

extern "C" JNIEXPORT jintArray JNICALL Java_com_plbear_imagedemo_jinterface_CvInterface_bitmap2Grey( JNIEnv *env, jobject /* this */, jintArray buf, jint w, jint h) {
    jint *cbuf;
    jboolean ptfalse = false;
    cbuf = env->GetIntArrayElements(buf, &ptfalse);
    if (cbuf == NULL) {
        return 0;
    }

    Mat imgData(h, w, CV_8UC4, (unsigned char *) cbuf);
// 注意,Android的Bitmap是ARGB四通道,而不是RGB三通道
    cvtColor(imgData, imgData, COLOR_BGRA2GRAY);
    cvtColor(imgData, imgData, COLOR_GRAY2BGRA);

    int size = w * h;
    jintArray result = env->NewIntArray(size);
    env->SetIntArrayRegion(result, 0, size, (jint *) imgData.data);
    env->ReleaseIntArrayElements(buf, cbuf, 0);
    return result;
}
完整的代码请参考GitHub github.com/YanYoJun/Im…
今天的文章Android OpenCV4.0接入指南分享到此就结束了,感谢您的阅读。
版权声明:本文内容由互联网用户自发贡献,该文观点仅代表作者本人。本站仅提供信息存储空间服务,不拥有所有权,不承担相关法律责任。如发现本站有涉嫌侵权/违法违规的内容, 请发送邮件至 举报,一经查实,本站将立刻删除。
如需转载请保留出处:http://bianchenghao.cn/23565.html
