目录
前言
上一篇文章已经介绍了fluent-mybatis项目的构建,文章地址:FluentMybatis 项目构建、代码生成(一) | FluentMybatis实践_阿良的博客-CSDN博客
这篇文章继续之前的项目,对代码进行基本调试。验证代码操作数据库情况。
依赖补充
按照官方给的代码依赖是不够的,这里需要对maven的pom文件进行补充。
        <dependency>
            <groupId>org.mybatis.spring.boot</groupId>
            <artifactId>mybatis-spring-boot-starter</artifactId>
            <version>2.2.0</version>
        </dependency>

        <dependency>
            <groupId>mysql</groupId>
            <artifactId>mysql-connector-java</artifactId>
            <scope>runtime</scope>
        </dependency>
数据库文件配置
这里我们还是使用mysql作为测试数据库,fm(fluent mybatis的简称)可以支持很多种数据库,暂时我们不考虑其他的数据库。
在application.properties文件中添加mysql数据库配置,至于druid连接池的使用后面的篇章用到再说。也可以用application.yml,这个随意。
spring.datasource.username=root
spring.datasource.password=123456
spring.datasource.url=jdbc:mysql://192.168.0.108:3306/test?useSSL=false&useUnicode=true&characterEncoding=utf-8
spring.datasource.driver-class-name=com.mysql.jdbc.Driver
测试代码
再测试包中加入测试代码,主要是做一个简单的插入数据测试。
代码如下:
package com.hy.fmp.test;

import com.hy.fmp.Application;
import com.hy.fmp.fluent.entity.TestFluentMybatisEntity;
import com.hy.fmp.fluent.mapper.TestFluentMybatisMapper;
import org.junit.jupiter.api.Test;
import org.springframework.beans.factory.annotation.Autowired;
import org.springframework.boot.test.context.SpringBootTest;

import java.util.Date;

@SpringBootTest(classes = Application.class)
public class InsertTest {
  @Autowired TestFluentMybatisMapper testFluentMybatisMapper;

  @Test
  public void testInsertDefaultValue() {
    // 插入数据
    testFluentMybatisMapper.insert(
        new TestFluentMybatisEntity()
            .setAge(18)
            .setName("法外狂徒张三")
            .setCreateTime(new Date())
            .setDelFlag(0));
  }
}
说明:
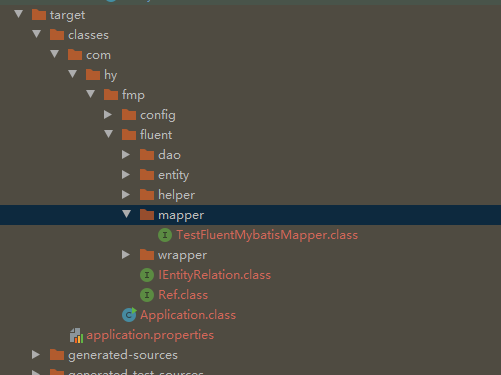
1、注意TestFluentMybatisMapper是target包内的mapper类。
2、表实体TestFluentMybatisEntity可以通过链式的代码写法。
@Accessors(
    chain = true
)
增加扫描mapper注解
扫描的mapper也是target包内的mapper目录
@SpringBootApplication
@MapperScan({"com.hy.fmp.fluent.mapper"})
public class Application {

  public static void main(String[] args) {
    SpringApplication.run(Application.class, args);
  }
}
执行测试代码
下面我们测试一下插入代码
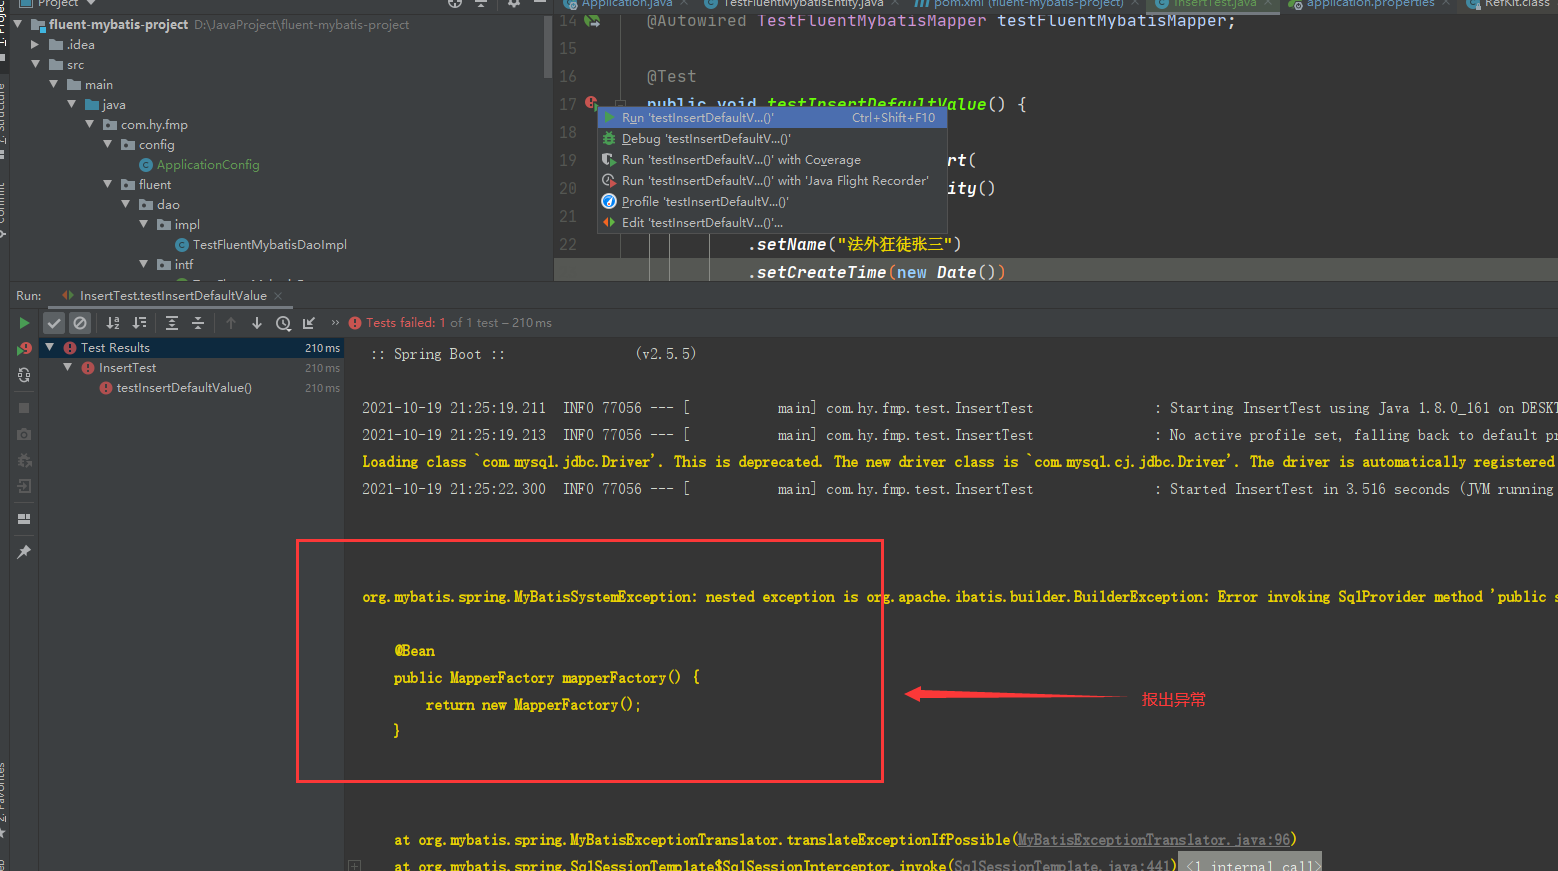
发现这里报了个异常,调整代码,增加配置类。
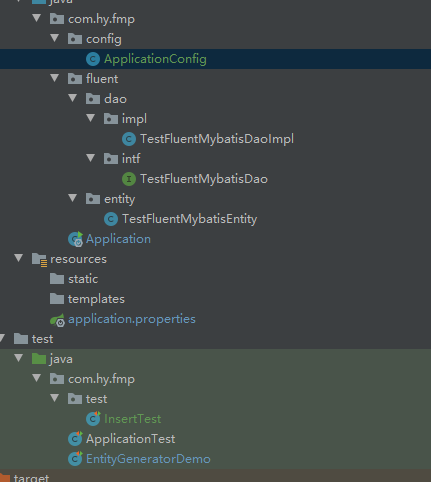
代码如下,增加MapperFactory注入。
package com.hy.fmp.config;

import cn.org.atool.fluent.mybatis.spring.MapperFactory;
import org.springframework.context.annotation.Bean;
import org.springframework.context.annotation.Configuration;

@Configuration
public class ApplicationConfig {

  //  @Bean("dataSource")
  //  public DruidDataSource newDataSource() {
  //    return DataSourceCreator.create("datasource");
  //  }
  //
  //  @Bean
  //  public SqlSessionFactoryBean sqlSessionFactoryBean() throws Exception {
  //    SqlSessionFactoryBean bean = new SqlSessionFactoryBean();
  //    bean.setDataSource(newDataSource());
  //    ResourcePatternResolver resolver = new PathMatchingResourcePatternResolver();
  //    // 以下部分根据自己的实际情况配置
  //    // 如果有mybatis原生文件, 请在这里加载
  //    bean.setMapperLocations(resolver.getResources("classpath*:mapper/*.xml"));
  //    /* bean.setMapperLocations(
  //    /*      new ClassPathResource("mapper/xml1.xml"),
  //    /*      new ClassPathResource("mapper/xml2.xml")
  //    /* );
  //    */
  //    org.apache.ibatis.session.Configuration configuration =
  //        new org.apache.ibatis.session.Configuration();
  //    configuration.setLazyLoadingEnabled(true);
  //    configuration.setMapUnderscoreToCamelCase(true);
  //    bean.setConfiguration(configuration);
  //    return bean;
  //  }

  // 定义fluent mybatis的MapperFactory
  @Bean
  public MapperFactory mapperFactory() {
    return new MapperFactory();
  }
}
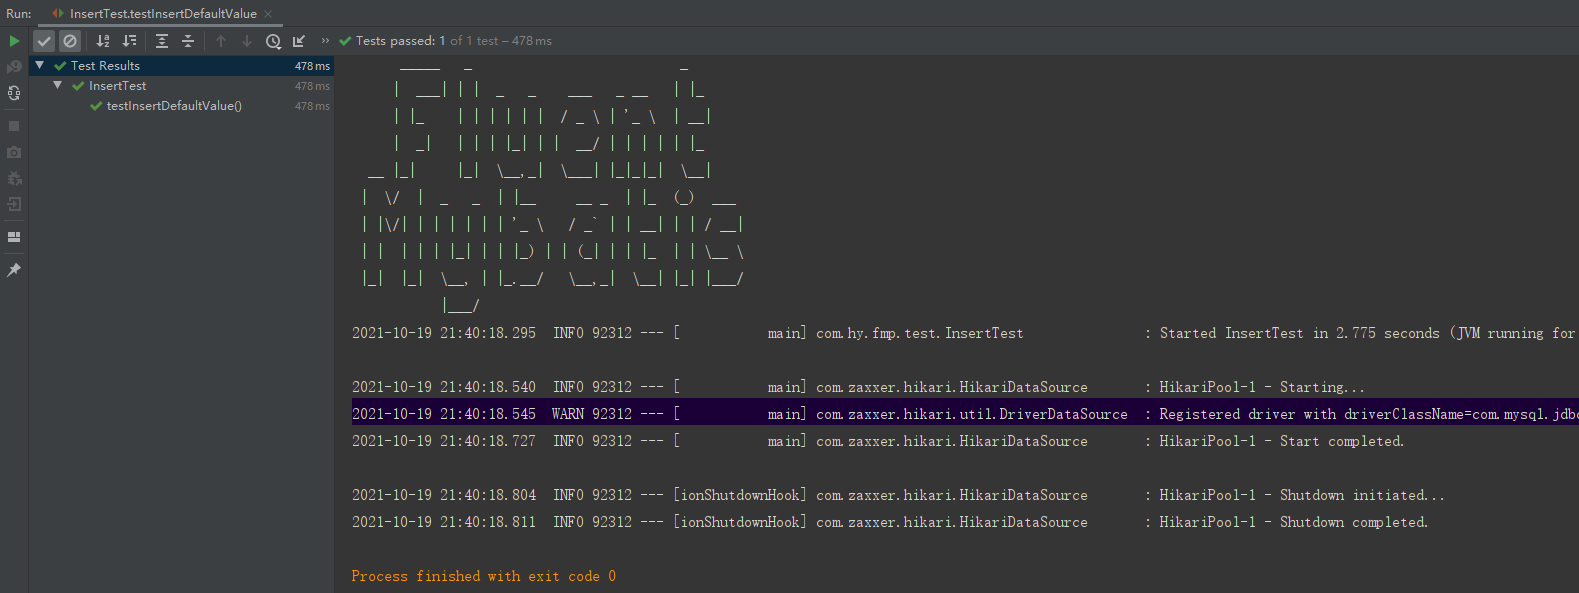
重新执行一下看看效果。
执行成功,看看表里的数据。ok,完美。
总结
到这里fluent-mybatis组件的代码构建、项目搭建、以及简单代码测试已经完成。后面我会慢慢研究fm的增删改查等功能,继续工程化这个项目。
代码GitHub地址: GitHub仓库
如果本文对你有帮助,请点个赞支持一下吧。
今天的文章FluentMybatis 项目构建、代码生成(二) | FluentMybatis实践分享到此就结束了,感谢您的阅读。
版权声明:本文内容由互联网用户自发贡献,该文观点仅代表作者本人。本站仅提供信息存储空间服务,不拥有所有权,不承担相关法律责任。如发现本站有涉嫌侵权/违法违规的内容, 请发送邮件至 举报,一经查实,本站将立刻删除。
如需转载请保留出处:https://bianchenghao.cn/4821.html


