实现
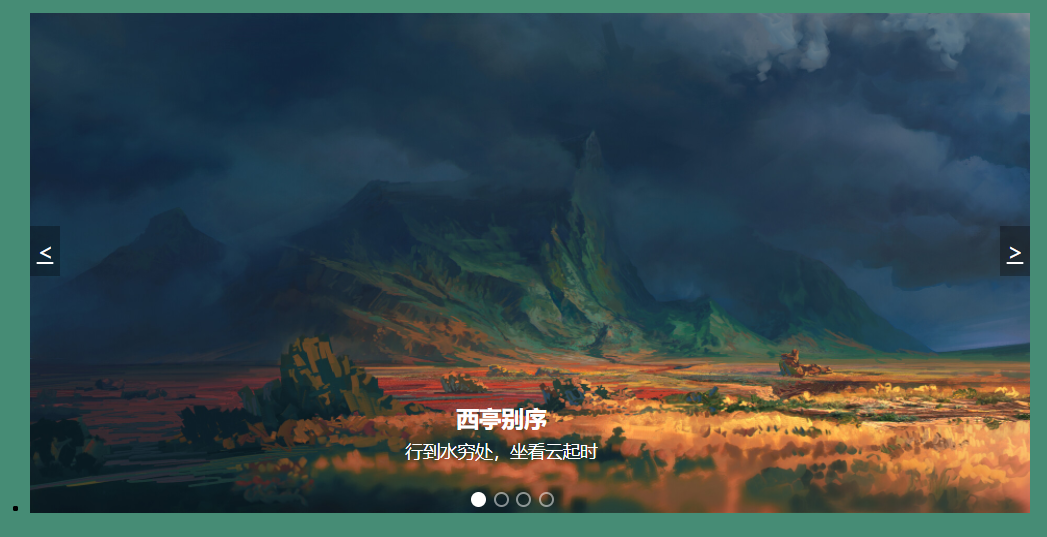
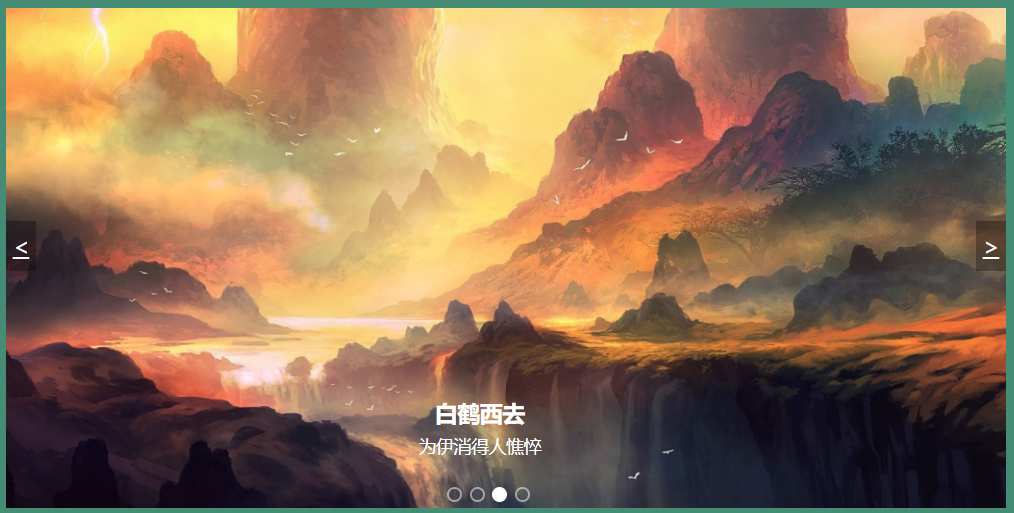
实现如图所示的轮播图,要实现的功能主要有:
- 鼠标经过轮播图模块,左右按钮显示,离开隐藏左右按钮。
- 点击右侧按钮一次,图片下滑一张;点击左侧按钮,图片上滑一张。
- 图片播放的同时,下面小圆圈模块跟随一起变化。
- 点击小圆圈,可以播放相应图片。
- 鼠标不经过轮播图,轮播图也会自动播放。
- 鼠标经过,轮播图模块自动播放停止。
分析
首先我们应该建立一个底层盒子,里面放置图片、左右按钮和小圆圈,html 部分如下:
<body> <!--底层的盒子--> <div class="focus"> <!--核心的图片区域--> <ul>
//默认第一张图片显示 <li class="active"> <img src="img/one.jpg" alt=""> <!--图片上的文字--> <div class="content"> <h2>西亭别序</h2> <p>行到水穷处,坐看云起时</p> </div> </li> <li> <img src="img/two.jpg" alt=""> <div class="content"> <h2>苏轼</h2> <p>竹杖芒鞋轻胜马,一蓑烟雨任平生</p> <p>他人笑我太疯癫,我笑他人看不穿</p> </div> </li> <li> <img src="img/three.png" alt=""> <div class="content"> <h2>白鹤西去</h2> <p>为伊消得人憔悴</p> </div> </li> <li> <img src="img/four.png" alt=""> <div class="content"> <h2>白鹤西去</h2> <p>为伊消得人憔悴</p> </div> </li> </ul> <!--左侧按钮--> <a href="#" class="arrow-l" id="left"><</a> <!--右侧按钮--> <a href="#" class="arrow-r" id="right">></a> <!--小圆圈:根据图片数量动态添加--> <ol class="circle"> </ol> </div> </body>
注意设置父盒子 focus 定位为 relative,存放图片的子盒子 li 定位为 absolute 使图片堆叠在一起。其它 css 的样式布局就不具体讲解了,后面会补充详细代码。
js 思想实现
此款轮播图的核心思想主要是使用 z-index 来设置图片的堆叠顺序来显示图片的,z-index 的值高则在最上层被显示,值底则被值高的遮挡起来不被显示。接下来我们来看一下 js 的具体功能实现。
功能 1:鼠标经过轮播图模块,左右按钮显示,离开隐藏左右按钮。
window.addEventListener('load',function (){
    //1、获取元素
    var arrow_l = document.querySelector('.arrow-l');//左按钮
    var arrow_r = document.querySelector('.arrow-r');//右按钮
    var focus = document.querySelector('.focus');//放置轮播图的底层盒子

    //2、鼠标经过底层盒子时,就显示隐藏的左右按钮
    focus.addEventListener('mouseenter',function (){
        arrow_l.style.display = 'block';
        arrow_r.style.display = 'block';
    })
    //鼠标离开底层盒子时,就隐藏左右按钮
    focus.addEventListener('mouseleave',function (){
        arrow_l.style.display = 'none';
        arrow_r.style.display = 'none';
    })

  //...后续的功能代码都是放在此监听事件里面,就单独说明了


})
功能 2:点击右侧按钮一次,图片下滑一张;点击左侧按钮,图片上滑一张。
//1、获取元素
    var ul = focus.querySelector('ul');//图片的ul
    var ol = focus.querySelector('ol');//小圆圈的ol
    var goleft = document.getElementById('left'); //左按钮
    var goright = document.getElementById('right');//右按钮

    var index = 0;//index表示第几张图片在展示,给他添加样式.active
    //2、排他思想:去掉所有元素的样式,只留下第 index 图片的样式
    var goIndex = function (index){
        //左右按钮的
        for(var i = 0;i < ul.children.length;i++){
            ul.children[i].className = '';
        }
        ul.children[index].className = 'active';

        //下面小圆圈的
        for(var i = 0;i < ol.children.length;i++){
            ol.children[i].className = '';
        }
        ol.children[index].className = 'current';
    }
    //3、右按钮:下一张
    var goNext = function (){
        //注意此处 index 的初值是0,所以比较长度要减1,点到最后一张图片时,返回第一张
        if (index < ul.children.length-1){
            index ++;
        }else{
            index = 0;
        }
        //确认 index 后设置样式显示图片
        goIndex(index);
    }
    //4、左按钮:上一张
    var preNext = function (){
        //注意此处index=0点到第一张图片,再点击返回最后一张
        if (index === 0){
            index = ul.children.length-1
        }else{
            index --;
        }
        //确认 index 后设置样式显示图片
        goIndex(index);
    }
    //5、分别给左右按钮添加点击事件
    goleft.addEventListener('click',function (){
        preNext();
    })
    goright.addEventListener('click',function (){
        goNext();
    })
功能 3:动态生成小圆圈,点击圆圈出现对应图片,并且圆圈变成圆球
//3、动态生成小圆圈,有几张图片,就生成几个小圆圈
    for(var i = 0;i < ul.children.length;i++){
        //创建一个小li
        var li = document.createElement('li');
        //为每个小圆圈添加索引值
        li.setAttribute('index',i);
        //把li插到ol里面
        ol.appendChild(li);
        //4、我们可以直接在生成的小圆圈的同时直接绑定点击事件
        li.addEventListener('click',function (){

            //5、点击圆圈出现对应图片
            //获取当前被点击小圆圈的索引值
            var point = this.getAttribute('index');
            //调用上面排他思想的函数
            goIndex(point);
        })
    }
    //默认把ol里面的第一个小li设置类名为 current
    ol.children[0].className = 'current';
功能 4:鼠标不经过轮播图,轮播图也会自动播放。图片播放的同时,下面小圆圈模块跟随一起变化。
//自动轮播
    var self = setInterval(function (){
        goIndex(index);
        if (index < ul.children.length-1){
            index ++;
        }else{
            index = 0;
        }
    },1000)
功能 5:鼠标经过,轮播图模块自动播放停止。离开时又自动播放。(只需要在上面的底层盒子的鼠标经过事件中添加清除定时器就可以)
//2、鼠标经过底层盒子时,就显示隐藏的左右按钮
    focus.addEventListener('mouseenter',function (){
        //...
        //7、鼠标经过,轮播图模块自动播放停止。
        clearTimeout(selfTimer);
        selfTimer = null;//清除定时器变量,释放内存
    })
    //鼠标离开底层盒子时,就隐藏左右按钮
    focus.addEventListener('mouseleave',function (){
        //...
        //7、鼠标离开时又自动播放
        selfTimer = setInterval(function (){
            goIndex(index);
            if (index < ul.children.length-1){
                index ++;
            }else{
                index = 0;
            }
        },1000)
    })
好了,到此轮播图的全部功能就已经实现了,当然这只是实现轮播图的其中一种方式,还有其它很多方法那就等着你们自己去探索了。接下来粘贴一些样式代码
附录
<style>

* {
  margin:0;
  padding:0;
}
body{
  background-color: rgba(50, 128, 102, 0.9);
}

.focus {
  position: relative;
  margin: 20px auto;
  width: 800px;
  height: 400px;
}

.focus ul {
  position:relative;
  width: 800px;
  height: 400px;
}
.focus ul li {
  position: absolute;
  width: 100%;
  height: 100%;
  opacity: 1;
  transition: all .5s;
}
.focus ul li img {
  width: 100%;
  height: 100%;
}
.focus ul li .content {
  position: absolute;
  bottom: 40px;
  left: 300px;
  text-align: center;
  color: white;
}
.focus ul li .content h2 {
  margin-bottom: 5px;
}
.focus ul li .content p {
  font-size: 14px;
}

.arrow-l,.arrow-r {
  display: none;
  position: absolute;
  top: 170px;
  /*margin-top: -20%;*/
  width: 24px;
  height: 40px;
  background: rgba(0,0,0,.3);
  text-align: center;
  line-height: 40px;
  color: #fff;
  font-size: 18px;
  /*左右按钮一直显示*/
  z-index: 100;
}
.arrow-r {
  right: 0;
}

.circle {
  position: absolute;
  bottom: 5px;
  left: 350px;
  list-style:none;
  /*圆圈一直显示*/
  z-index: 100;
}
.circle li {
  float: left;
  width: 8px;
  height: 8px;
  border: 2px solid rgba(255,255,255,0.5);
  margin: 0 3px;
  border-radius: 50%;
  /*鼠标经过显示小手*/
  cursor: pointer;
}
.current {
  background-color: #fff;
}
/*给图片动态添加的堆叠顺序*/
.active {
  opacity: 1;
  z-index: 10;
}

</style>
今天的文章JS 实现轮播图_js轮播图代码分享到此就结束了,感谢您的阅读,如果确实帮到您,您可以动动手指转发给其他人。
版权声明:本文内容由互联网用户自发贡献,该文观点仅代表作者本人。本站仅提供信息存储空间服务,不拥有所有权,不承担相关法律责任。如发现本站有涉嫌侵权/违法违规的内容, 请发送邮件至 举报,一经查实,本站将立刻删除。
如需转载请保留出处:https://bianchenghao.cn/48868.html


