基于uni-app的andiord 离线打包
开发工具及所需要的夹包
1.Android Studio 下载地址 Android Studio官网
2.HBuilderX下载地址 这里HBuilderX版本也是用的 3.2.9 版本的
3.App离线SDK下载 最新android平台SDK下载
4.这里集成是3.2.9版本SDK下载地址 ;提取码:5nzq
首先说明本文打包只是一个简单示范并未涉及 用户权限以及第三方集成如 qq、微信等具体请参考官网uni-app 离线打包
1.确认HBuilderX版本 3.2.9
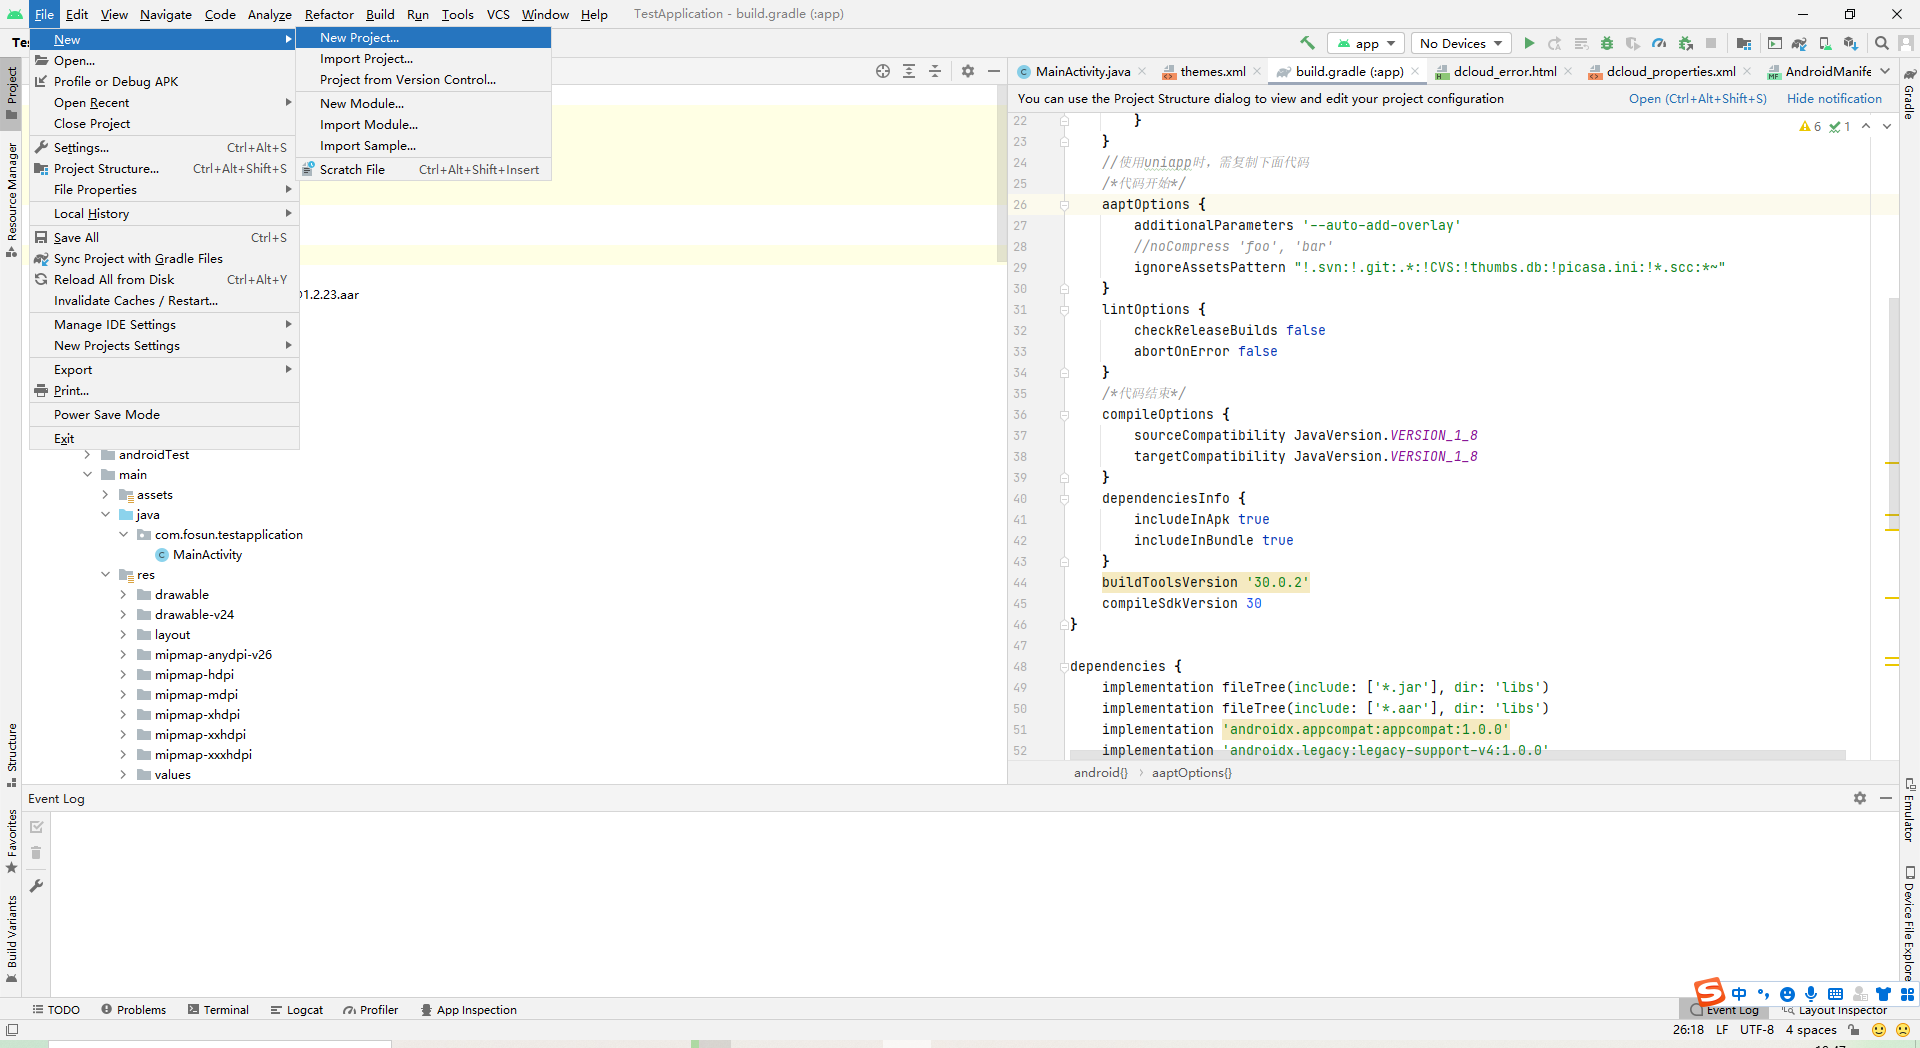
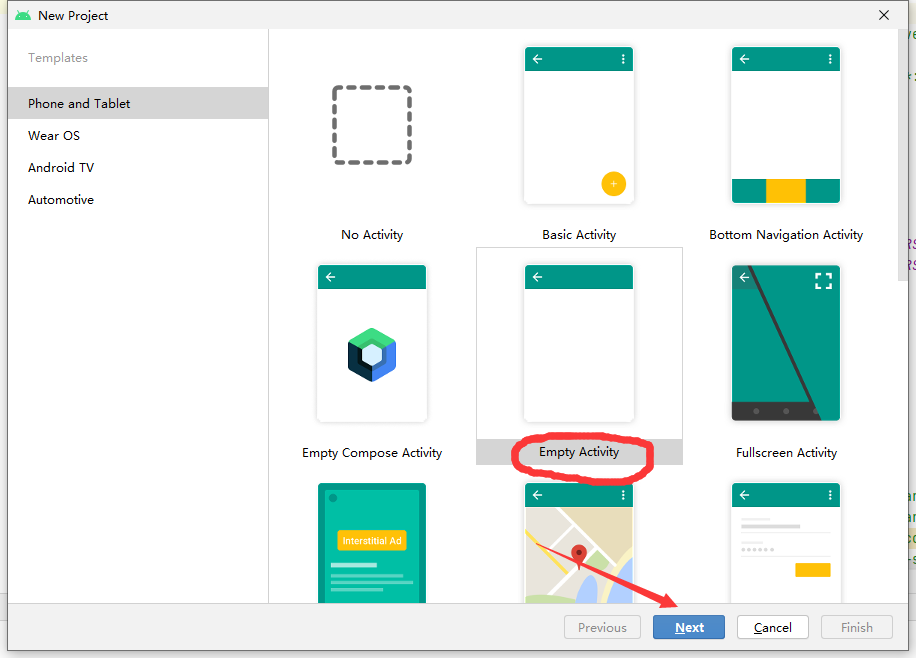
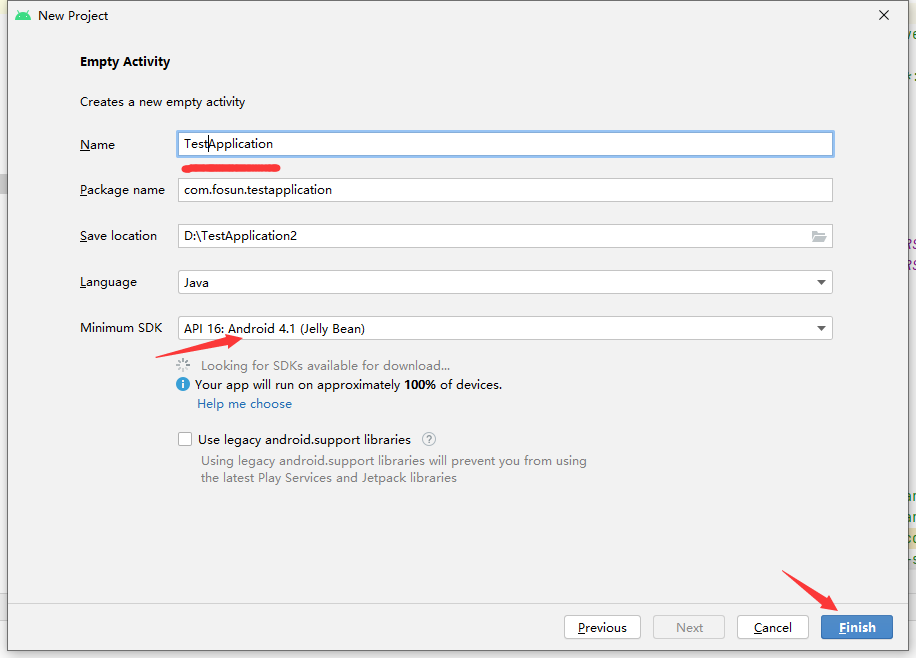
2.打开 andriod studio———创建空白页
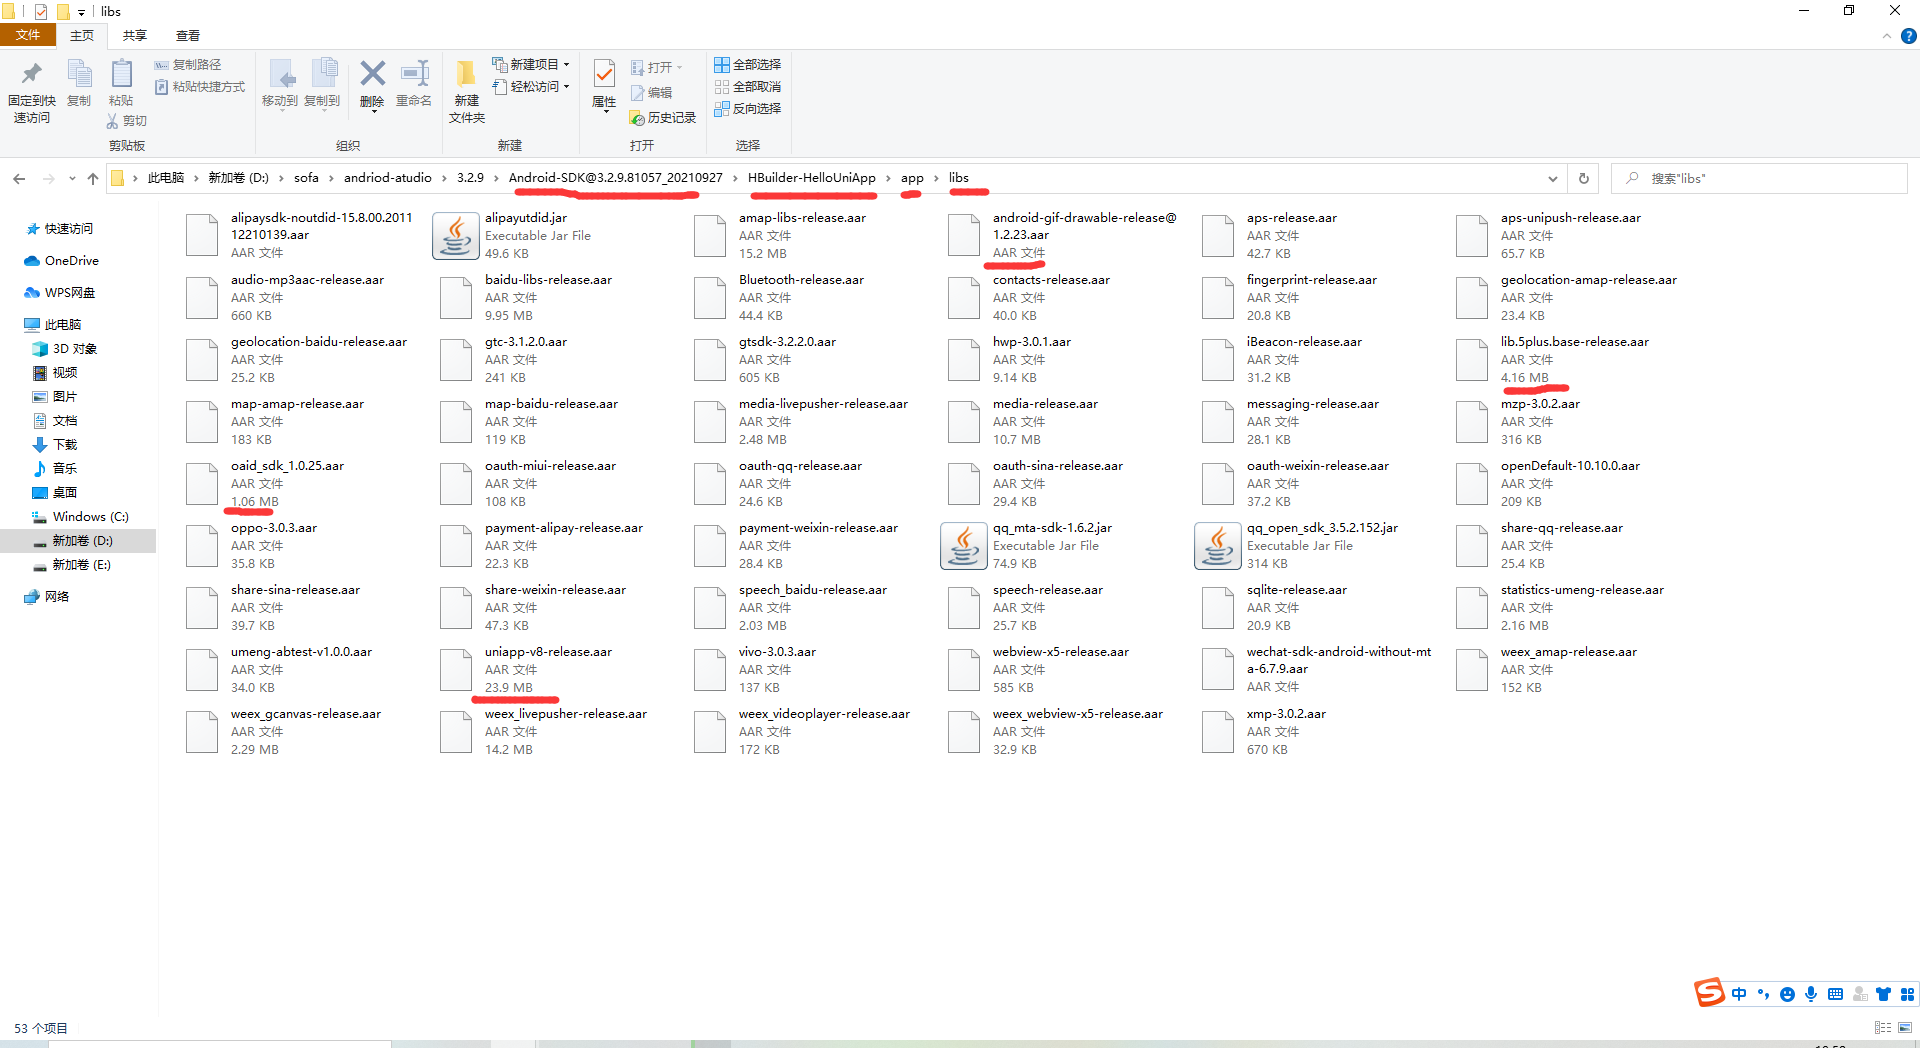
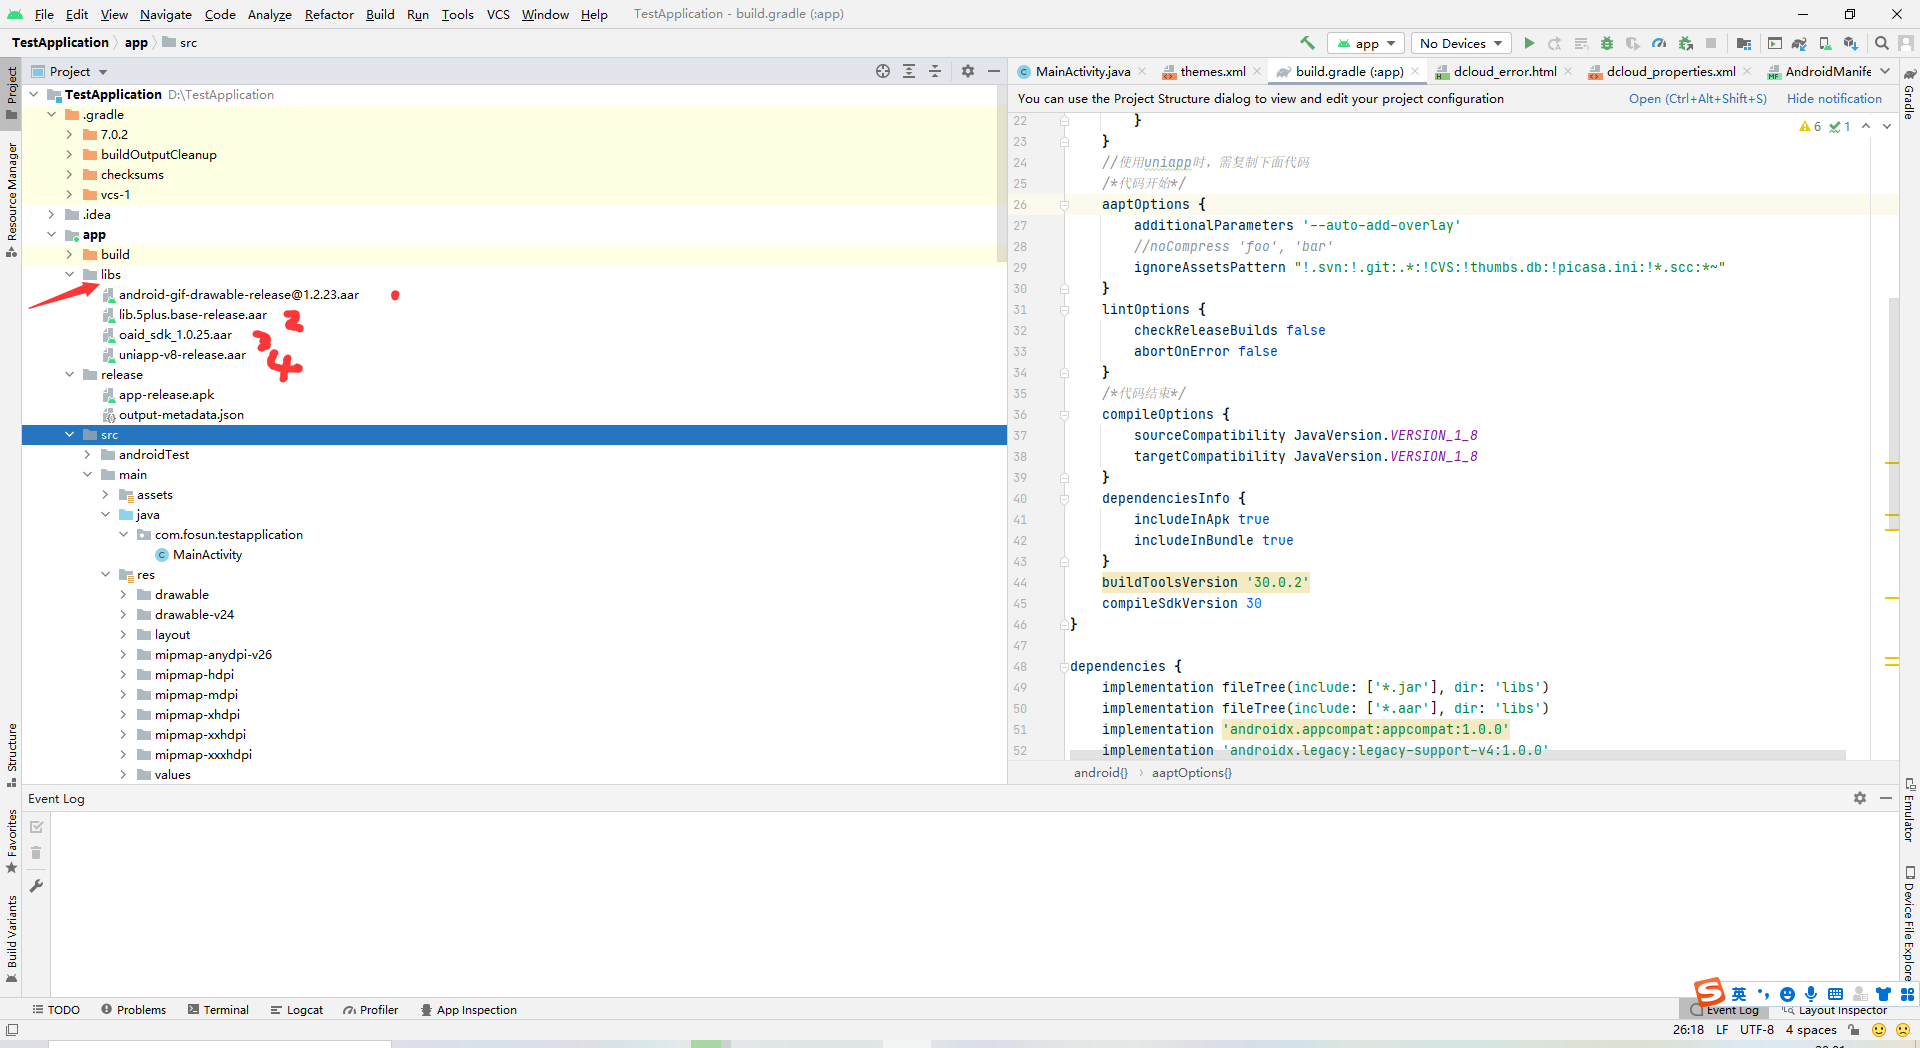
3.将下载的SDK中的libs—-拷贝到项目中的libs
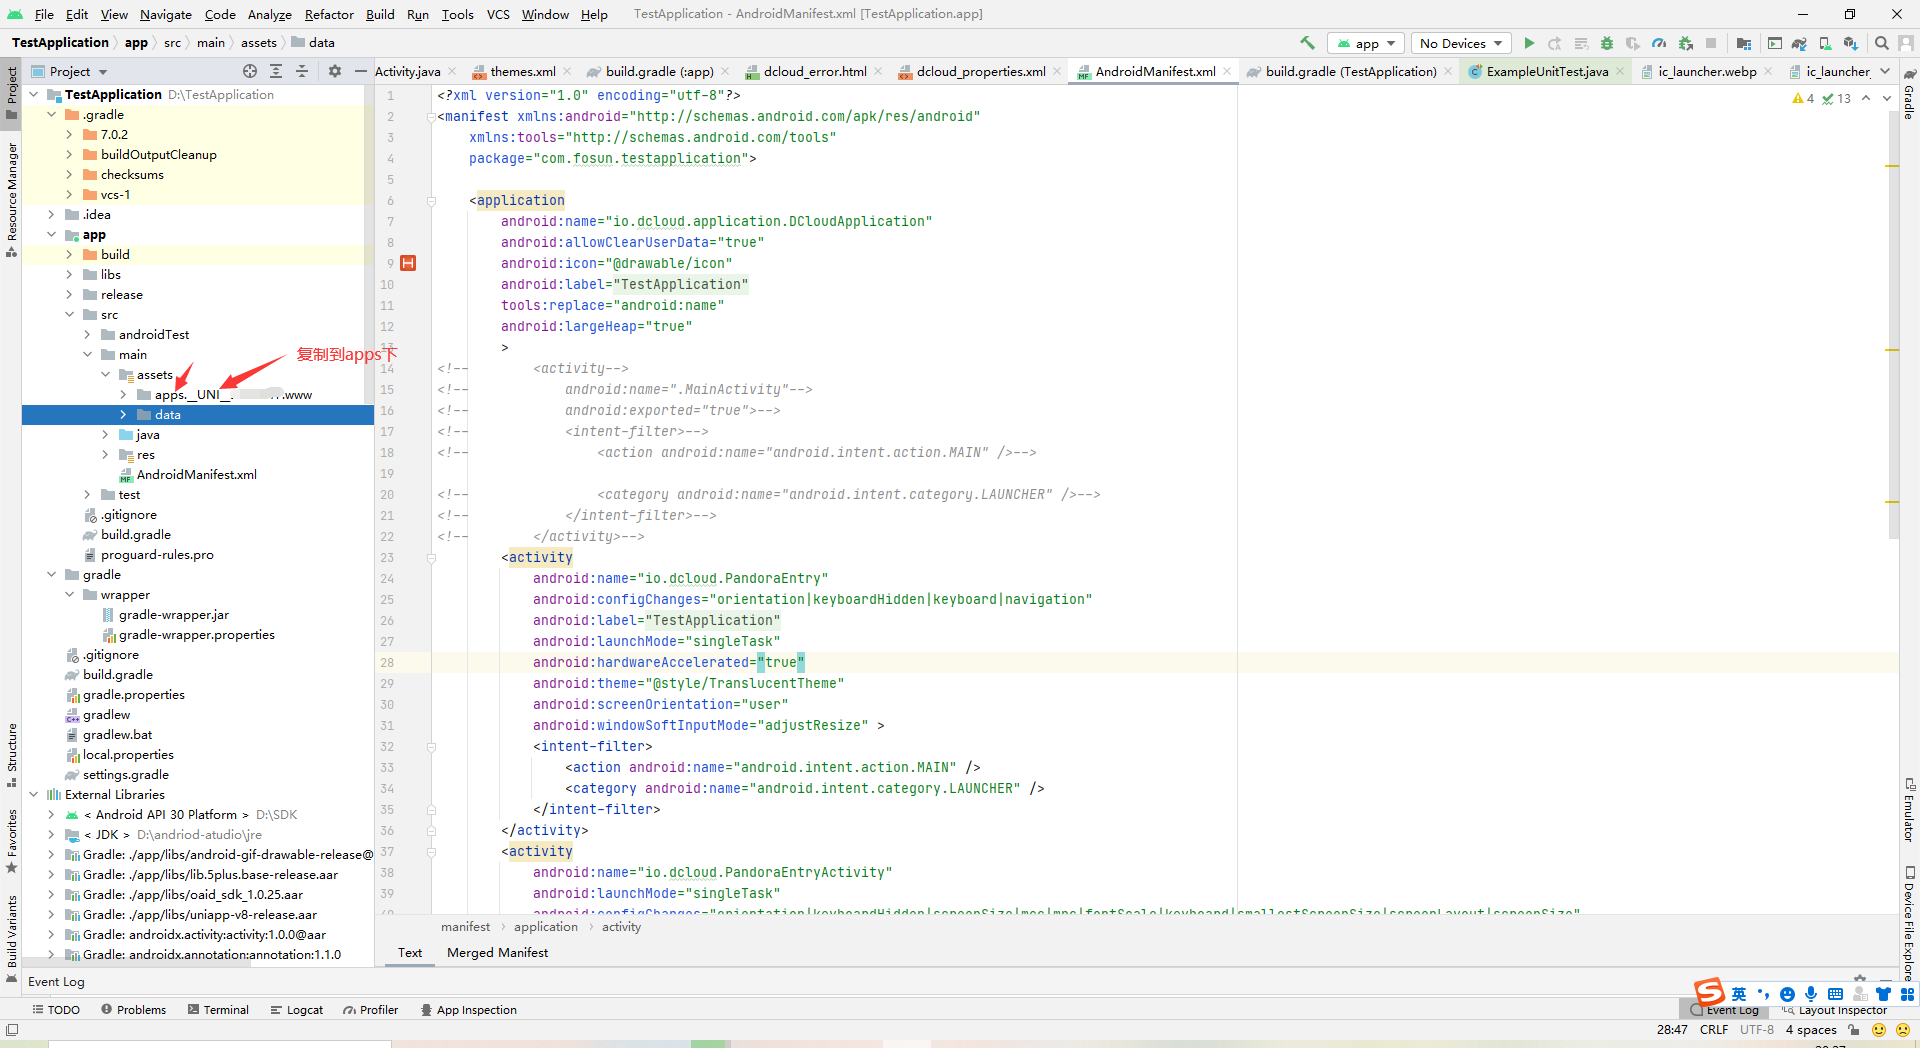
4.配置src —- main下的静态资源
1.创建 assets
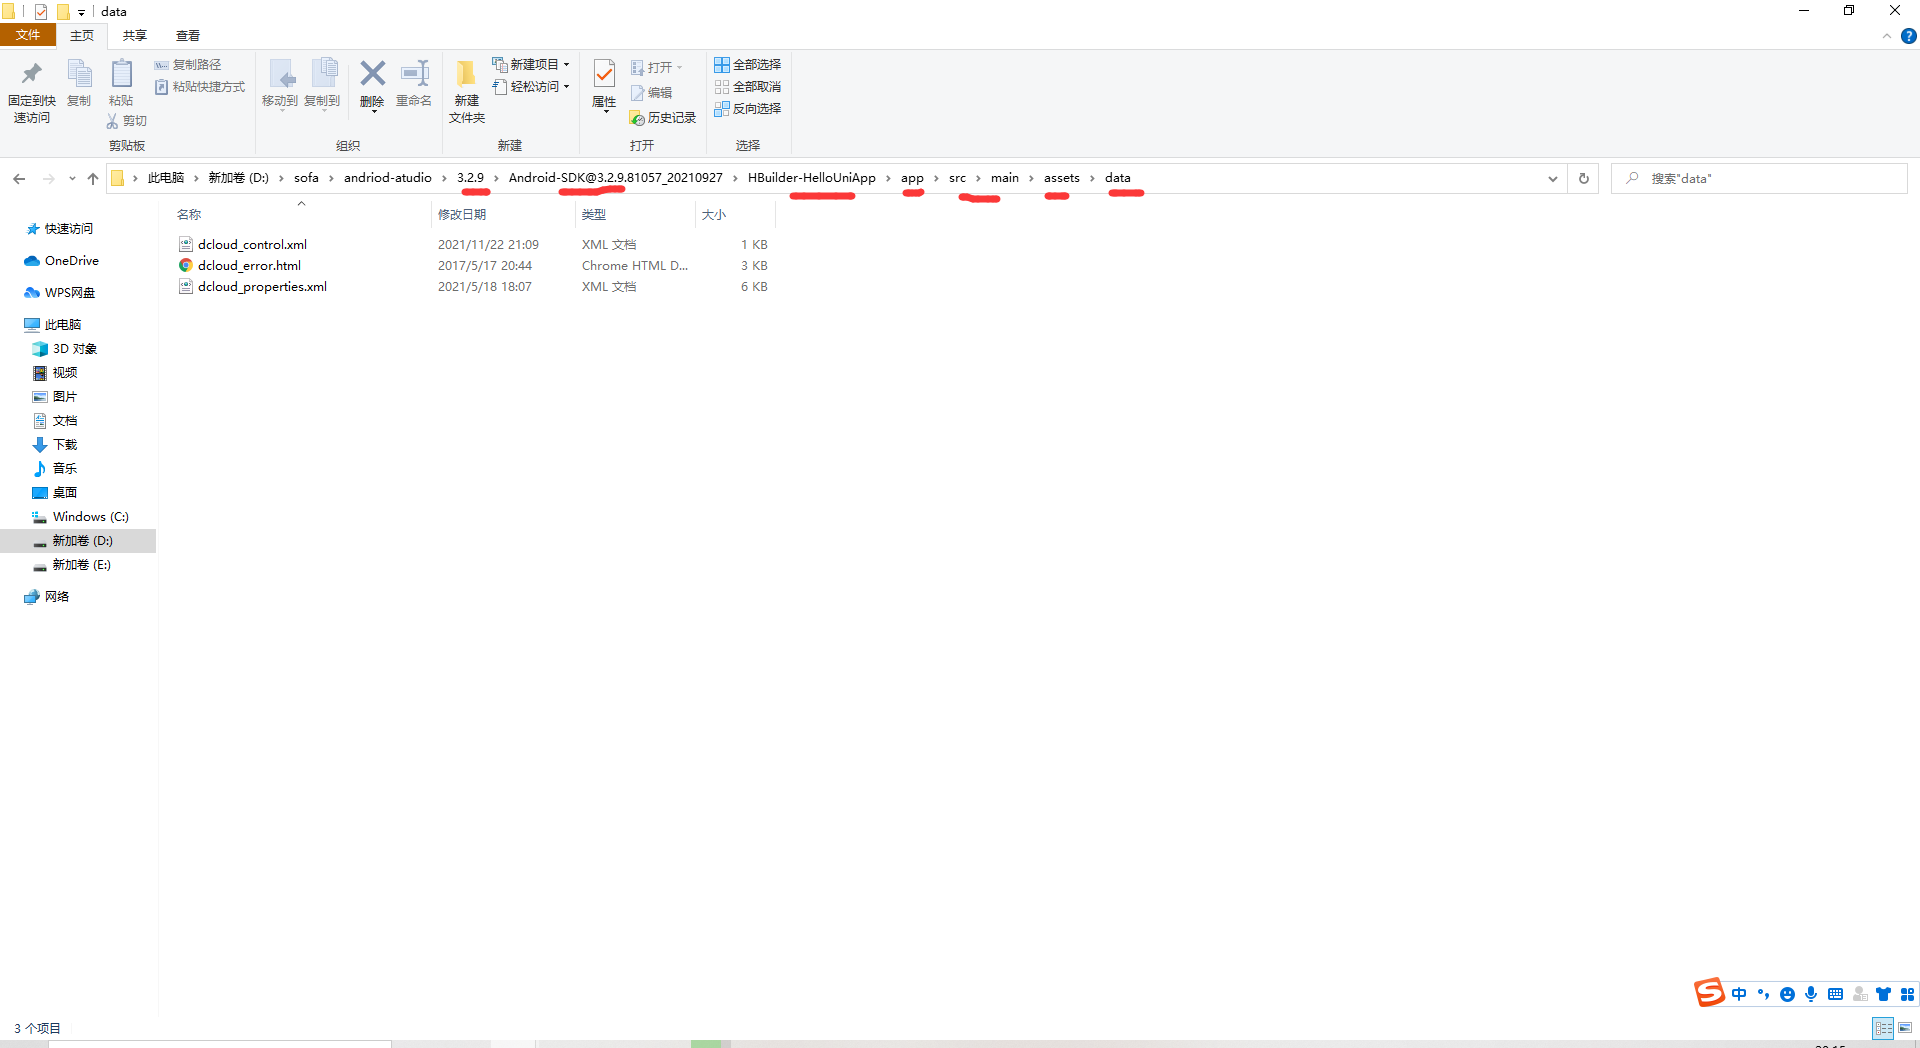
2.在 assets — 创建data并导入 dcloud_control.xml — dcloud_error.html — dcloud_properties.xml
三个文件位置也是在我们下载的SDK中
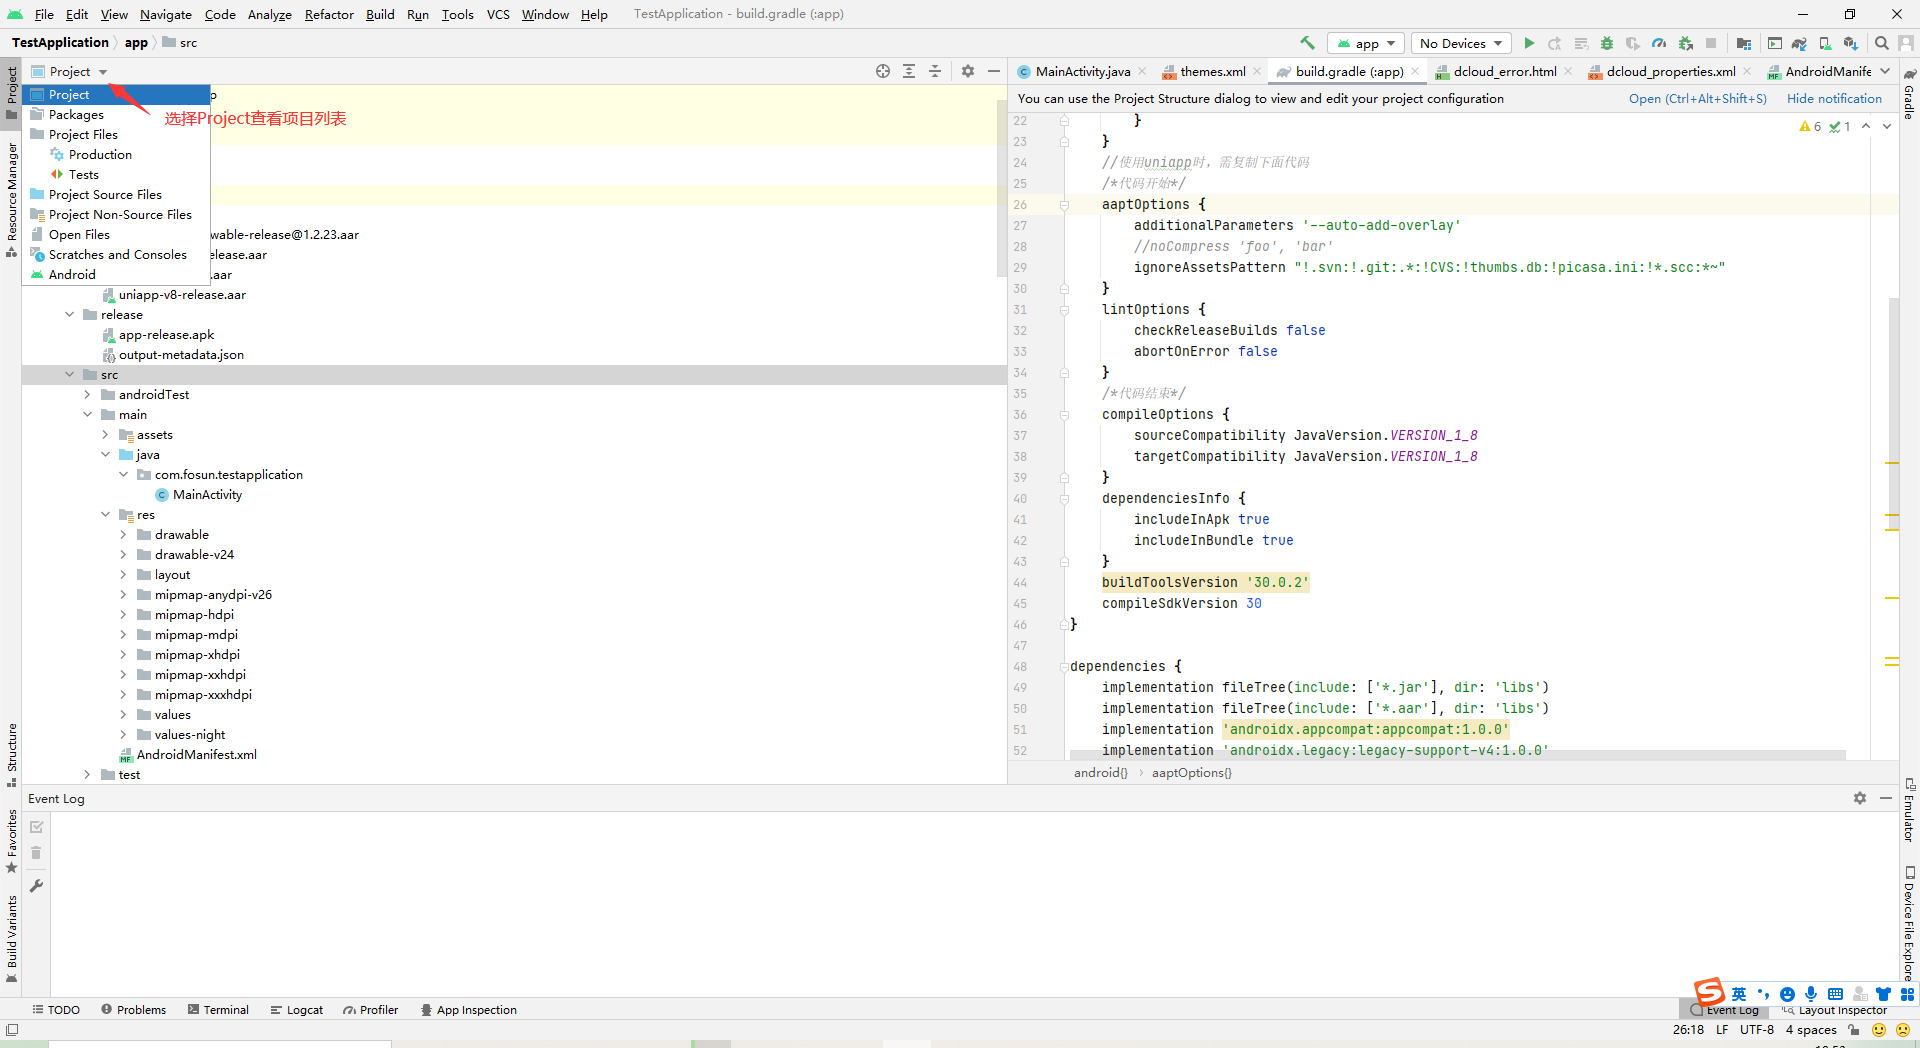
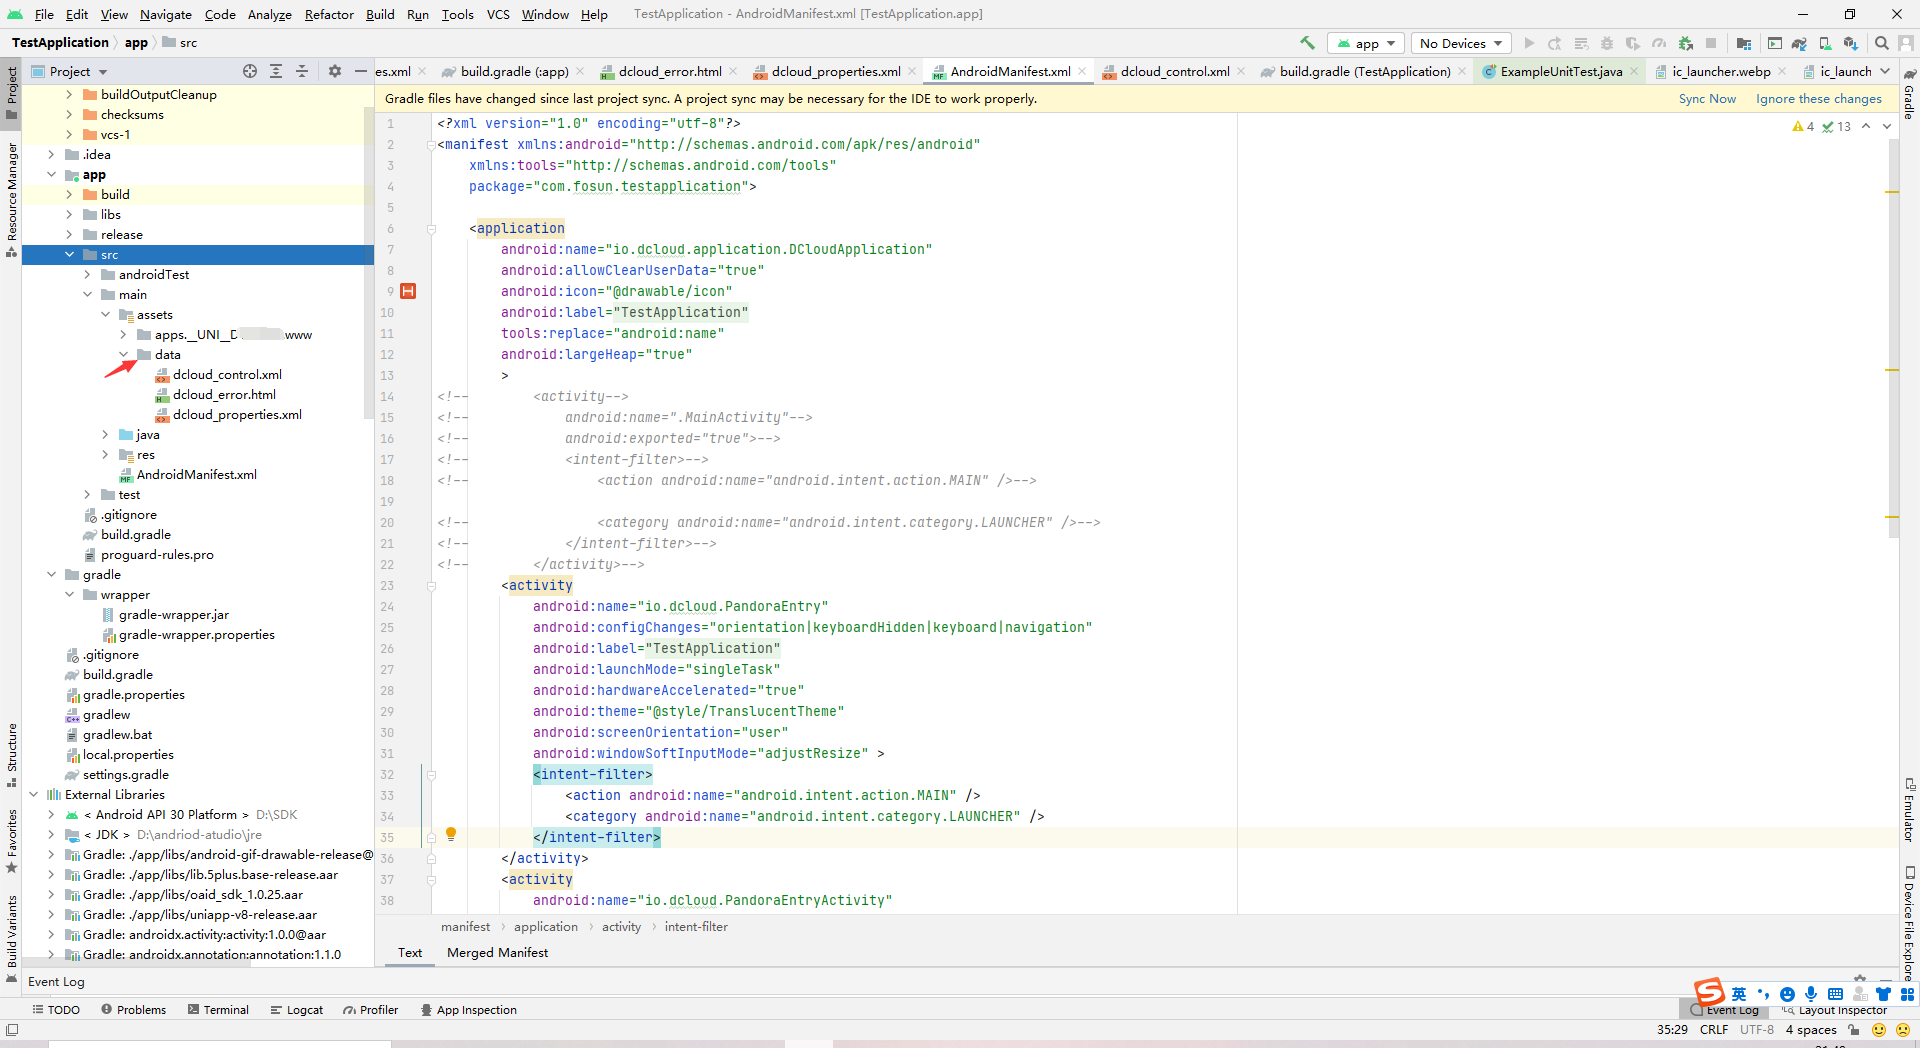
导入结果
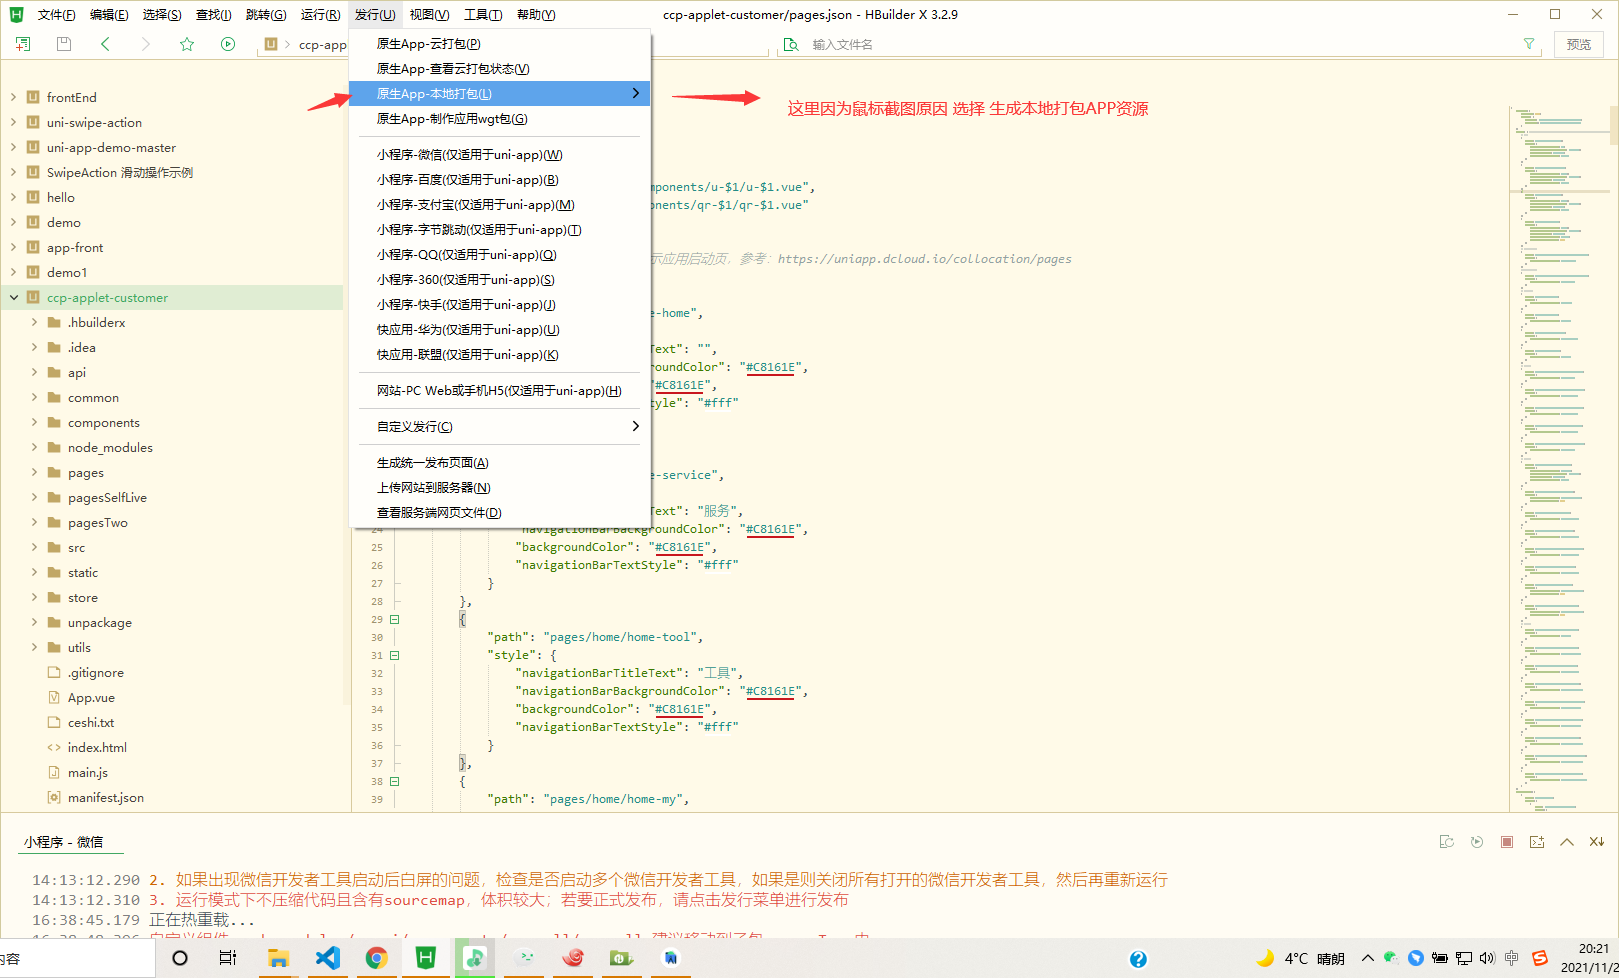
3.创建HBuilderX打包后资源并引入
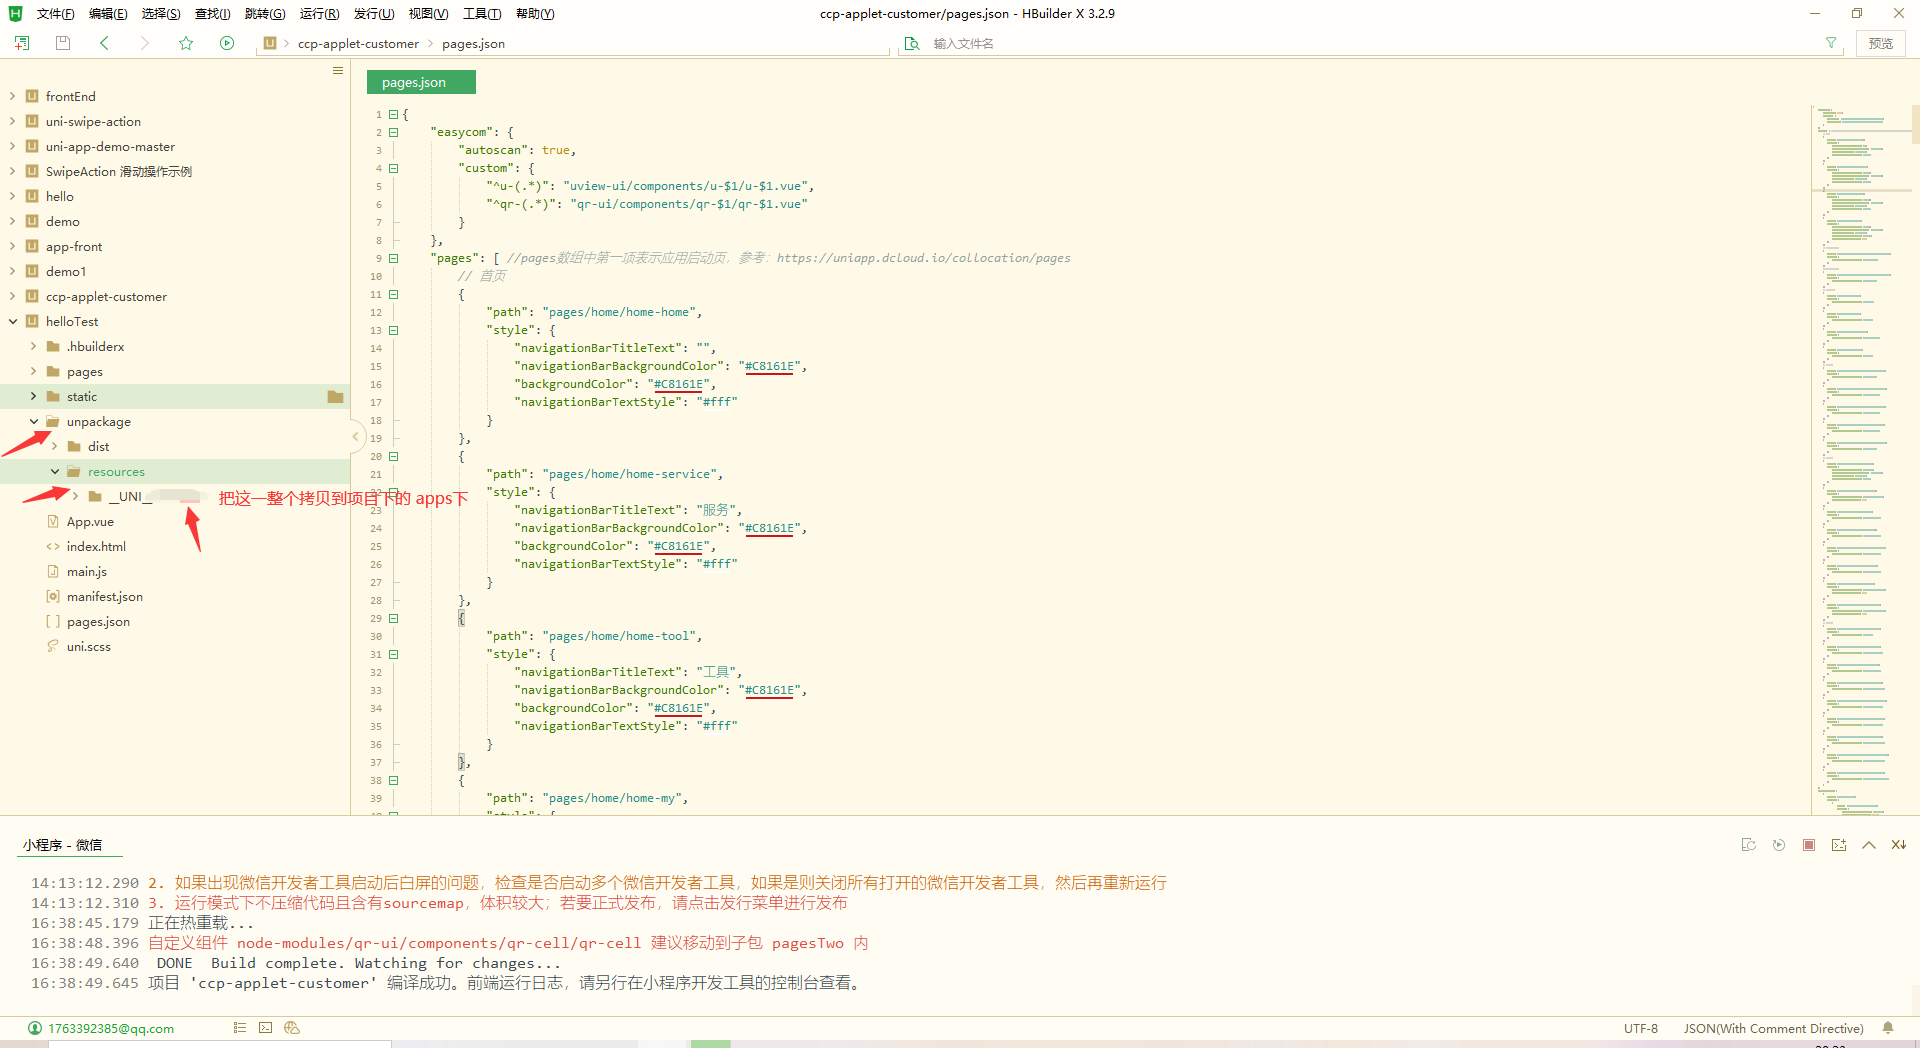
将会生成我们需要的静态文件目录
然后拷贝放在创建的 apps文件夹中
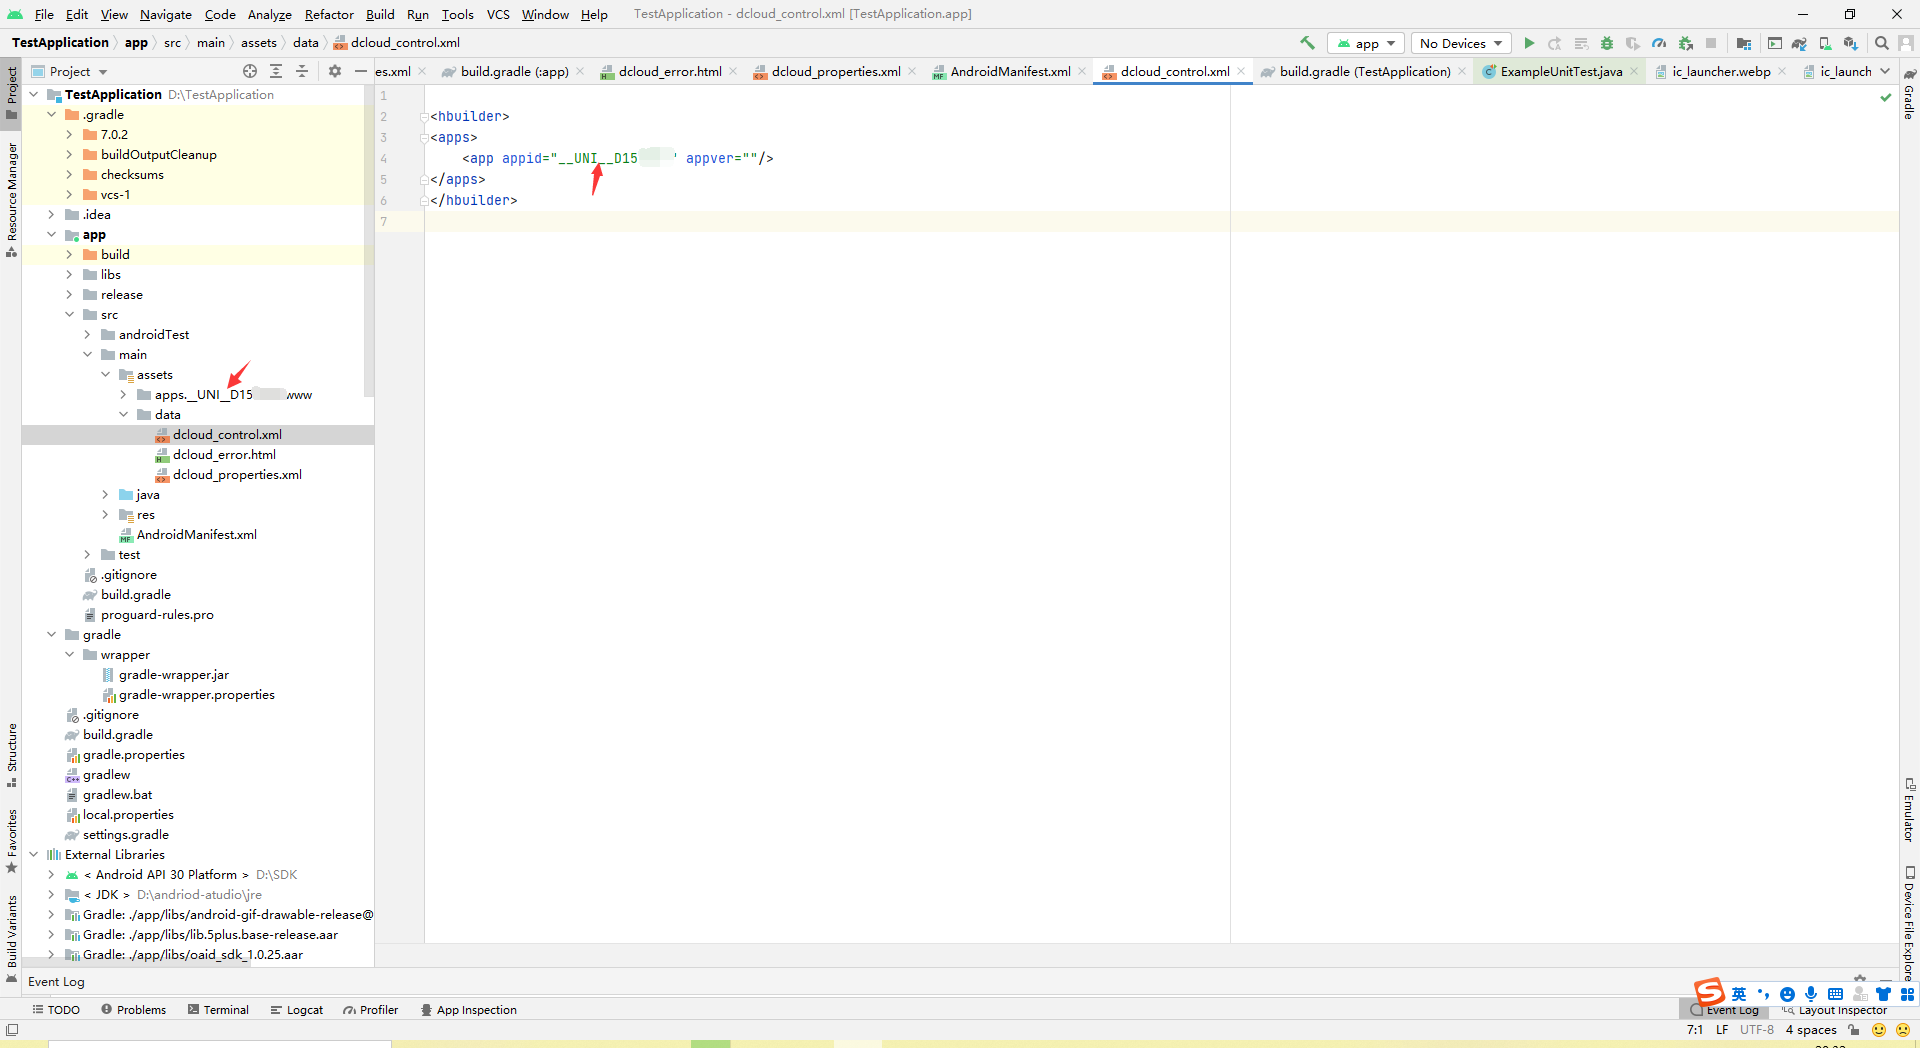
5.配置data — dcloud_control.xml文件
dcloud_control.xml 中的 中的 appid 内容与 apps下的文件名保持一致
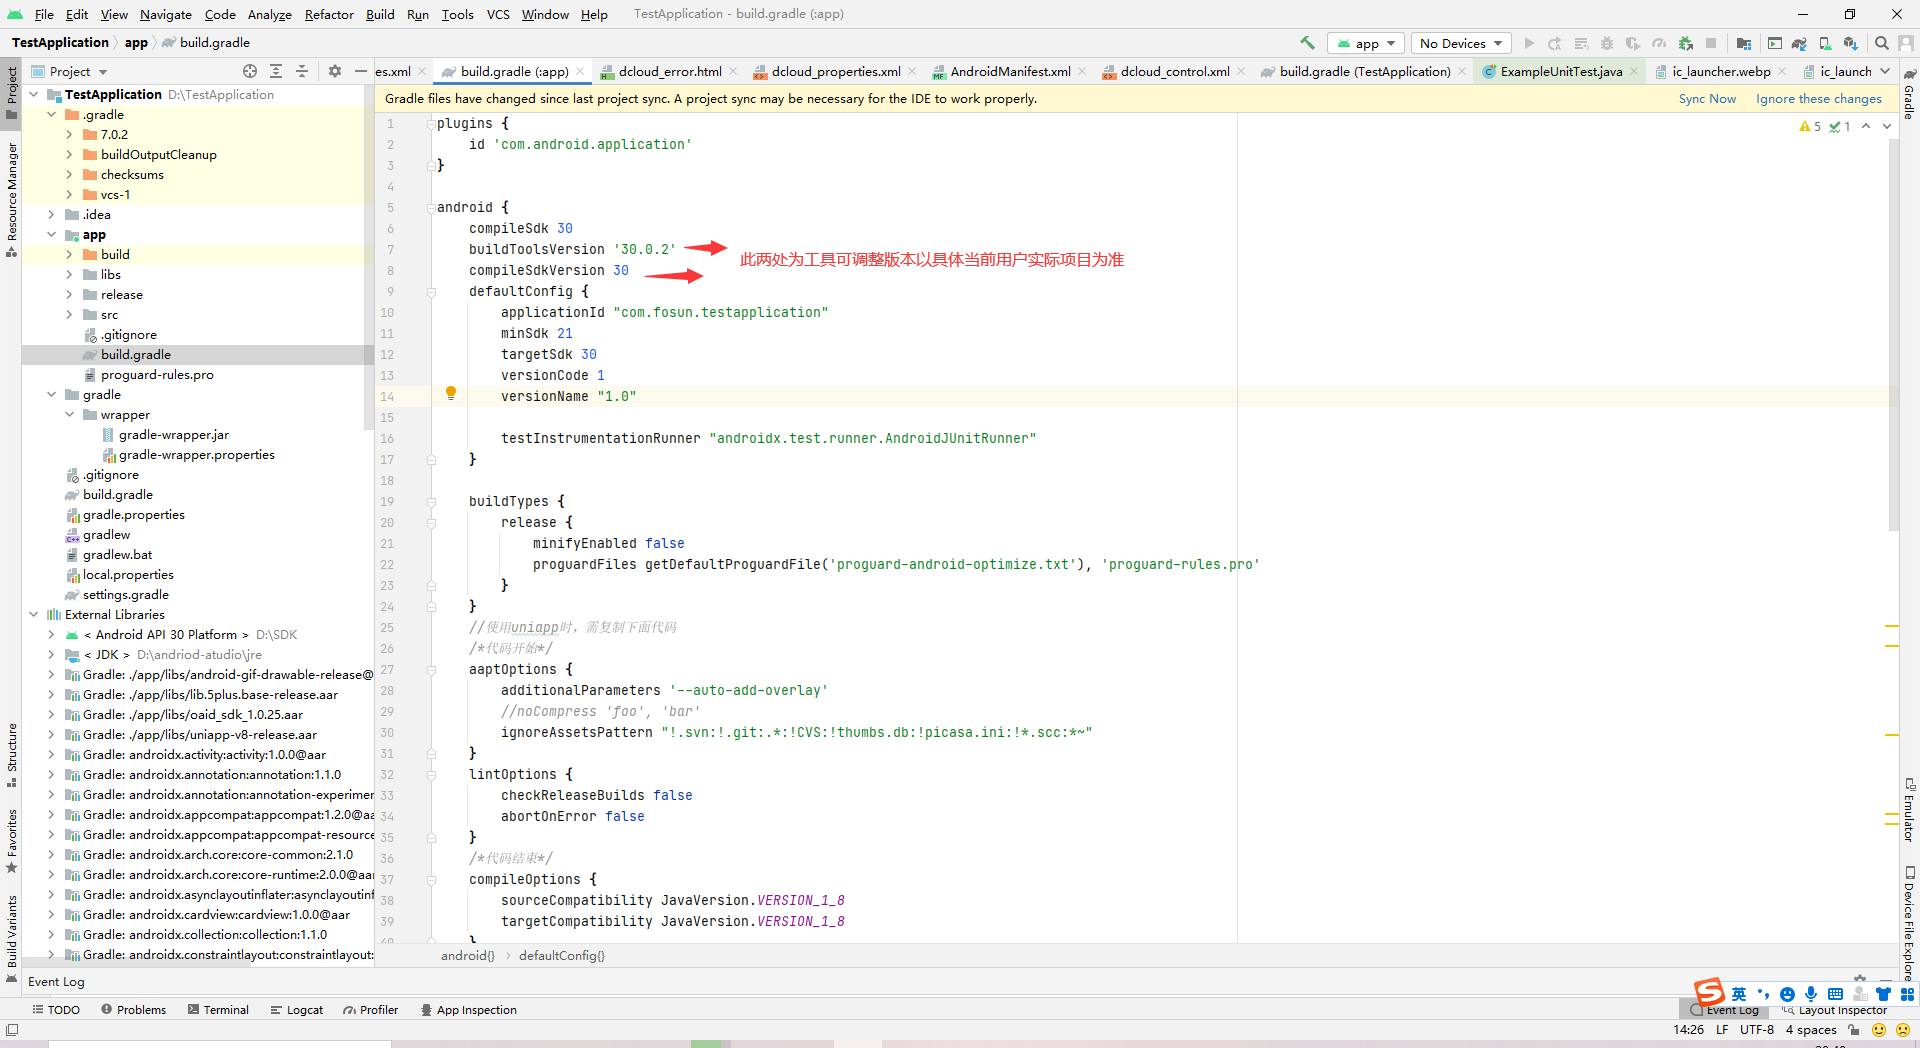
6.app下的 build.gradle配置,需要注意的和完整依赖包都将贴下
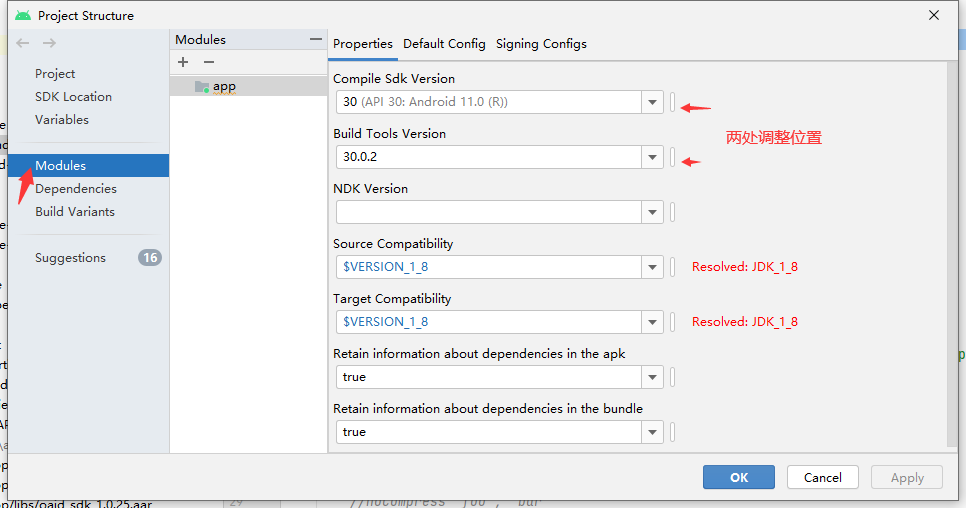
1.buildToolsVersion ‘30.0.2’ 和 compileSdkVersion 30
调整工具位置为 File ——- Project Structure —- Modules
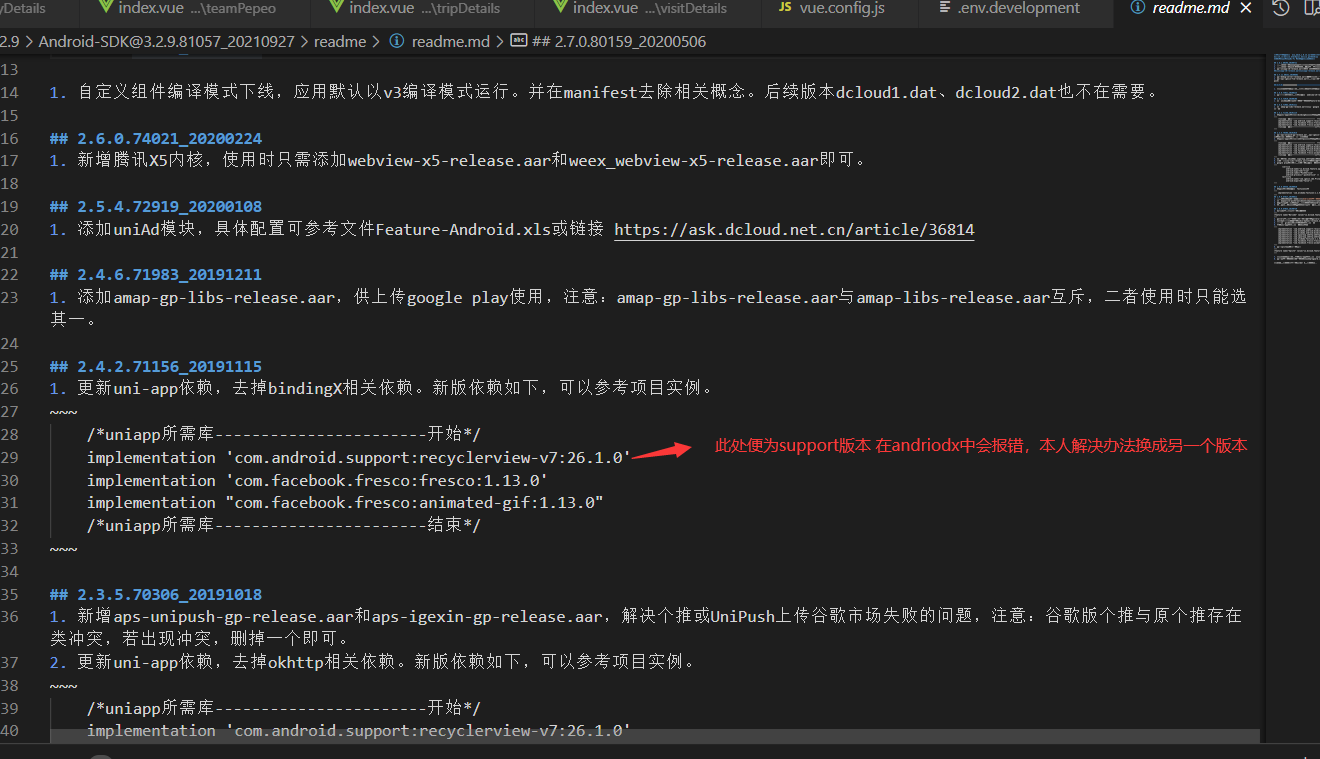
2.注意dependencies中的配置分为 AndroidX版本 和 support版本我们创建的是 AndroidX版本,官网下载的版本升级说明中说替换的的必须包为 support版本 列如:
完整代码如下:
plugins {

    id 'com.android.application'
}

android {

    compileSdk 30
    buildToolsVersion '30.0.2'
    compileSdkVersion 30
    defaultConfig {

        applicationId "com.fosun.testapplication"
        minSdk 21
        targetSdk 30
        versionCode 1
        versionName "1.0"

        testInstrumentationRunner "androidx.test.runner.AndroidJUnitRunner"
    }

    buildTypes {

        release {

            minifyEnabled false
            proguardFiles getDefaultProguardFile('proguard-android-optimize.txt'), 'proguard-rules.pro'
        }
    }
    //使用uniapp时,需复制下面代码
    /*代码开始*/
    aaptOptions {

        additionalParameters '--auto-add-overlay'
        //noCompress 'foo', 'bar'
        ignoreAssetsPattern "!.svn:!.git:.*:!CVS:!thumbs.db:!picasa.ini:!*.scc:*~"
    }
    lintOptions {

        checkReleaseBuilds false
        abortOnError false
    }
    /*代码结束*/
    compileOptions {

        sourceCompatibility JavaVersion.VERSION_1_8
        targetCompatibility JavaVersion.VERSION_1_8
    }
    dependenciesInfo {

        includeInApk true
        includeInBundle true
    }
}

dependencies {

    implementation fileTree(include: ['*.jar'], dir: 'libs')
    implementation fileTree(include: ['*.aar'], dir: 'libs')
    implementation 'androidx.appcompat:appcompat:1.0.0'
    implementation 'androidx.legacy:legacy-support-v4:1.0.0'
    implementation 'androidx.recyclerview:recyclerview:1.0.0'
    implementation 'com.facebook.fresco:fresco:2.5.0'
    implementation "com.facebook.fresco:animated-gif:2.5.0"
    implementation 'com.github.bumptech.glide:glide:4.9.0'
    implementation 'com.alibaba:fastjson:1.1.46.android'


    implementation 'com.google.android.material:material:1.3.0'
    implementation 'androidx.constraintlayout:constraintlayout:2.0.4'
    testImplementation 'junit:junit:4.+'
    androidTestImplementation 'androidx.test.ext:junit:1.1.2'
    androidTestImplementation 'androidx.test.espresso:espresso-core:3.3.0'


    implementation 'com.squareup.okhttp:okhttp:2.3.0'
    implementation 'com.squareup.okhttp:okhttp-ws:2.3.0'
    implementation 'com.alibaba:fastjson:1.1.46.android'
    implementation 'com.facebook.fresco:fresco:1.13.0'
    implementation "com.facebook.fresco:animated-gif:1.13.0"


}
7.配置AndroidManifest.xml
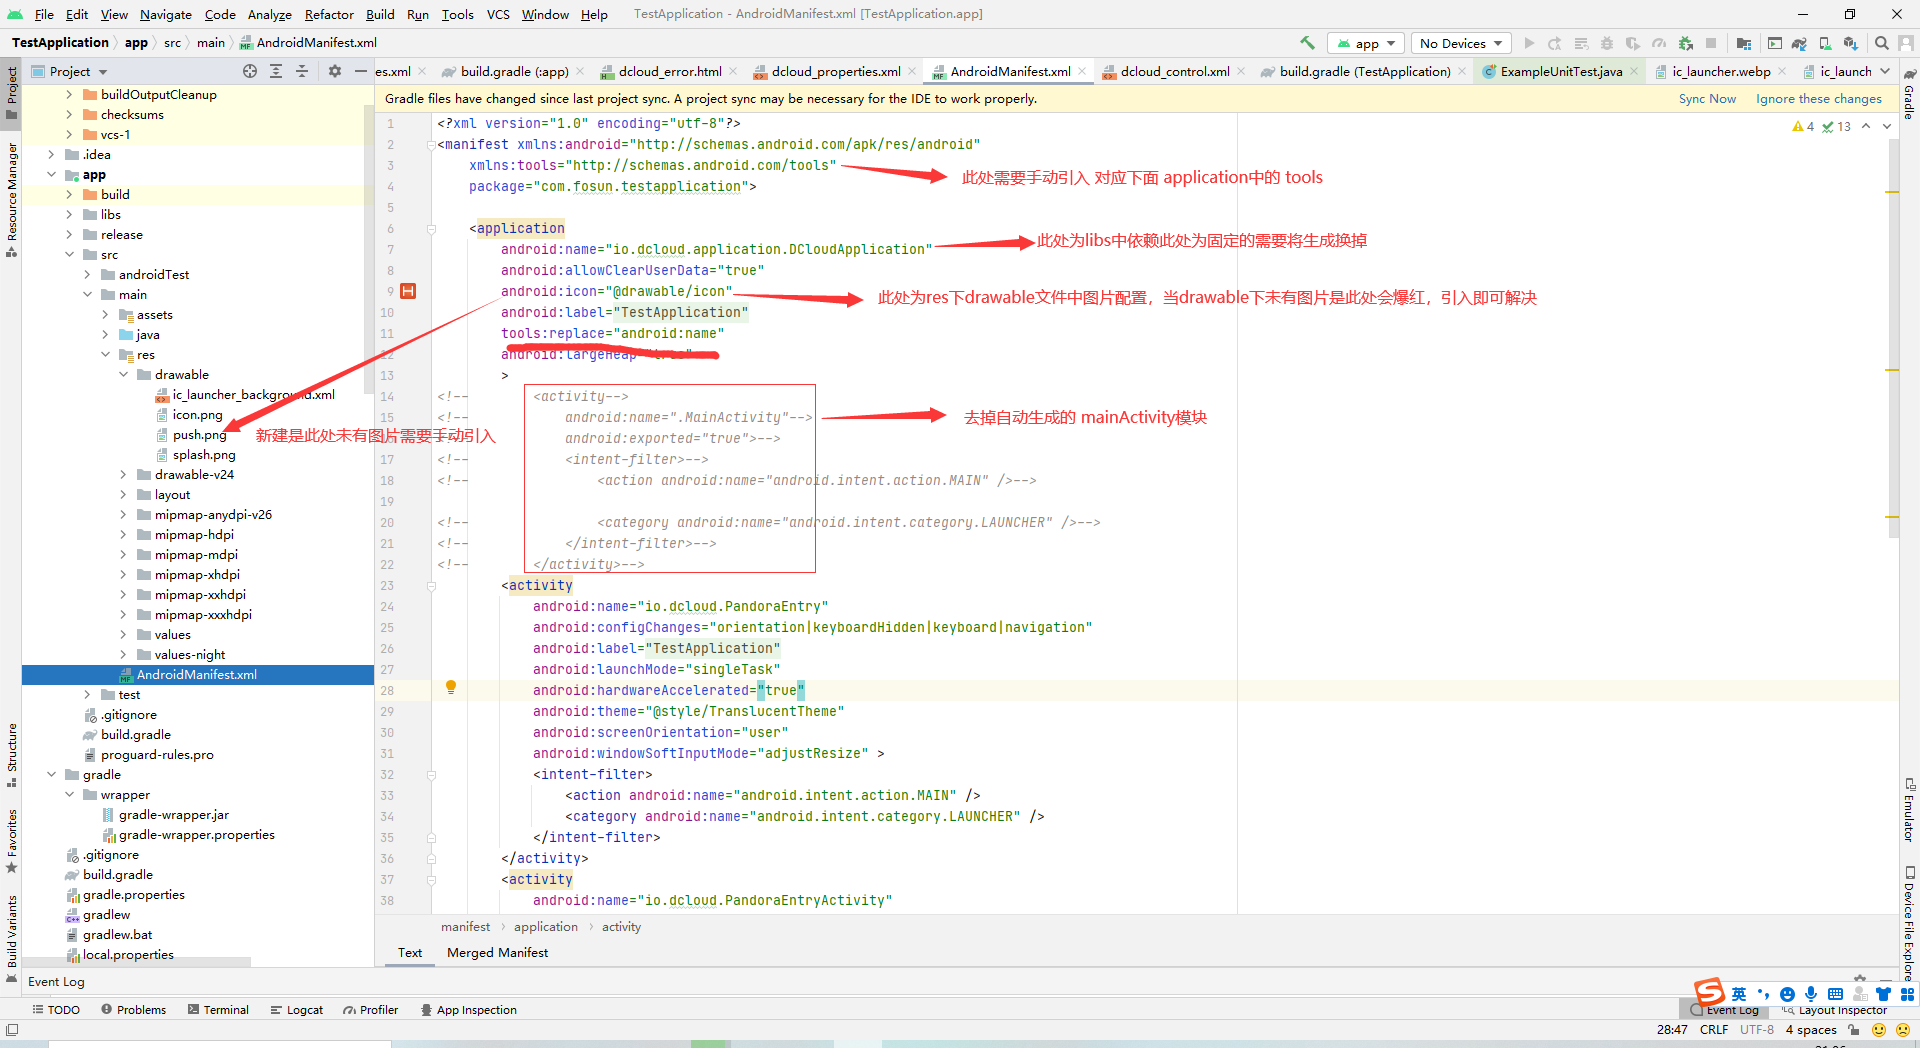
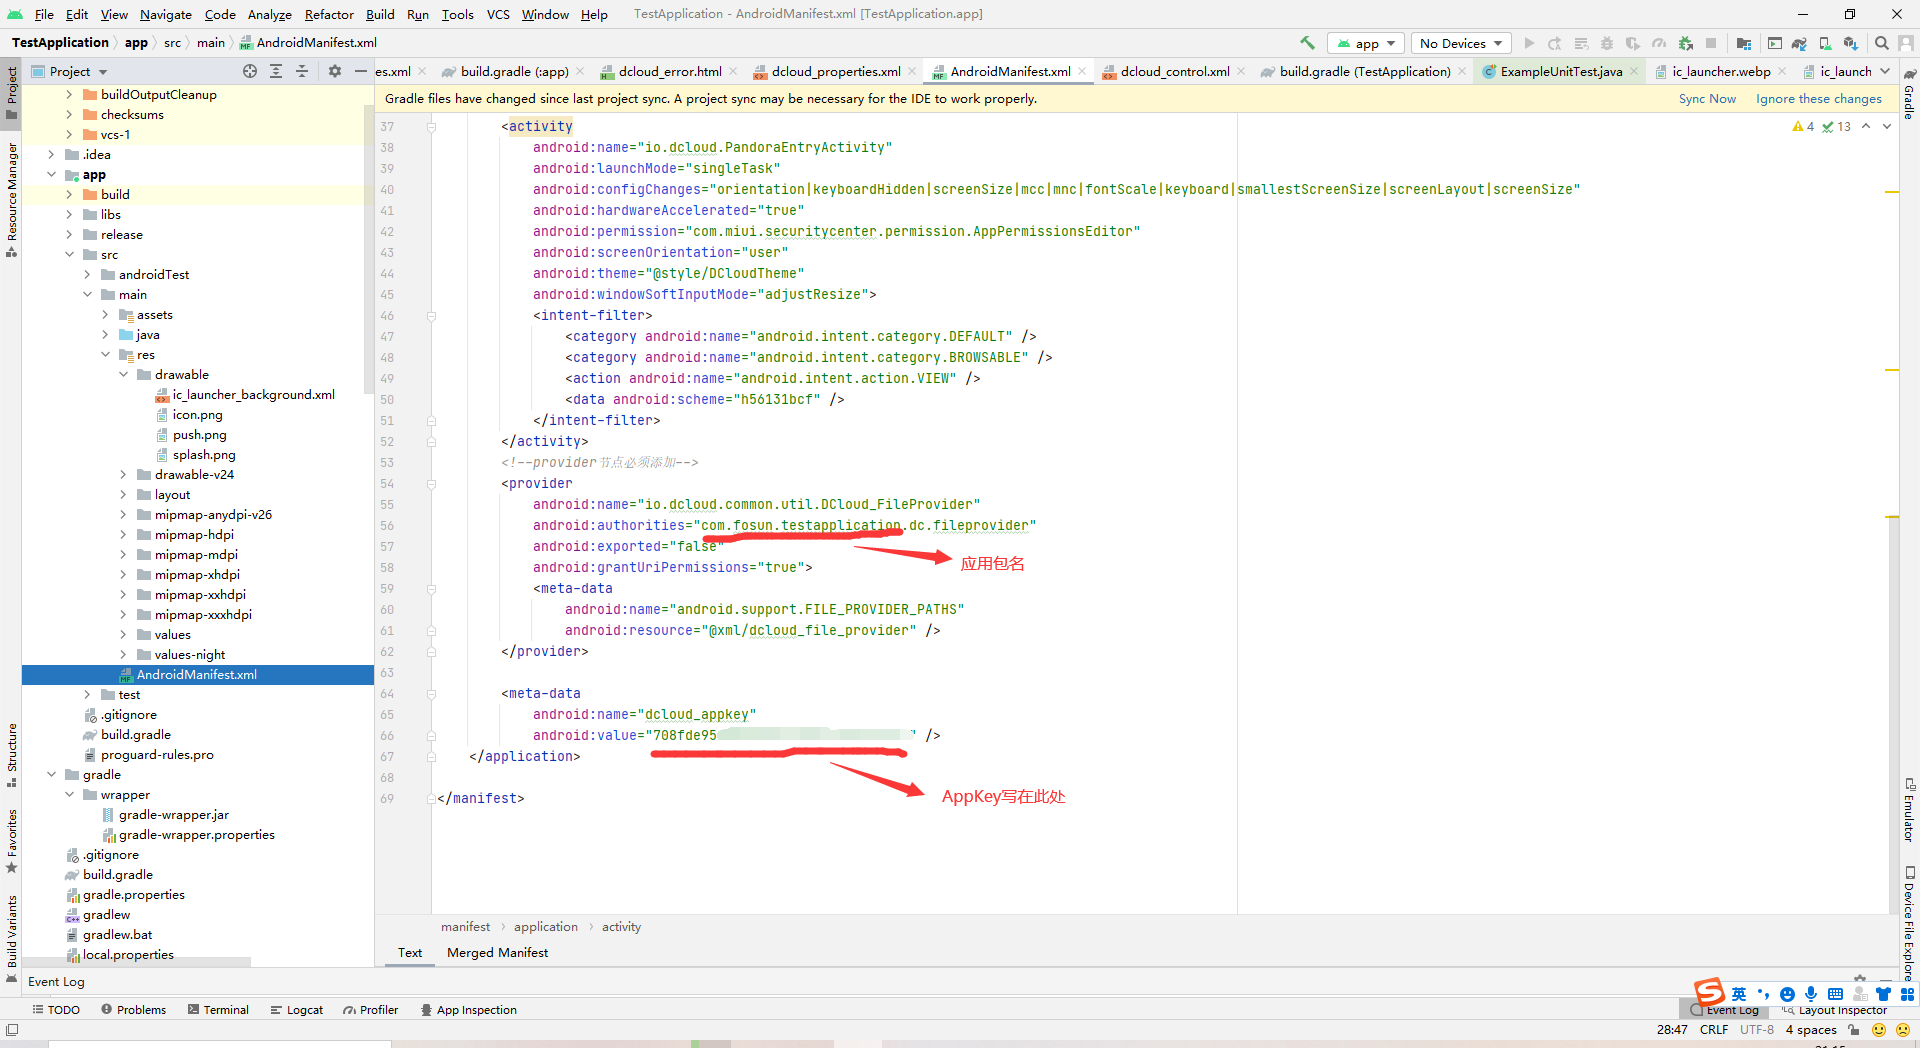
1.注意标记如下 application中如果debug的话需要另外添加配置
2.AppKey配置及包名配置指向 appkey申请流程 ,打包及AppKey生成时所需安卓证书 证书生成教程
剩下和官网配置一样,完整代码如下
<?xml version="1.0" encoding="utf-8"?>
<manifest xmlns:android="http://schemas.android.com/apk/res/android"
    xmlns:tools="http://schemas.android.com/tools"
    package="com.fosun.testapplication">

    <application
        android:name="io.dcloud.application.DCloudApplication"
        android:allowClearUserData="true"
        android:icon="@drawable/icon"
        android:label="@string/app_name"
        tools:replace="android:name"
        android:largeHeap="true"
        >
<!--        <activity-->
<!--            android:name=".MainActivity"-->
<!--            android:exported="true">-->
<!--            <intent-filter>-->
<!--                <action android:name="android.intent.action.MAIN" />-->

<!--                <category android:name="android.intent.category.LAUNCHER" />-->
<!--            </intent-filter>-->
<!--        </activity>-->
        <activity
            android:name="io.dcloud.PandoraEntry"
            android:configChanges="orientation|keyboardHidden|keyboard|navigation"
            android:label="@string/app_name"
            android:launchMode="singleTask"
            android:hardwareAccelerated="true"
            android:theme="@style/TranslucentTheme"
            android:screenOrientation="user"
            android:windowSoftInputMode="adjustResize" >
            <intent-filter>
                <action android:name="android.intent.action.MAIN" />
                <category android:name="android.intent.category.LAUNCHER" />
            </intent-filter>
        </activity>
        <activity
            android:name="io.dcloud.PandoraEntryActivity"
            android:launchMode="singleTask"
            android:configChanges="orientation|keyboardHidden|screenSize|mcc|mnc|fontScale|keyboard|smallestScreenSize|screenLayout|screenSize"
            android:hardwareAccelerated="true"
            android:permission="com.miui.securitycenter.permission.AppPermissionsEditor"
            android:screenOrientation="user"
            android:theme="@style/DCloudTheme"
            android:windowSoftInputMode="adjustResize">
            <intent-filter>
                <category android:name="android.intent.category.DEFAULT" />
                <category android:name="android.intent.category.BROWSABLE" />
                <action android:name="android.intent.action.VIEW" />
                <data android:scheme="h56131bcf" />
            </intent-filter>
        </activity>
        <!--provider节点必须添加-->
        <provider
            android:name="io.dcloud.common.util.DCloud_FileProvider"
            android:authorities="com.fosun.testapplication.dc.fileprovider"
            android:exported="false"
            android:grantUriPermissions="true">
            <meta-data
                android:name="android.support.FILE_PROVIDER_PATHS"
                android:resource="@xml/dcloud_file_provider" />
        </provider>

        <meta-data
            android:name="dcloud_appkey"
            android:value="AppKey" />
    </application>

</manifest>
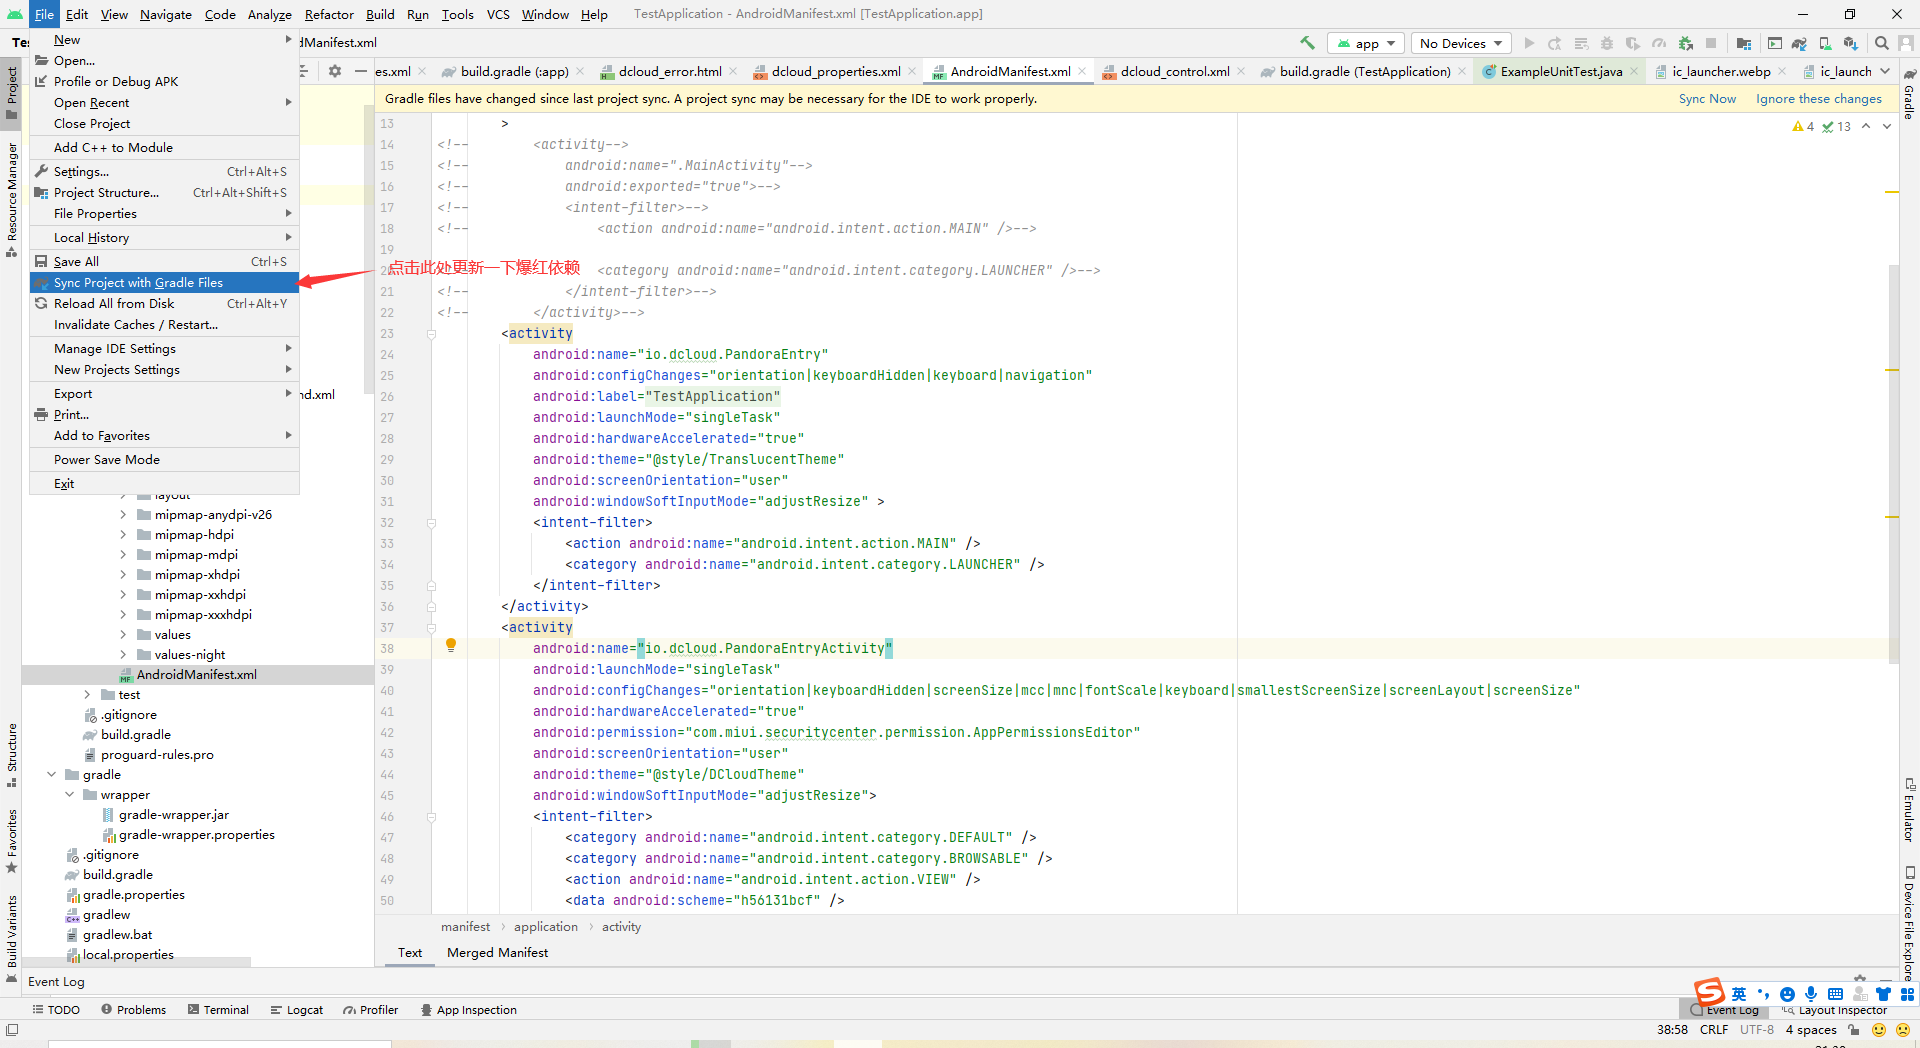
配置到这里上面可能爆红一片了,这里不要慌更新一下所需依赖配置
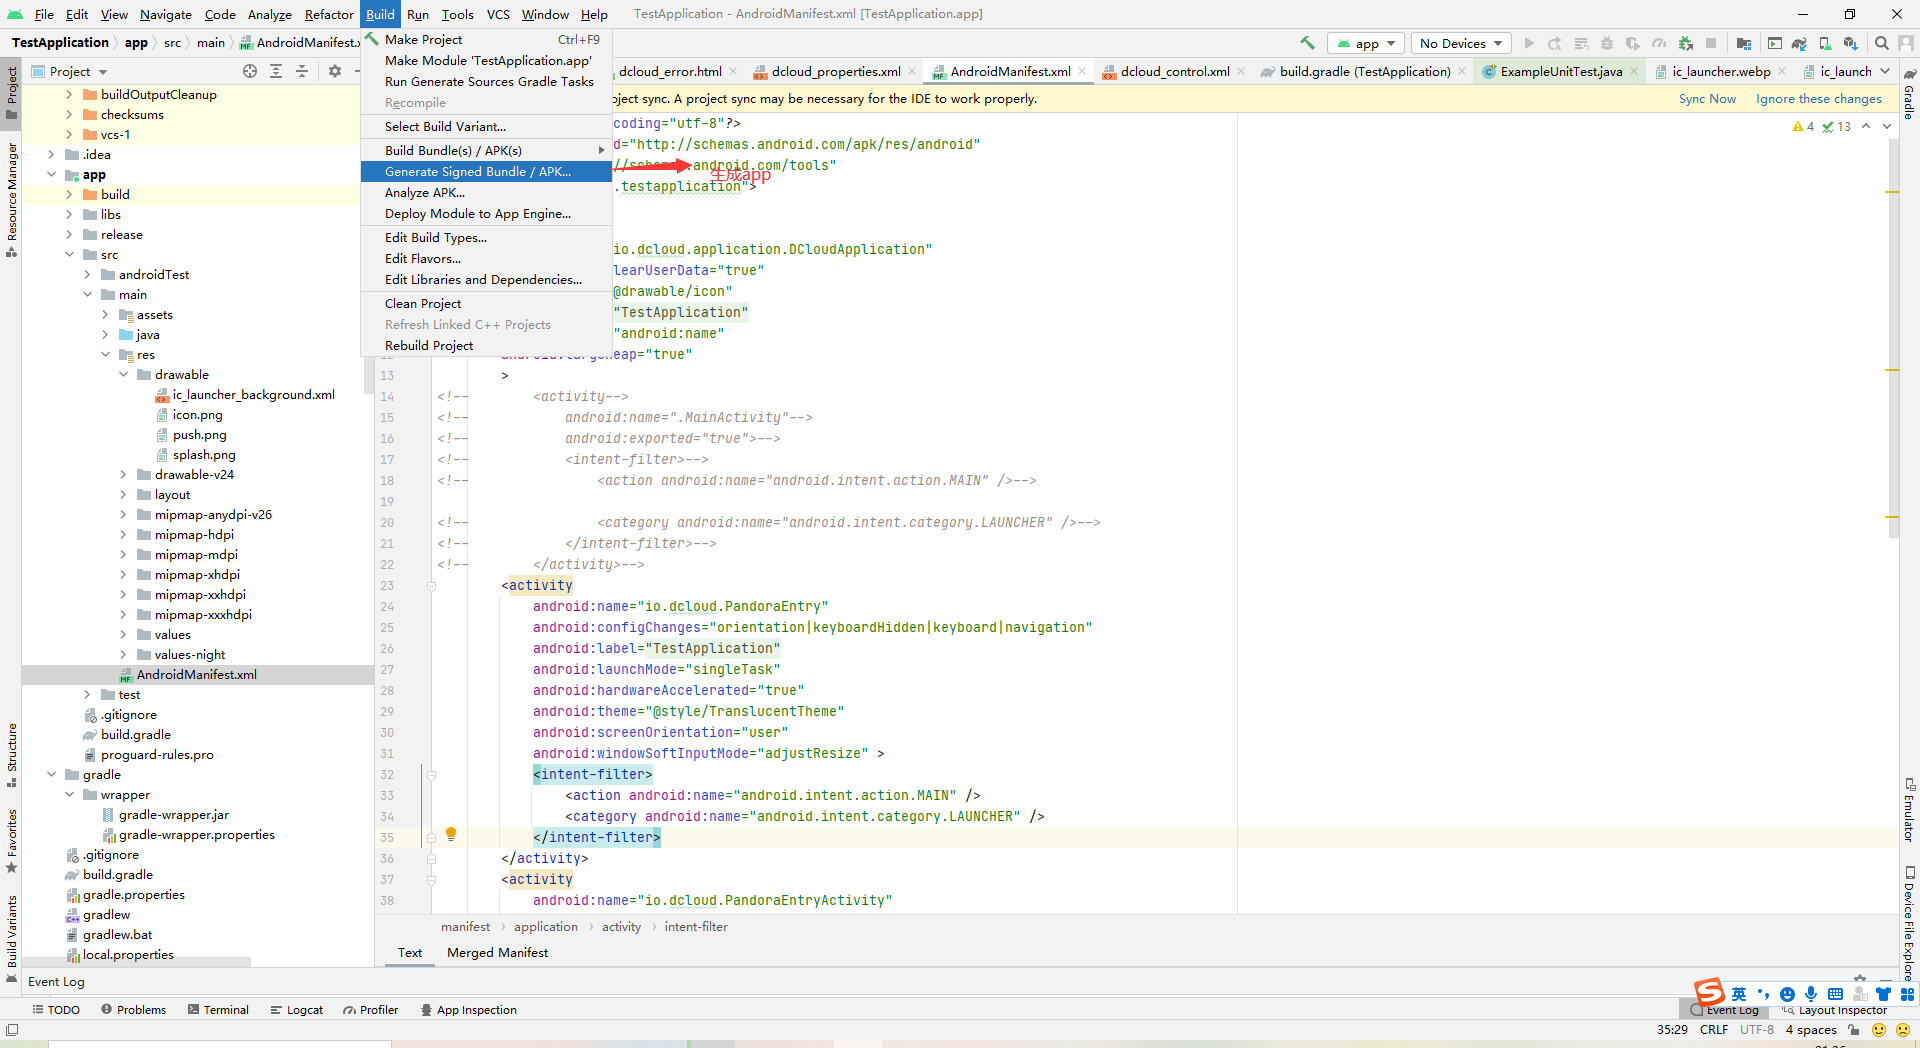
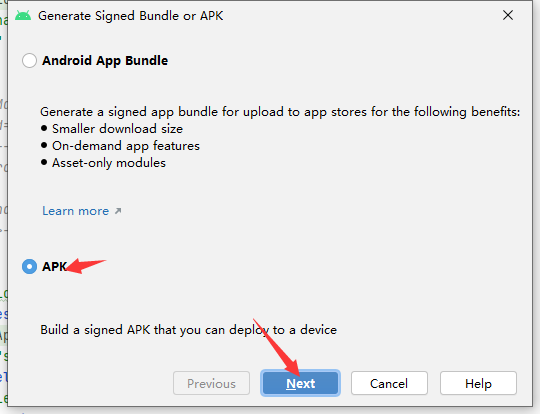
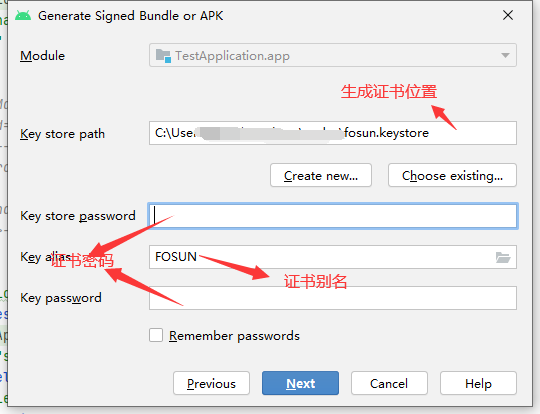
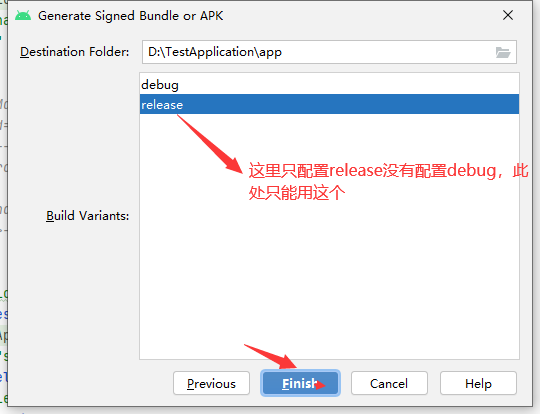
这里我们配置文件基本配置完成了,下面打包配置
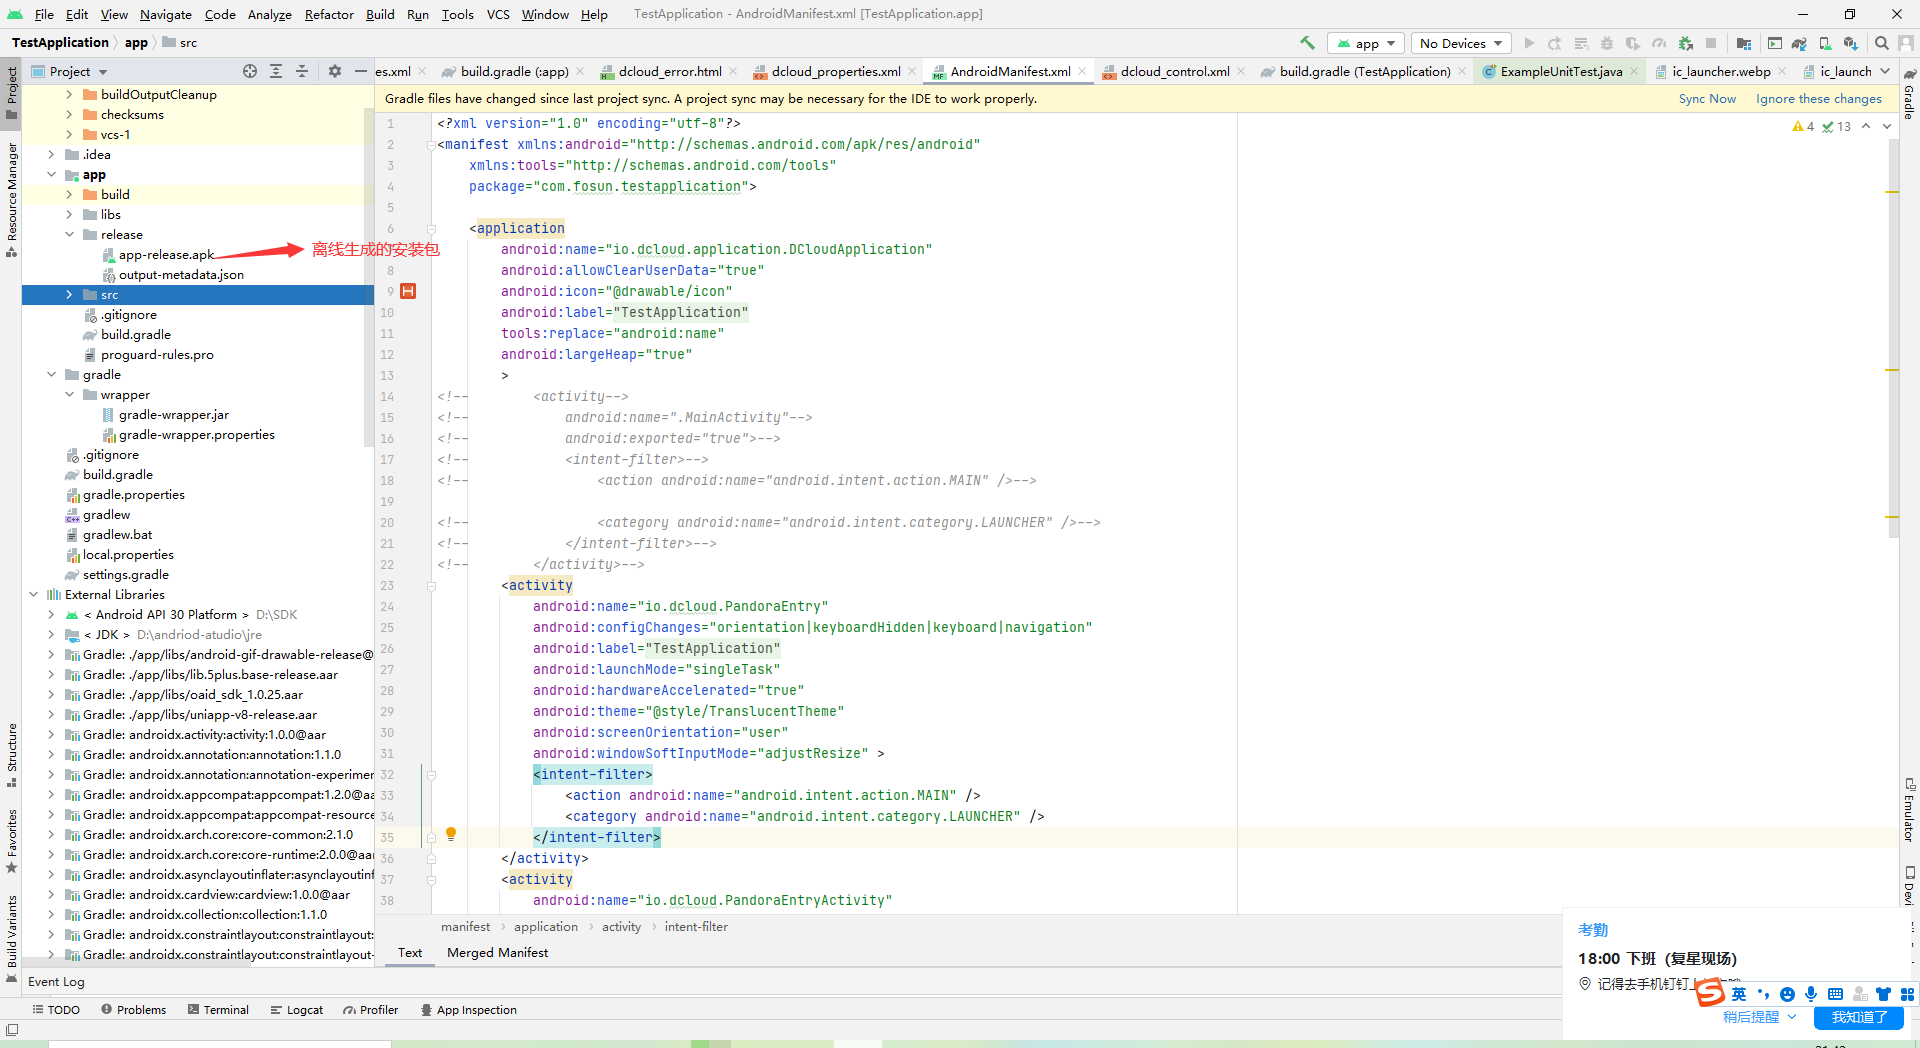
打包完成我们将会在目录中多了一个 release文件夹,此时将会有一个安装包
今天的文章uniapp离线打包分享到此就结束了,感谢您的阅读。
版权声明:本文内容由互联网用户自发贡献,该文观点仅代表作者本人。本站仅提供信息存储空间服务,不拥有所有权,不承担相关法律责任。如发现本站有涉嫌侵权/违法违规的内容, 请发送邮件至 举报,一经查实,本站将立刻删除。
如需转载请保留出处:https://bianchenghao.cn/6937.html


