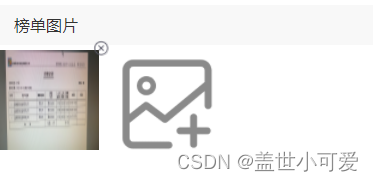
uniapp我的示例:如下
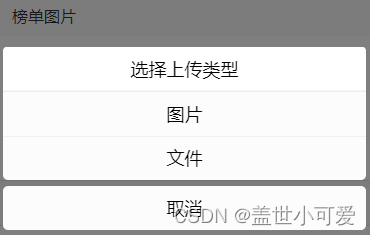
点击加号图片:选择上传类型:图片或者文件
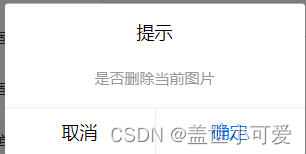
上传的图片可以删除
这是界面上的一系列操作,接下来我们来看如何代码实现吧
一、界面代码:展示图片
<view class="title"> <font class="leftTitle">文件图片</font> </view> <view class="flex-wrap"> //循环显示上传的图片(imgArr这是放上传成功的数组) <view class="imgwrap" v-for="(item,index) in imgArr"> //放一个删除的标识在图片右上角 <image src="../../static/into_delete.png" class="iconfont icon-guanbi1" @click="closeImg(index)"></image> <image class="img" style="width: 100%;height: 100%;" :src="getFlieName(item)"> </image> </view> // 默认上传的图片 <image class="img" src="../../static/submit_upload.png" @click="chooseVideoImage" style="width: 120px;height: auto;" mode="widthFix"></image> </view> 二、样式代码
.flex-wrap { width: 100%; display: flex; flex-wrap: wrap; align-items: center; } .imgwrap { position: relative; width: 100px; height: 100px; margin-right: 18upx; margin-bottom: 20upx; .iconfont { width: 16px; height: 16px; color: #eee; position: absolute; top: -20upx; right: -20upx; z-index: 1; cursor: pointer; } } 逻辑代码:点击上传图片,先选择上传类型
// 弹框 chooseVideoImage() { uni.showActionSheet({ title: "选择上传类型", itemList: ['图片', '文件'], success: (res) => { // console.log(res) if (res.tapIndex == 0) { this.uploadImg() //图片上传 } else { this.uploadFile() //文件上传 } } }) }, 写了一个上传的公共方法(都是调用同一个上传接口) 界面引入:
是图片上传就走图片上传方法、文件上传就走文件上传方法,
import httpTypes from '@/utils/http-types' /utils/http-types文件内容如下:
import baseurl from './config.js' //公共接口地址 获取请求地址(你自己项目的IP地址) var token //获取token 我们项目接口需要token验证 所以拿到token uni.getStorage({ key: 'storage_key', success: function (res) { token = JSON.parse(res.data).token } }); // 上传图片封装 function uploadFile(obj) { console.log(obj,'obj')// 先看看你传过来的文件格式 然后根据后端需求传哪些参数 let url = baseurl + '/file/upload?fileName='+obj.filePath.name; //服务器地址 // alert(url) let filePath = obj.filePath.path; //要上传文件资源的路径。 let formData = obj.formData || {'user': 'test'}; let success = obj.success; let name = obj.name || 'filePath'; //文件对应的 key let method = obj.method || 'POST'; //默认post请求 let fail = obj.fail; let complete = obj.complete; // console.log(filePath,'filePath') // 这里请求后端 uni.uploadFile({ url: url, filePath:filePath, name: 'file', formData:{'user': 'test','file':filePath}, header: { userAgent: 1, Authorization: token }, success: function(res) { success(res) }, fail: function(v){ fail(v)}, complete: function(v){ complete(v)}, }) } export default { request: request, uploadFile: uploadFile }; 图片上传方法和文件上传方法、选择类型的时候调用
// 图片上传 uploadImg() { let that = this uni.chooseImage({ count: 9, //上传图片的数量 sizeType: ['copressed', 'original'], //原图货压缩图 sourceType: ['album', 'camera'], //相册或者拍照 success: function (res) { const filename = res.tempFiles[0].name const tempFilePaths = res.tempFiles; uni.showLoading({ title: "上传中", mask: true }) httpTypes.uploadFile({ //上传服务器 filePath: tempFilePaths[0], success: (res) => { let arr = JSON.parse(res.data); //转换格式 let imgurl = arr.data that.imgArr.push(imgurl) //push进数组 console.log(that.imgArr, 'that.imgArr') }, fail: (res) => { }, complete: (res) => { uni.hideLoading() } }); } }); }, // 文件 uploadFile(e) { let that = this uni.chooseFile({ count: 9, //上传的数量 extension: ['.docx', '.doc', '.ppt', 'xlsx'], success: function (res) { const filename = res.tempFiles[0].name const tempFilePaths = res.tempFiles; httpTypes.uploadFile({ //上传服务器 filePath: tempFilePaths[0], success: (res) => { let arr = JSON.parse(res.data); //转换格式 let imgArr = arr.data that.imgArr.push(imgArr) //push进数组 }, }); } }); }, 上传成功之后 界面显示要判断一下是图片类型还是文件类型,文件类型的话直接显示本地Excel的一个默认图片类型 不需要显示文件,图片类型的话 拿到地址显示
// 判断是否是文件 getFlieName(fileName) { console.log(fileName, 'fileName') if (this.isImgFile(fileName)) { return this.baseUrl + '/file/download?filePath=' + fileName } else { return '../../static/excel.png' } }, isImgFile(fileName) { // console.log(fileName, 'fileName') //后缀获取 let suffix = ''; // 获取类型结果 let result = ''; const flieArr = fileName.split('.'); suffix = flieArr[flieArr.length - 1]; if (suffix != "") { suffix = suffix.toLocaleLowerCase(); // 图片格式 const imglist = ['png', 'jpg', 'jpeg', 'bmp', 'gif']; // 进行图片匹配 result = imglist.find(item => item === suffix); if (result) { return true; } } return false; }, 上传成功之后也可以操作删除,删除这里是直接界面移除
// 删除图片 closeImg(index) { var that = this; uni.showModal({ title: '提示', content: '是否删除当前图片', success: function (res) { if (res.confirm) { that.imgArr.splice(index, 1); } else if (res.cancel) { console.log('用户点击取消'); } } }); }, 今天的文章
uniapp删除本地图片_图片怎么去除水印分享到此就结束了,感谢您的阅读。
版权声明:本文内容由互联网用户自发贡献,该文观点仅代表作者本人。本站仅提供信息存储空间服务,不拥有所有权,不承担相关法律责任。如发现本站有涉嫌侵权/违法违规的内容, 请发送邮件至 举报,一经查实,本站将立刻删除。
如需转载请保留出处:https://bianchenghao.cn/61148.html


