目录
Linux/Ubuntu 18.04 截图软件Shutter详细教程,包括启用Edit功能,延时截图等
安装Shutter
sudo add-apt-repository ppa:shutter/ppa
sudo apt-get update
sudo apt-get install shutter
安装完成后搜索shutter就可以打开了,主界面里面的 Selection 是用鼠标框选指定区域并截屏,Window 是截取某个窗口。
指令介绍
在终端中可以用 shutter -h 查看指令
$ shutter -h
Usage:
    shutter [options]

Options:
    Example 1
            shutter -a -p=myprofile --min_at_startup

    Example 2
            shutter -s=100,100,300,300 -e

    Example 3
            shutter --window=.*firefox.*

    Example 4
            shutter --web=http://shutter-project.org/ -e

  Capture Mode Options:
    -s, --select=[X,Y,WIDTH,HEIGHT]
            Capture an area of the screen. Providing X,Y,WIDTH,HEIGHT is
            optional.

    -f, --full
            Capture the entire screen.

    -w, --window=[NAME_PATTERN]
            Select a window to capture. Providing a NAME_PATTERN (Perl-style
            regex) ist optional.

    -a, --active
            Capture the current active window.

    --section
            Capture a section. You will be able to select any child window
            by moving the mouse over it.

    -m, --menu
            Capture a menu.

    -t, --tooltip
            Capture a tooltip.

    --web=[URL]
            Capture a webpage. Providing an URL ist optional.

    -r, --redo
            Redo last screenshot.

  Settings Options:
    -p, --profile=NAME
            Load a specific profile on startup.

    -o, --output=FILENAME
            Specify a filename to save the screenshot to (overwrites any
            profile-related setting).

            Supported image formats: You can save to any popular image
            format (e.g. jpeg, png, gif, bmp). Additionally it is possible
            to save to pdf, ps or svg.

            Please note: There are several wildcards available, like

             %Y = year
             %m = month
             %d = day
             %T = time
             $w = width
             $h = height
             $name = multi-purpose (e.g. window title)
             $nb_name = like $name but without blanks in resulting strings
             $profile = name of current profile
             $R = random char (e.g. $RRRR = ag4r)
             %NN = counter

            The string is interpretted by strftime. See "man strftime" for
            more examples.

            As an example: shutter -f -e -o './%y-%m-%d_$w_$h.png' would
            create a file named '11-10-28_1280_800.png' in the current
            directory.

    -d, --delay=SECONDS
            Wait n seconds before taking a screenshot.

    -c, --include_cursor
            Include cursor when taking a screenshot.

    -C, --remove_cursor
            Remove cursor when taking a screenshot.

  Application Options:
    -h, --help
            Prints a brief help message and exits.

    -v, --version
            Prints version information.

    --debug Prints a lot of debugging information to STDOUT.

    --clear_cache
            Clears cache, e.g. installed plugins, at startup.

    --min_at_startup
            Starts Shutter minimized to tray.

    --disable_systray
            Disables systray icon.

    -e, --exit_after_capture
            Exit after the first capture has been made. This is useful when
            using Shutter in scripts.

    -n, --no_session
            Do not add the screenshot to the session. This is useful when
            using Shutter in scripts.
可以发现常用指令有
| Command | Action |
|---|---|
| shutter -s | 截取鼠标选取的区域 |
| shutter -f | 截取全屏 |
| shutter -w | 截取指定窗口 |
| shutter -a | 截取当前活动窗口 |
| shutter -s -d=SECONDS | 延时SECONDS秒,截取鼠标选取的区域 |
设置常用快捷键
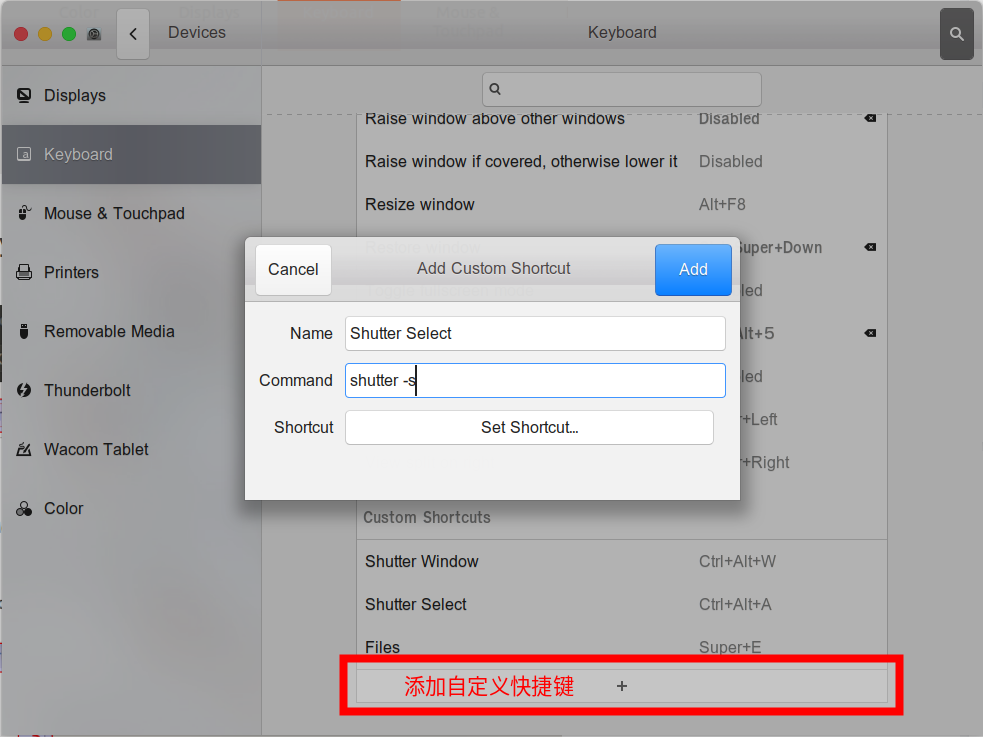
知晓了上面的指令我们就可以设置快捷键了,搜索 “Shortkey” 或 ”Shortcut”,或者打开 “Settings” -> “Keyboard” 可以打开快捷键设置,移动到最下方的 “Custom Shortcuts”,点 “+” 进行添加,“Name”写一个能认识的名字,“Command”写想要添加的指令,比如 shutter -s,然后再 “Set Shortcut” 添加快捷键,因为平时用QQ习惯了,所以就添加Ctrl + Alt + A 作为截取选取区域的快捷键。如图
启用Edit功能
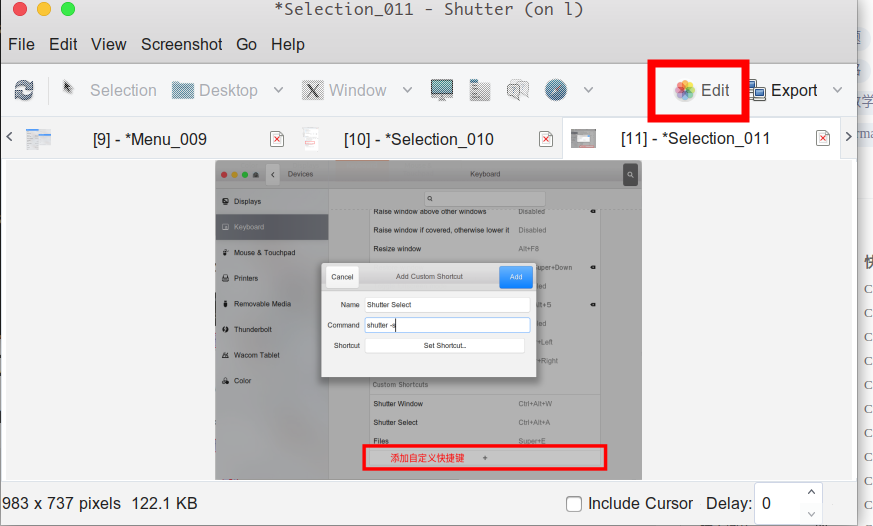
Ubuntu 18的Shutter的Edit功能被关闭了,原因是Shutter需要的 libgoo-canvas-perl library在Ubuntu 18.04中不支持了,但是我们可以自行安装。首先需要下载这三个包:
libgoocanvas-common: https://launchpad.net/ubuntu/+archive/primary/+files/libgoocanvas-common_1.0.0-1_all.deblibgoocanvas3: https://launchpad.net/ubuntu/+archive/primary/+files/libgoocanvas3_1.0.0-1_amd64.deblibgoo-canvas-perl: https://launchpad.net/ubuntu/+archive/primary/+files/libgoo-canvas-perl_0.06-2ubuntu3_amd64.deb
进行安装
sudo dpkg -i libgoocanvas-common_1.0.0-1_all.deb
sudo dpkg -i libgoocanvas3_1.0.0-1_amd64.deb
sudo apt-get -f install
sudo dpkg -i libgoo-canvas-perl_0.06-2ubuntu3_amd64.deb
sudo apt-get -f install
就可以启用编辑Edit了
延时截图
方法1
在“指令介绍”中提到了,可以在command后面加上 -p=SECONDS 进行SECONDS秒的延迟截图,不过我们还有几个方法进行延时截图。
方法2
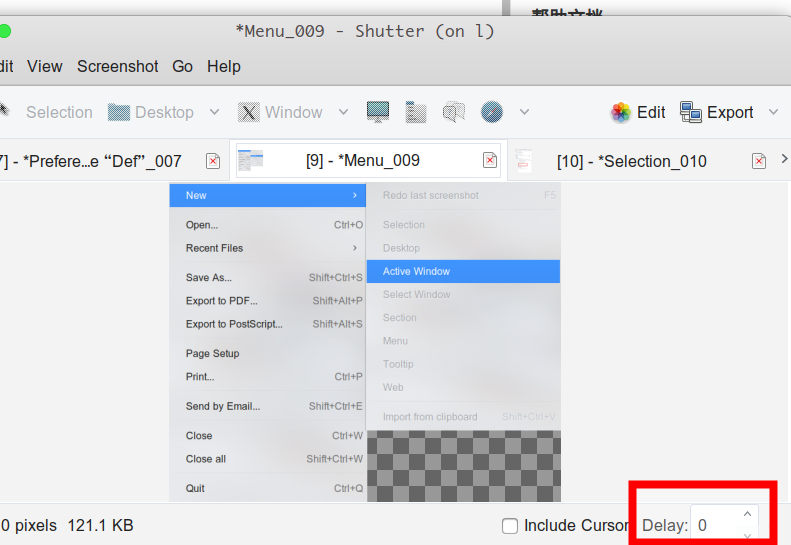
在主界面的右下角可以设置延迟时间(可能需要重启才能生效)
方法3
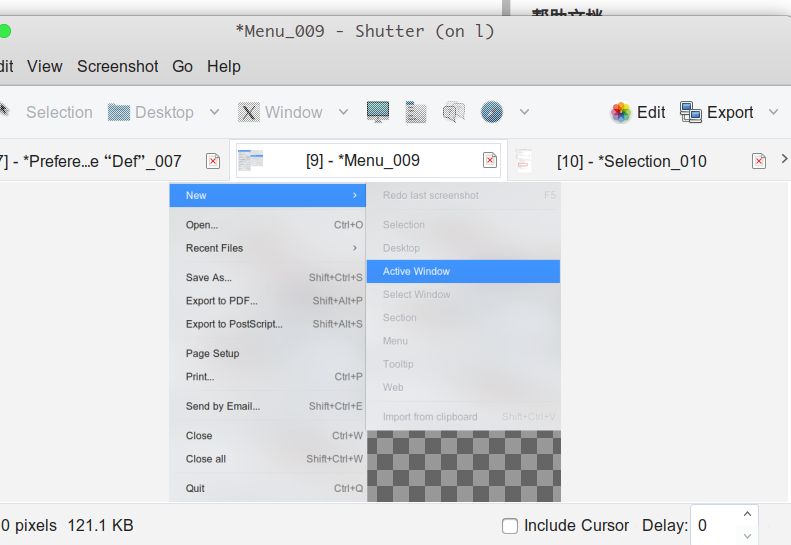
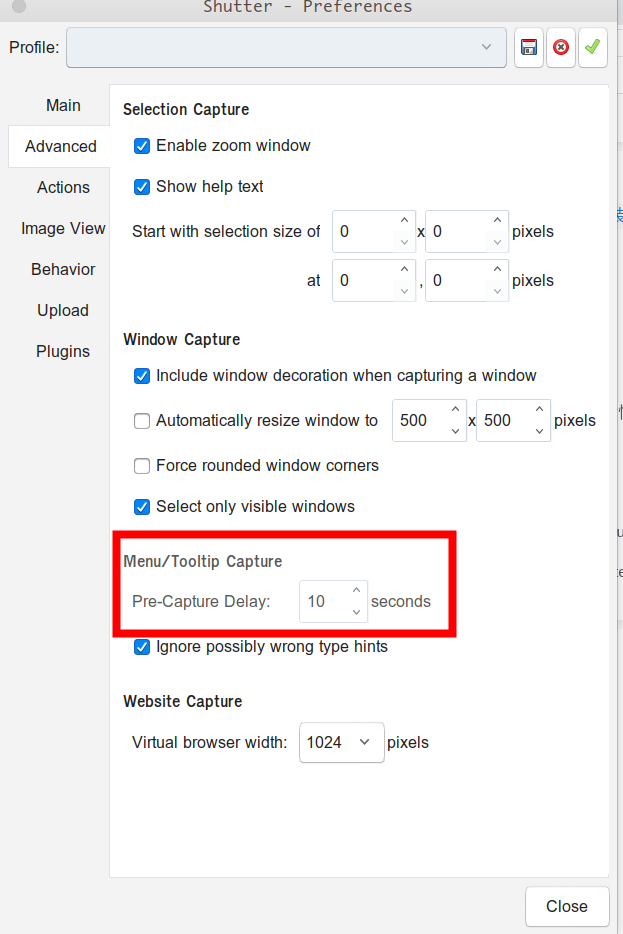
一般来说,我们需要延迟截取的是像菜单Menu这样的区域(此情况下用不了或者快捷键失效),我们可以去到Shutter的 “Edit” -> ” Preferences” -> “Advanced” 里面找到 “Menu/Tooltip Capture”设置延时
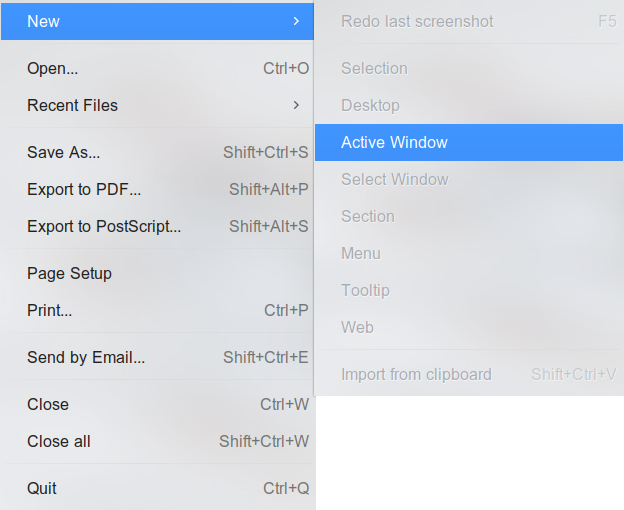
每当我们用 “File” -> “New” -> “Menu” 的时候就会延迟10s(或者你设置的时间),给你足够时间去打开一个Menu,然后Shutter会自动把Menu给截取,如下图
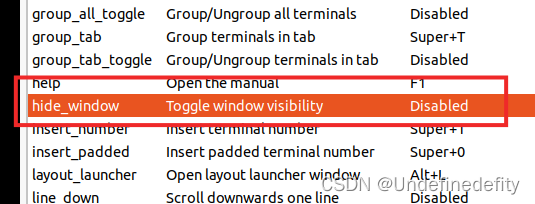
Ctrl Alt A会与Terminator 的 hide window 冲突
去到Terminator的Preferences里面的Keybindings里面找到hide window这个快捷键,虽然快捷键绑定的是Shitf + Ctrl + Alt + A ,但是不知道为什么用Ctrl + Alt + A 也一样可以激活,直接把这个disable掉(点击修改后按Backspace)或者换其他快捷键。
今天的文章Linux/Ubuntu 18.04 截图软件Shutter详细教程,包括启用图片编辑Edit功能,延时截图等分享到此就结束了,感谢您的阅读。
版权声明:本文内容由互联网用户自发贡献,该文观点仅代表作者本人。本站仅提供信息存储空间服务,不拥有所有权,不承担相关法律责任。如发现本站有涉嫌侵权/违法违规的内容, 请发送邮件至 举报,一经查实,本站将立刻删除。
如需转载请保留出处:https://bianchenghao.cn/89352.html

